






This page describes how to set up your organization to use NinaOne to deploy PaperCut Hive or Pocket to your macOS devices.
Summary of deploying the client (edge node)
- The computer app is run with elevated privileges, so it doesn’t require the user to be logged in.
- The computer app creates the PaperCut Hive or Pocket edge node processes, and PaperCut Printer object.
- The edge node can be deployed without a print client. For example, you can install a super node on a Windows Server.
- The edge node must be deployed before installing the print client.
Summary of deploying the print client
- The computer app creates the print client processes for print job submission.
- It installs files and processes in the Users Security Context.
- The install runs as “Run as current Logged on User”.
- After successful execution, it requires the user to perform the linking process. This can be automated by following our guidance on How to use the command line to automate user sign in for PaperCut Hive and Pocket, clicking “Get Started” in their email invitation, or logging into the task tray icon as pictured below.
Prerequisites
- Workstations managed through NinjaOne
- PaperCut Pocket/Hive Org
Bulk deployment for macOS
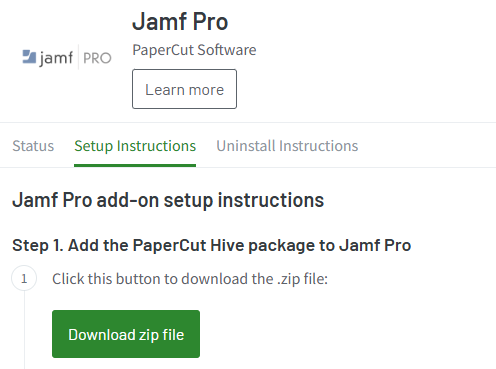
Download the .ZIP file from the Jamf Pro add-on
-
In the admin console, go to the Add-ons section.
-
Select the Jamf Pro add-on, then click Add to add it to your organization.
-
Click Manage. The sidebar is displayed.
-
In the sidebar, click Setup Instructions. The setup instructions contain the .ZIP file and the script required for the next step.
-
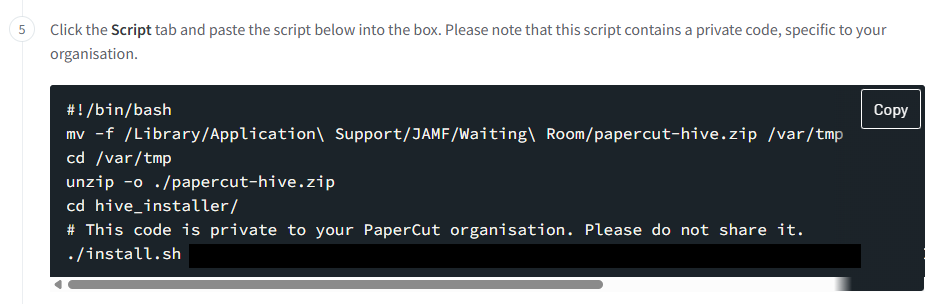
Copy the script from step 5 of the Jamf instructions.
Create the Automation in NinjaOne for macOS
Create a file transfer automation in NinjaOne
-
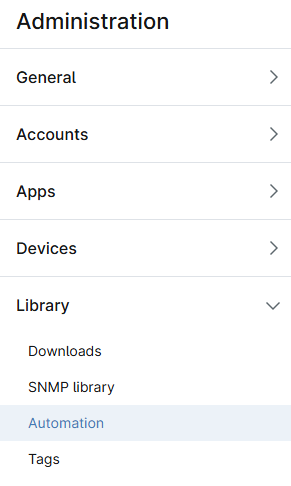
Log in to NinjaRMM and go to Administration > Library > Automation.
-
Click Add automation.
-
In the drop-down list, select File Transfer.
-
Type a name for the automation.
-
Select Mac as the operating system.
-
Set the destination folder to
/var/tmpand upload the .ZIP file you downloaded in step 1.
Create a script automation to install PaperCut Hive or Pocket
- Click Add automation.
- Paste the script you copied from PaperCut Hive or Pocket in step 2.
- Remove the first line that references a JAMF waiting room. After removing that, the first line of your script should now say
cd /var/tmp. - Type a name and description for the script explaining that it unzips the files and runs the installation process.
- Select ShellScript as the language and Mac as the operating system.
- Select to run the script as System.
- Save the automation.
Set up the policy for Mac workstations
- Go to Administration > Policies > Agent Policies.
- Select the Mac policy.
- Add a condition that looks for
pc-print-client-service. - Add the two automations you created previously in the following order:
- File transfer automation
- Script automation
- Type a name for this condition.
- Select your preferences for the remaining fields related to Priority, Severity, and notifications.
Post-deployment checks
Spot-check a few macOS computers to ensure the following:
- In Activity Monitor, check the
pc-edgenode-serviceprocess is running.
The computer requires this service to perform Edge Mesh activities such as receiving, replicating, or printing jobs if the PaperCut Cloud Service calls upon it. - In Activity Monitor, check that
pc-print-clientprocess is running.
This is the print client needed to link the end-user to PaperCut Pocket or PaperCut Hive and submit jobs via the PaperCut Printer. This process must be running in memory. It provides the functions the user needs to print jobs via the PaperCut Printer.
If either of these is not running, please contact your PaperCut reseller and provide copies of the logs.
Locations of logs
- setup logs:
/Library/PaperCut Hive/data/logs/Setup Log %date% 00X.txt - edge node logs: The edge node service logs are located in:
/Library/PaperCut Hive/data/logs/ - print client logs: The print client service logs are located in:
~/Library/PaperCut Hive/data/logs/
Note: For macOS, since the print client is installed under the user context, so you’ll need to perform either of the below steps to grab the set of logs:
- Open Finder.
- Hold down the Option key when clicking the Go menu. The library will appear below the current user’s home directory
Or
- Open Finder.
- Click on the Go menu and choose Go to Folder.
- In the popup, type ~/Library and press Enter.
Comments
Comments are not available in this preview environment. On papercut.com, this space shows the live Disqus comment thread for this page.