Before you dive straight into configuring your system, you might want to get a feel for where to focus your efforts, and what specific features you’ll want to implement.
Narrow your printer discovery scope
As the first administrator using PaperCut Hive or Pocket, you’ll need to install the System Client to query the network for printers. By default, PaperCut searches far and wide for every printer it can find, so that it’s as easy for you as possible.
However, we offer an option to narrow down where PaperCut Hive or PaperCut Pocket searches for your printers. If you already know where your printers are, you can save a little bit of time and reduce the chance of pulling in printers that you don’t care about by limiting the search scope. You can specify addresses for PaperCut to check, or you can provide an IP range that you want the search to stay within.
Learn more about:
Configuring your system's printer discovery scope
Decide how to invite your users
When you decide you’re ready to onboard your users, you can either:
- start off with a slow rollout, one user at a time
- get things rolling quickly by adding a few people at a time.
If you’re feeling particularly efficient, you can use an add-on to import from your Microsoft Entra ID (Azure AD) directory or Google Workspace (with more coming soon).
Learn more about managing your users
Outline your users’ clients/computers
Before you invite your users, it’s useful to outline the types of users that you have. Computers in any environment will generally fall into one of the following categories.
Remote and mobile clients
These users are going to be in and out of the office frequently, but still need to print to the office from home or a coffee shop. Since their devices won’t have contact with the printers in the office very consistently, you need a way to get their print jobs through to the printers regardless of if they’re at their desk or on the road.
“Regular” users
These are the users who will be in an office and online during most business hours. These computers have consistent access to a consistent list of printers. They don’t have to be permanent fixtures at the office, but they shouldn’t be primarily located in places like coffee shops, home offices, or other areas that don’t have access to your printers.
Permanent workstations and servers
Some environments have computers that are almost always on, don’t change locations, and can talk with a consistent list of printers.
- When your regular users’ computers can talk directly with your printers, there’s no need to treat these more permanent devices any differently — Autopilot will take care of how best to get your print jobs where they need to go.
- If your network is such that these permanent devices are the only computers which can reliably reach the printers, setting up a Print Delivery Profile can take advantage of their dependability — whether it’s a retired server, a front desk computer, or that weird laptop in the corner that no one’s turned off for like a year!
Additional resources for client (edge node) management
Edge Mesh, edge nodes, and the Cloud Node
Decide how to deliver Find-Me print jobs
Print delivery path overview
PaperCut Pocket and PaperCut Hive automatically decide the best path for print jobs that have been released. Autopilot is on by default and, based on feedback provided by the installed clients, PaperCut knows which of those clients have consistent and reliable access to the printers.
However, admins can also configure their own “deterministic print path” by creating Print Delivery Profiles . The admin can choose individual clients to be used along a print job’s path, or more broadly, a network gateway that serves multiple clients and printers. In either configuration, the admin has control over which clients (or maybe even a single user client) are best suited to deliver print jobs to certain printers.
For example, a client could be set up at a satellite office that has three printers. You can create a Print Delivery Profile that is assigned to those three printers ensuring that only that specific client will deliver the print jobs released to them. And as a bonus, we still have Autopilot as an optional backup in case your preferred client goes offline.
Methods and protocols
“Queue? IPP? 9100? What should I choose?!”
Well it’s going to depend! Now that you’ve planned which clients will be involved in delivering a Find-Me print job, you need to start thinking about how the jobs should actually make it to the printer.
PaperCut Pocket and PaperCut Hive will automatically determine applicable print delivery methods during our discovery process, but if you want more control, read on to learn about customizing methods and protocols via the admin console.
IPP printing only
This is a great option if you have a fleet of devices that all support driverless AirPrint printing (IPP Everywhere). Most modern printers try to adhere to this standard. This option is super useful for “set and forget” printing — as long as your printers support the standards of IPP that we need, you won’t have to touch any configuration for this to work.
Raw (Port 9100) printing only
Raw printing is useful for any printers that fall between the cracks with their support of IPP — maybe you’ve got some old printers that don’t support IPP at all, or maybe you’ve got some printers that support IPP, but don’t adhere to the driverless printing standard. Raw printing is very reliable, but it relies on print jobs first being rendered with a traditional print driver, so you’ll need to set up a custom print queue with a manufacturer driver to leverage this delivery method.
Queue printing only
Some printers are very happy receiving jobs over IPP, while others are better served by raw printing with a manufacturer driver. But what about printers where you want to avoid using IPP without also needing to deploy a custom print queue with a manufacturer driver? Not to worry — for these cases, we can leverage a traditional print queue on a computer to deliver your jobs!
For this configuration, all you need to do is install a queue with a driver of choice on a handful of the computers running the PaperCut Hive or PaperCut Pocket client. This allows PaperCut Hive or PaperCut Pocket to use the operating system’s local, native queues to submit the job to the printer.
Hybrid IPP/Raw/queue printing
If more than one of these submission options are valid, why not use them all? Having a combination of IPP, Raw, and queue printing available for your printers provides redundancy, and helps to make sure that you’ll have the highest likelihood of delivery possible.
If you decide that you want to use more than one delivery method in your network, you can prioritize the order in which they’ll be preferenced, too. For more information on how to configure this, check out our configuring delivery methods article.
Pick your release methods
Release options at the printer/MFD
Available on PaperCut Pocket and PaperCut Hive

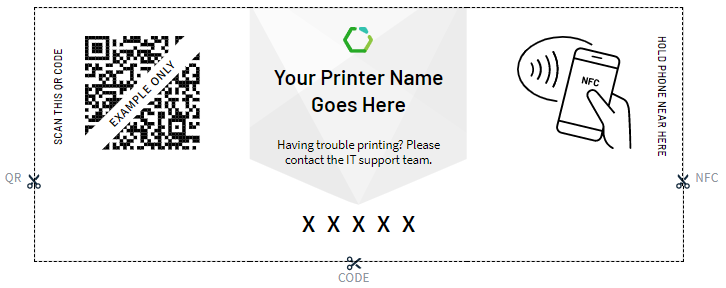
QR Code scanning
If you want, you can instruct PaperCut Hive or PaperCut Pocket to produce a label that can be applied to your printers that has a device-specific QR code on it for quick release from any mobile device with the mobile app installed. The user can either scan this through the PaperCut Hive or PaperCut Pocket app directly, or through their QR scanner of choice. QR codes are also a great way to enable self-registration for your users!
NFC scanning
NFC has been added to just about every mobile device in the last decade. In case your organization is living in the future and already has an implemented NFC tag system for your printers — or if you’re looking to make the leap now — you can associate the tag values with the printers so that users can simply use their phones to scan the tags and release their jobs.
Printer code
Sometimes you just want to go about things the old fashioned way. Maybe your mobile devices don’t have NFC and photography just isn’t quite how you want to express yourself. For you, we have the printer code — unique to each device and enterable on every mobile app. Stay vigilant, though, the clever user can save this code to release from anywhere!
Implementing your choices
Once you’ve decided which release methods you want to use, you can select which to enable for your users in their mobile app through the Configure > Secure Print Release. From there, just print out the label and customize it to show the options that you want!
Learn more about secure printing
Release anywhere
Available on PaperCut Pocket and PaperCut Hive
Mobile release
The entire release process can be completed through the mobile app if you want it to. The user selects the job that they want to release, followed by the printer that they want to release it to, and they’ll be on their way. Keep “List” enabled as a release method if this is an option you want for your users.
Release options for PaperCut Hive only

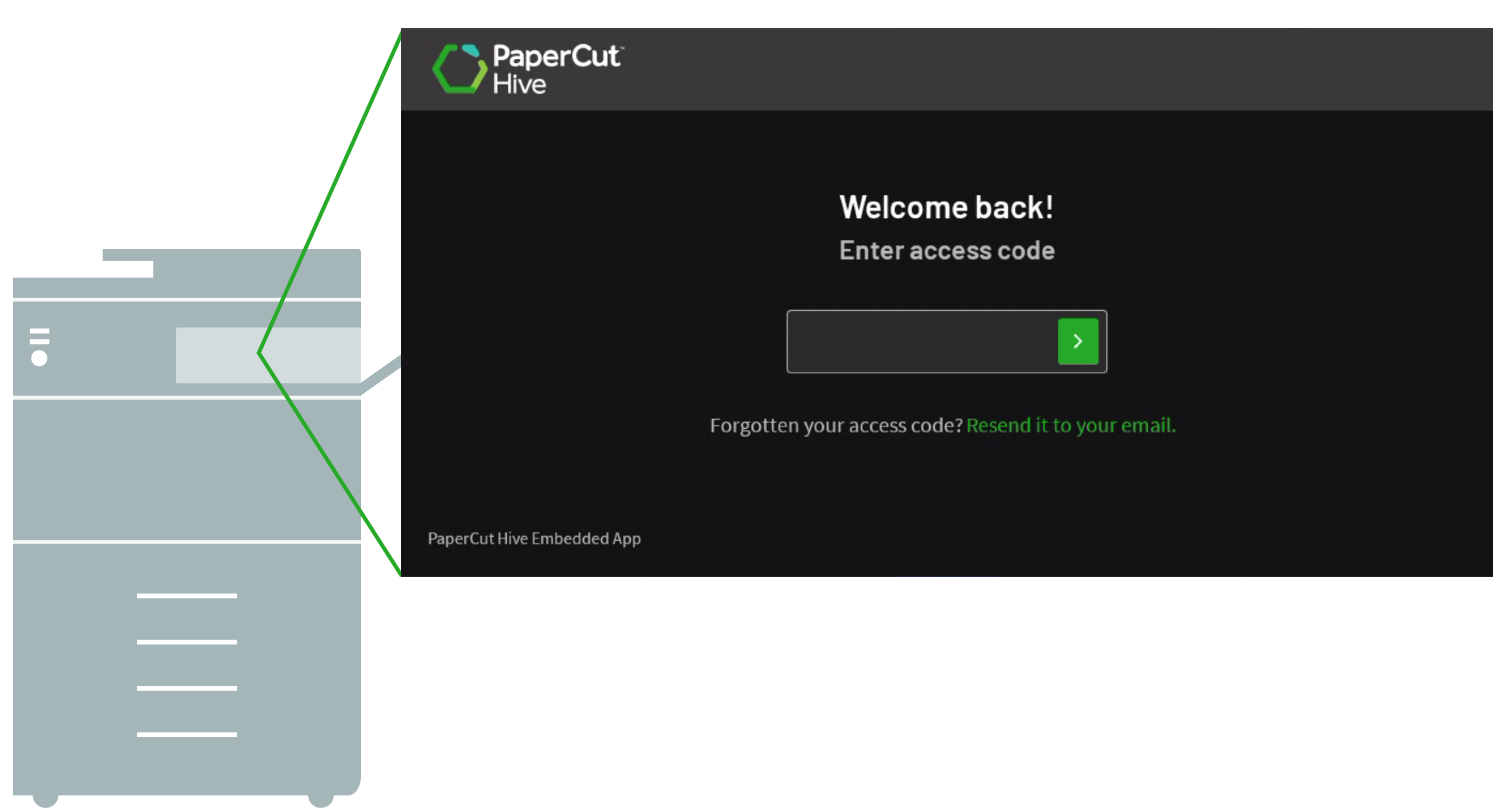
PaperCut Hive enables you to install embedded applications on your multifunction devices (MFDs) that support it. This means that you don’t have to worry about getting the apps installed on your user’s mobiles to get printing working, you can just install the app and let your users interact with the printers instead.
Lite release
Lite release is a great option if you just want to allow your users to release their jobs to the devices without needing to interact with their mobile device (or if your users are unable to use a mobile device at all). The lite release is also good if your multifunction device doesn’t have the full embedded application yet, or if you don’t want to bother tracking copy or scan jobs.
Full embedded app release
The full embedded application provides all the same functionality as the lite release, but also includes the ability to track and control copy, scan, and fax jobs. The full embedded app also supports the use of badge or card ID readers that are plugged into the device directly to ease the sign in workflow for your users.
For help deciding, learn more about the printer apps .
Conclusion
Now that you’ve worked through the computers you’ll be installing on, the ways you can strengthen the system to meet your needs, and the methods that your users can employ to release their jobs, you should have a good idea of all the moving parts within your new PaperCut Pocket or PaperCut Hive installation!
Take a look at the other sections in this PaperCut Pocket and PaperCut Hive Help Center to explore the features covered in this article at depth.


Comments