
Print job delivery
The majority of print jobs are transferred from the client to the Mobility Print server in PDF format using IPP (Internet Printing Protocol). PDF is a fantastic interchange format as it’s printer vendor independent.
The Mobility Print server then converts the PDF file into the printer’s own PDL (for example, PostScript or PCL) ready for printing. This means the clients don’t need to have a vendor/brand specific print driver. The server does the conversion, taking the complexity away from the client and the end user.
Each client’s operating system has its own print infrastructure and user interface. For some clients it’s built in (for example, iOS), while for others it requires users to download an app (for example, Android).
Let’s get further under the hood. Internet Printing Protocol (IPP) has rapidly become the defacto standard for print job transfer. It’s used by CUPS on Linux, macOS, and internally supported by the majority of printers. IPP everywhere!
Mobility Print has its own IPP embedded stack. It’s a modern stack written by the team in-house in the Go language. We’re all experts on print protocols here at PaperCut Software, however reading through all 1000+ pages of RFC documents has been no mean feat!
Below are examples of print delivery in two different environments - mDNS/DNS, and Known Host.
Example 1: Environments using mDNS and DNS
An example workflow on Apple iOS, Chrome, and Android
Tom is an end user who taps the Print button on his phone.
- Tom’s phone discovers printers using DNS (DNS-SD) or mDNS.
- Tom selects the options (for example, duplex) then taps Print. The job’s content is delivered to the Mobility Print server as a PDF file over the IPP protocol (iOS) or HTTP API (Chrome and Android).
- The PDF and the selected job attributes are spooled into
data/spool. Three files are generated for each job:- job content in PDF (*.pdf)
- print job options/instructions (*.ticket.toml)
- printing state for the job (*.info.toml)
- The Mobility Print server converts the PDF to the required Page Description Language (PDL) used by the printer, such as PostScript or PCL, using the drivers installed on the server (avoiding the need for vendor drivers on the client).
- The job is placed in the operating system’s print queue (for example, the Windows print queue).
- The job is delivered to the physical printer.
An example workflow on Windows
Tom wants to print a document from his laptop.
- Tom clicks Print and selects a printer. A standard set of print options are offered (duplex, color, copies).
- The print job arrives at the Mobility Print Server as a PostScript file generated by PaperCut Software’s Global Printer Driver.
- If the destination printer uses:
- the PaperCut Global Printer Diver, there is no conversion to PDF and the job is printed
- a native driver, Mobility Print Server converts the PostScript file to PDF using GhostTrap (installed by default) and prints the job.
Understanding the different workflows from a phone and laptop can help when diagnosing why a print job doesn’t print.
Example 2: Environments with a known host
An example workflow for setting up clients to discover printers
Jon is a system administrator who wants to install Mobility Print in an environment that doesn’t have a BIND or Window internal DNS server. He now wants to configure Mobility Print for the clients to discover the printers.
-
Jon goes to the Mobility Print admin interface and sets up printer discovery using known host.
-
Jon copies the URL from the bottom of the Mobility Print Admin page and shares it with the users.
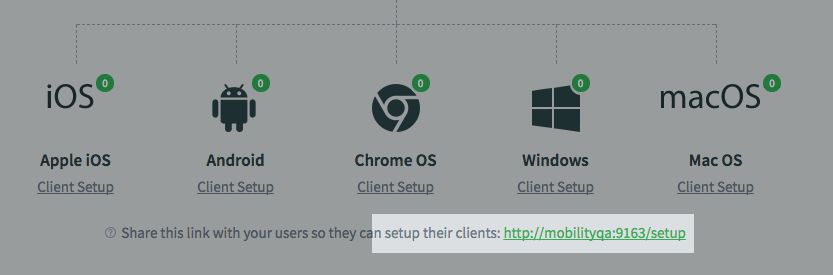
The bottom of the Mobility Print Admin page showing the link to share with the users
-
The end users click the link, which takes them to Mobility Print Help Center page for their specific type of client. They follow the instructions there to set up their client.
An example workflow for a user setting up printer discovery for an Apple iOS client
- Tom is an end user who has received a setup link from Jon via email.
- Tom taps the setup link. The Set up printing on your iOS client (iPhone, iPad) online help page is displayed.
- Tom taps the Download Mobility Print button opens the link using Safari.
- Tom is prompted to install the iOS profile that contains the published printers for his organization. He can now print from his iOS client.
An example workflow for a user setting up printer discovery for a macOS or Windows client
- Tom is an end user who has received the setup link from Jon.
- Tom clicks the setup link. The relevant Help Center setup page for printing to a macOS or Windows client is displayed.
- Tom clicks the Download Mobility Print button and runs the installer.
- The list of published printers for each Mobility Print Server is installed on the macOS or Windows client.
An example workflow for a user setting up printer discovery for Chromebooks in a managed environment
Dan, the school system administrator, is running a single Mobility Print server to support Chromebooks printing at the school. He has set up Google Workspace for Chromebooks in a managed environment. Dan has also created a policy so that the PaperCut Mobility Print extension uses the single Mobility Print server at the school to discover printers.
Tom is a student who uses his Chromebook at school.
- Tom logs into his Chromebook, which has the Mobility Print extension installed already installed.
- Chromebook installs the policy and connects to the specified Mobility Print servers to retrieve a list of published printers.
- Ann is a new student who has received a Chromebook to use at school. Ann’s school has already configured the Chromebook to install the PaperCut Mobility Print app for printing. She logs into her new Chromebook.
- The Chromebook installs the policy and connects to the specified Mobility Print server to retrieve a list of published printers.
An example workflow for a user setting up printer discovery on an Android device
Sarah is an end user who has received the setup link from Jon, the System Administrator. She already has the Mobility Print Android app on her phone. Dan is new to Mobility Print.
- Sarah taps the link, then taps the Download Mobility Print button. An updated version of Mobility Print is installed that uses the IP/hostname of the Mobility Print server to retrieve a list of published printers for Mobility Print servers.
- Dan taps link, then taps the Download Mobility Print button. The Google Play Store opens.
- Dan downloads the Mobility Print app.
- The Mobility Print app uses the Mobility Print server’s IP address/hostname to automatically retrieve the list of published printers from those Mobility Print servers.
Comments