
Groups are collections of users. PaperCut NG/MF sources groups and group members from a selected directory/domain source, enabling SysAdmins to take advantage of the existing network structure. Groups in PaperCut are used in the following ways:
-
To control how quota/credit is allocated to users on a regular basis.
-
To automate the addition of new (future) user accounts.
-
To assist with making modifications to user accounts by group.
-
For group-based reporting.
-
To filter/restrict user behavior and access.
-
For use with Print Deploy to determine which users are sent which print queues.
PaperCut NG/MF mirrors (caches) domain network group memberships for performance reasons. Therefore, changes in group membership made at the domain level might not be immediately reflected in PaperCut. To see the changes immediately, you just need to refresh the group membership.
Refresh group membership
If you’ve updated group memberships in your directory system (e.g. Azure AD, Google Workspace or others) but you’re not seeing those changes reflected yet in PaperCut MF/NG, try manually syncing your groups:
-
Select Options > User/Group Sync.
The User/Group Sync page is displayed. -
Click Synchonize now.
Groups are mirror/cached for two reasons:-
For fast reporting and search performance.
-
To ensure PaperCut NG/MF is a good network application and does not overload domain controllers with group membership requests.
-
Large networks can contain hundreds of groups and/or organizational units. In many cases only a small percentage of these groups are pertinent to PaperCut NG/MF management. To ensure administrators are not overwhelmed with all groups, PaperCut NG/MF only lists the groups that the administrator selected as relevant.
Note that you don’t need to do this manually unless you’re looking to force an update. Users and groups are synchronized each night by default.
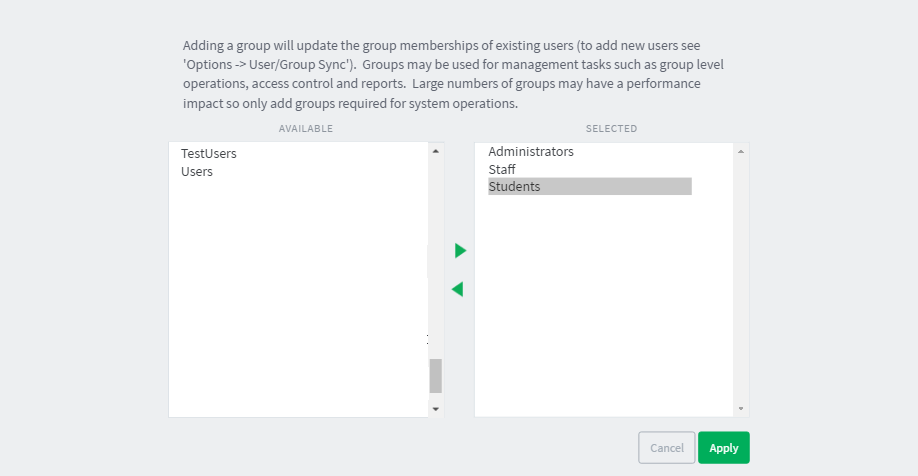
Add an imported group to the PaperCut NG/MF Group List
When you import users into PaperCut NG/MF from a user directory, the groups in that directory are also imported. The groups are not, however, automatically displayed in the Group List. You need to add the required groups to the Group List.
-
Click the Groups tab. The Group List page is displayed.
-
In the Actions menu, click Add/Remove groups. The Add/Remove Groups page is displayed.
-
On the left side, select the group(s) required; then click the Add arrow.
-
Click Apply.
Define a group via a text file (using ‘Internal groups’)
There are some situations where it’s not possible to maintain groups within the network directory source, for example, you might not have read-access to the domain.
If it’s not possible to define the required groups using your network directory, you can define them via a text file (for example, a tab-delimited file). There’s an example template and further information in the file called additional-groups.txt.tmpl in [app-path]/server/data/conf/.
For more information, see Creating internal user groups (defining groups in a text file).
Bypass LDAP connections using a text file
You can create an additional-groups.txt file both to create new groups in PaperCut NG/MF and to populate those groups with existing PaperCut NG/MF users.
Ordinarily, if you’ve configured LDAP as your primary user sync source (under Options > User/Group sync), PaperCut NG/MF still reaches out to your LDAP directory server to verify the group memberships you have defined in additional-groups.txt. It tries to override the Group settings you have configured manually via your additional-groups.txt file and can cause errors when searching for new groups.
If you use LDAP for authentication, however, you might prefer to define groups using a text file instead of relying on LDAP. This prevents any LDAP searches while executing Add/Remove groups.
-
In the Admin web interface, click Options.
-
In the Actions menu, click Config editor (advanced).
-
Find the
user-source.group-list-override-fileconfig key and update the value to Y.
Comments