
You can create Quick Scans that create folders in the following cloud storage locations:
- Scan to OneDrive Personal
- Scan to OneDrive for Business
- Scan to SharePoint
- Scan to Google Drive
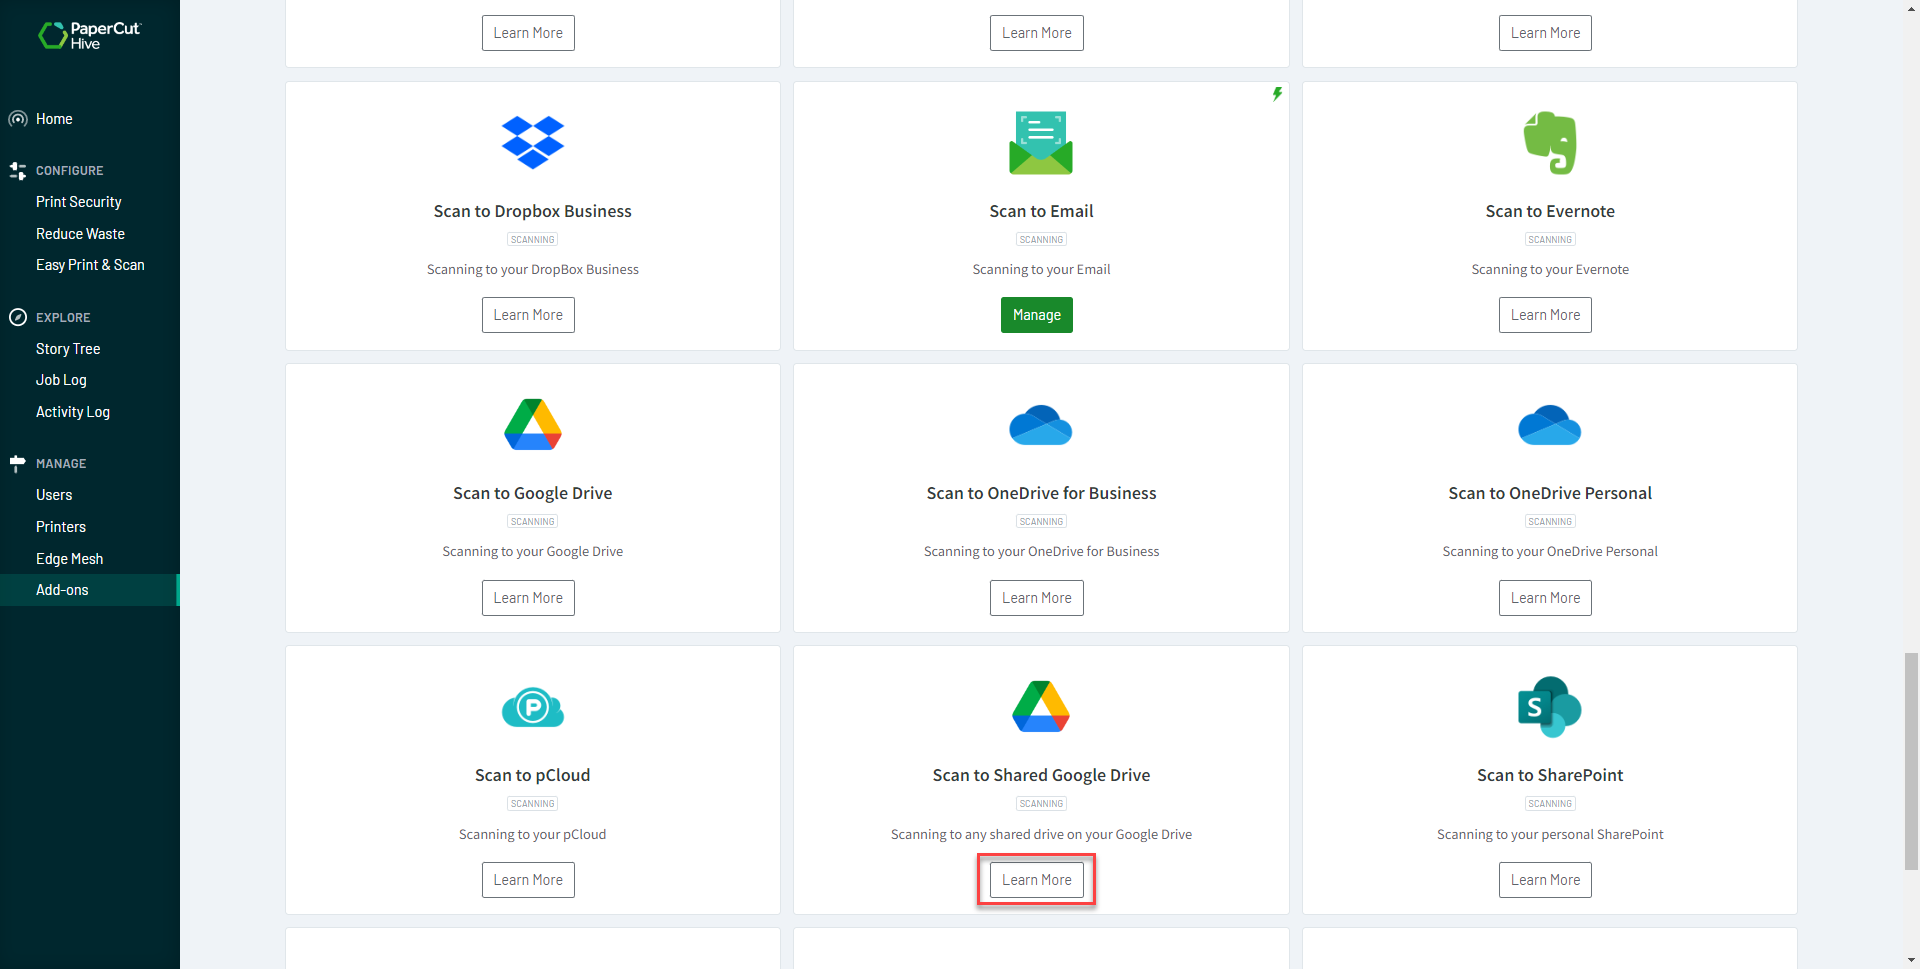
- Scan to Shared Google Drive
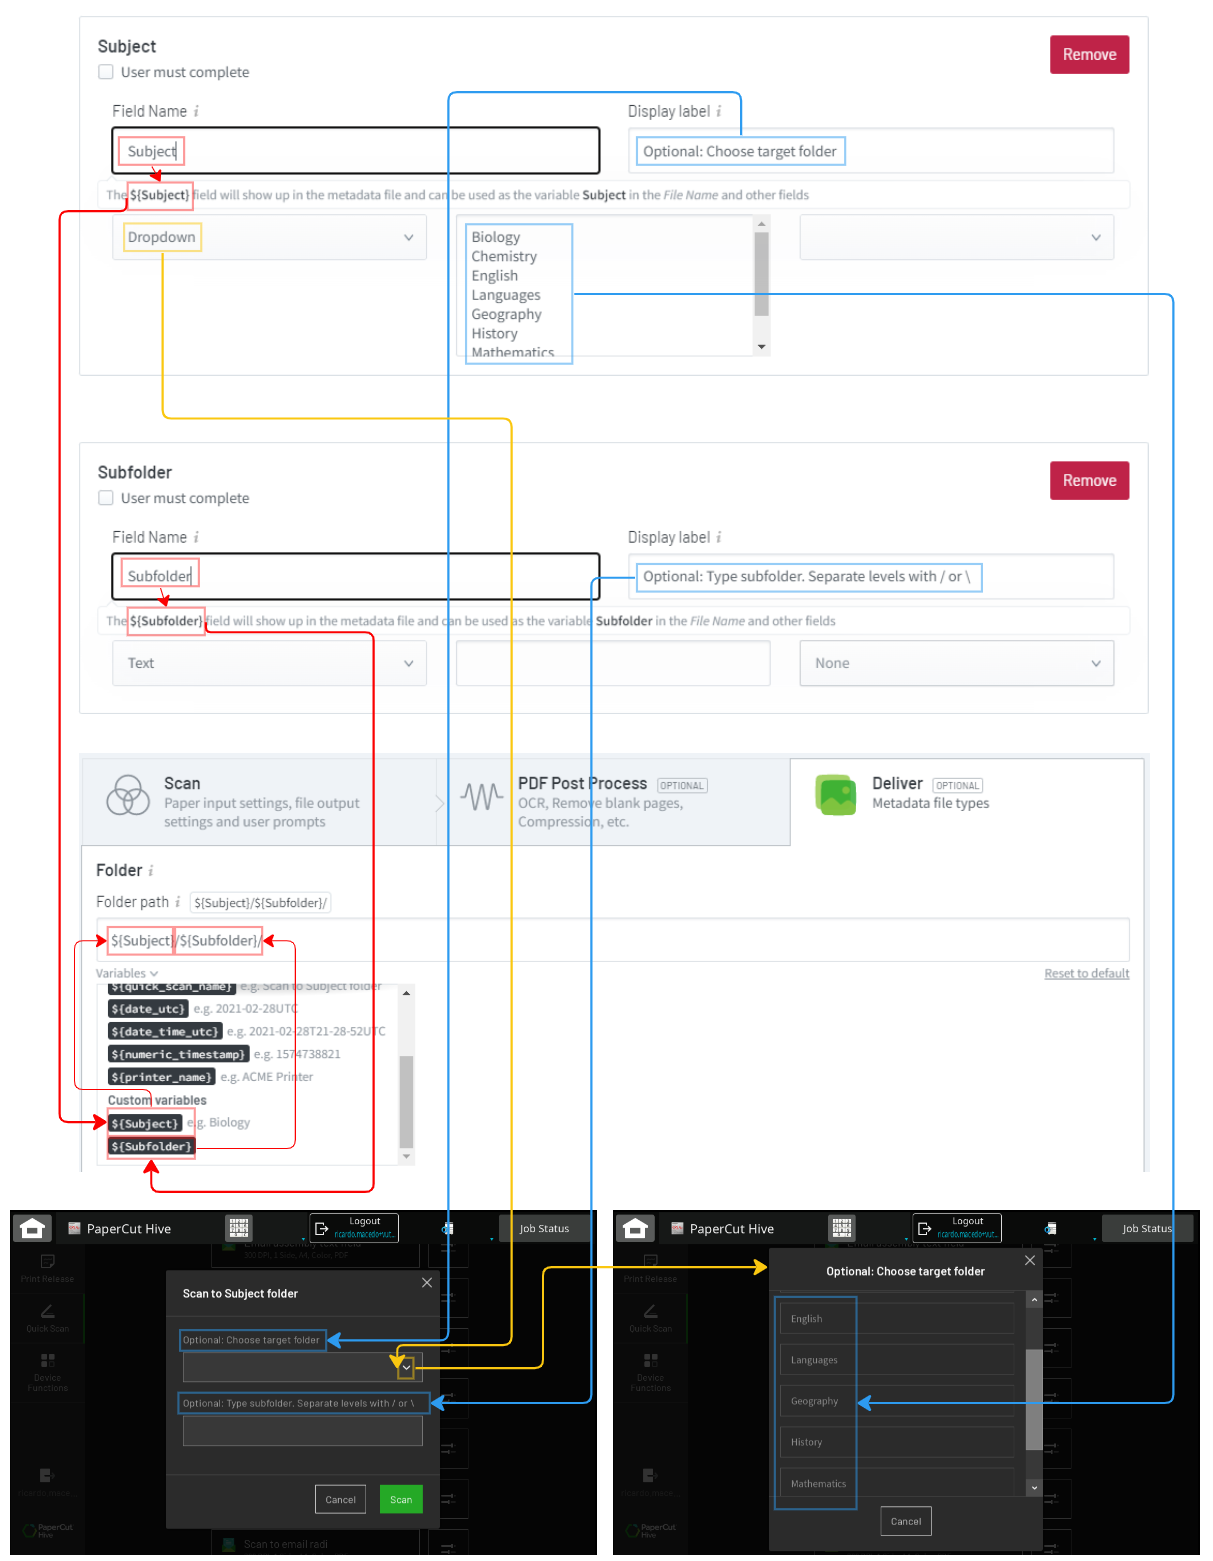
When you create a Quick Scan, you can add custom capture fields to the Quick Scan, that will appear as prompts to the end-user at the MFD. This lets you capture additional data from the user about the document being scanned. You can also use the auto-generated variables from these capture fields to assemble a folder path in the Quick Scan’s scan file destination.
Printer brands that support scanning to folders
All brands that support Integrated Scanning.
Scan to shared Google Drive with automatic folder creation: set up and demo
Scenario 1: A student wants to scan to OneDrive or Google Drive. They want to scan into a main folder named with the school subject, and also create subfolders under it
This example uses Google Drive as the destination but you can do the same for OneDrive, SharePoint, and Shared Google Drive.
All of these destinations have the field on the Deliver tab > Folder. However, SharePoint and Shared Google Drive have specific fields:
- SharePoint: Scan > SharePoint Document URL
- Shared Google Drive: Deliver > Shared Drive
Configure the Quick Scan at the admin console
-
Go to Add-ons and add the Scan to Google Drive add-on to your organization.
-
Go to Easy Print & Scan > Integrated Scanning.
-
Click Add Quick Scan.
-
Select Scan to Google Drive.
-
Rename the Quick Scan to something like: Scan to subject folder.
-
In the Scan tab, go to Input Settings > Original > Visible Options and choose the paper sizes for your organization’s region.
-
Click the Default dropdown and choose the default paper size.
-
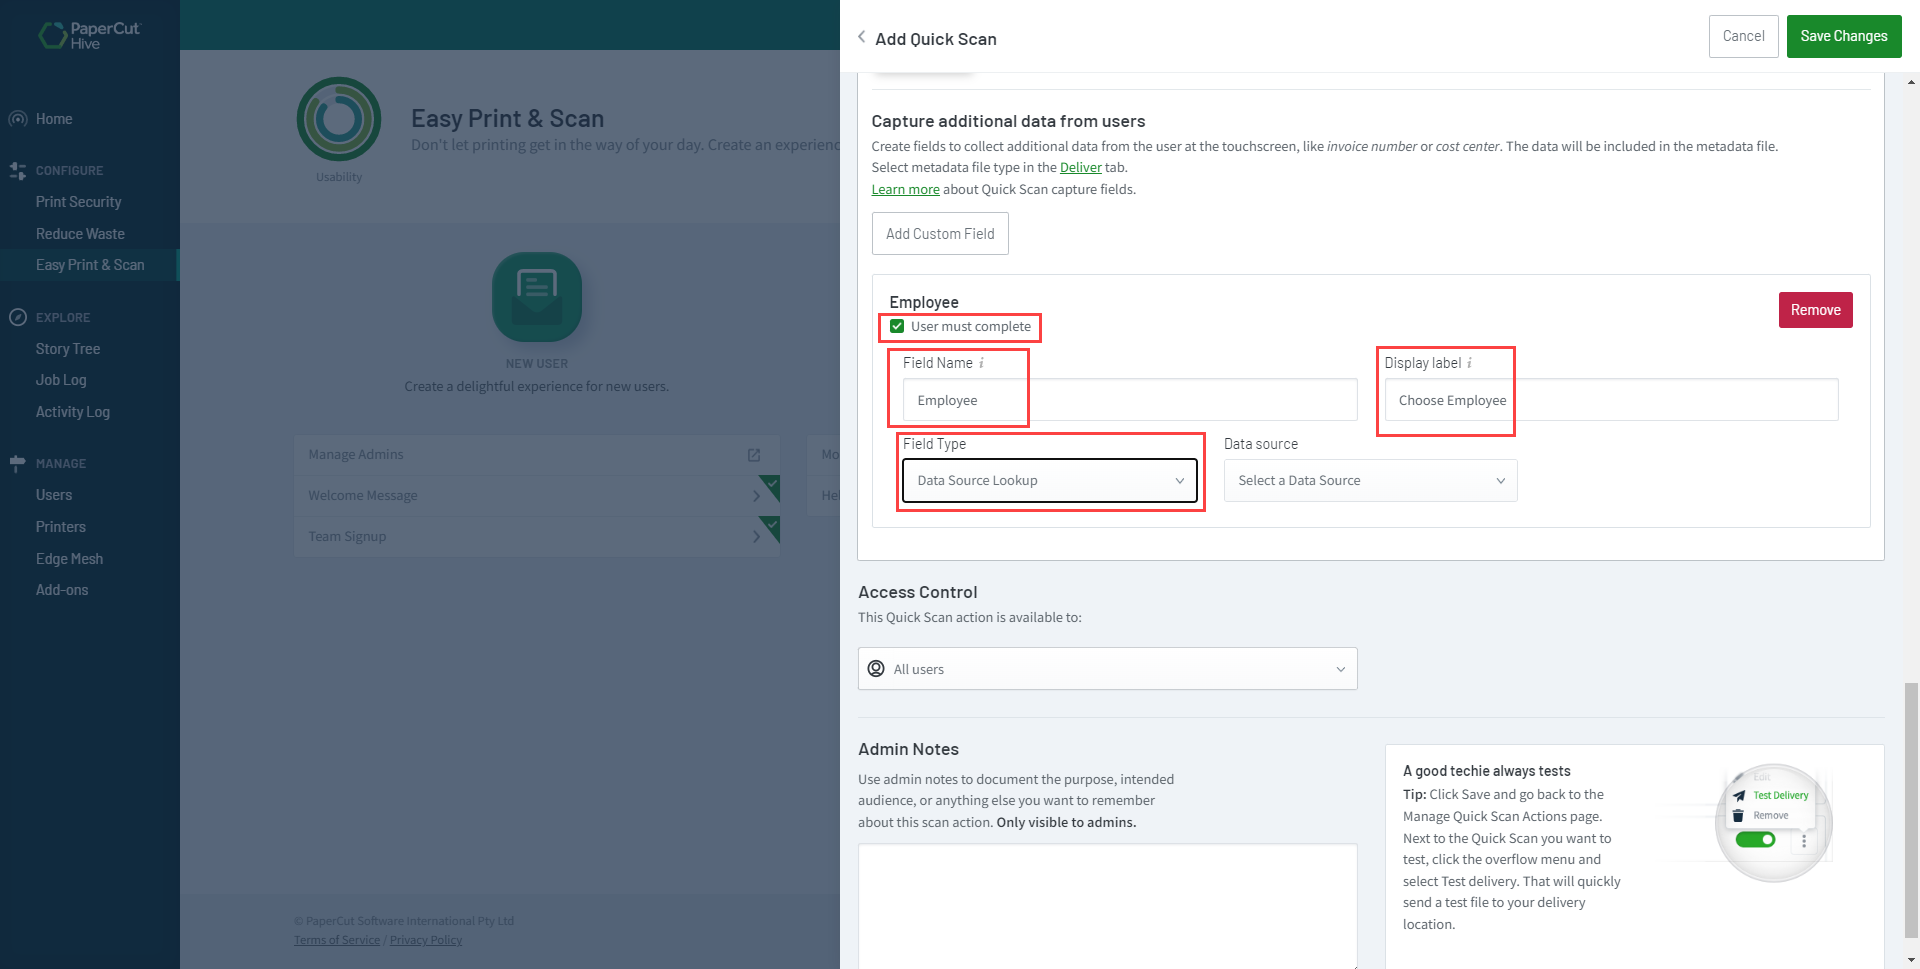
Scroll down to Capture additional data from users.
-
Click Add Custom Field. Extra input fields are displayed.
-
Don’t tick the User must complete checkbox.
-
Complete these fields:
- Field Name: Type Subject.
- Display label: Type (Optional) Choose a target folder.
- Field Type: Select Dropdown.
-
In the Options box, type the list of subjects relevant to your school. Each subject must be on a separate line, for example:
Biology
Chemistry
English
Geography
History
Languages
Mathematics
Physics
-
Optional: Create a second custom field to provide a text box for students to type the name of a subfolder:
a. Click Add Custom Field.
b. Don’t tick the User must complete checkbox.
c. Complete these fields:
- Field Name: Type Subfolder.
- Display label : Type (Optional) Type the subfolder path. Separate levels with / or \
- Field Type: Select Text.

d. Go to the Deliver tab.
e. In Folder > Folder path type ${Subject}/${Subfolder}

14. At the top right of the page, click Save Quick Scan.
Continue the configuration at the MFD
- Log in to the MFD.
- Go to Quick Scan.
- Tap Scan to subject folder, which is the name you gave earlier to this Quick Scan.
- In the field Optional: Choose a target folder, pick Geography.
- In the field Optional: Type subfolder. Separate levels with / or \, type: Brazil\Rio
- Perform the scan.
A visual representation of the relationship between configuring the Quick Scan in the admin console and what you see on the MFD’s touchscreen
Continue the configuration - email inbox
1. Click Authorize. This is a once-off authorization for the 1st scan job to each cloud destination. This authorizes PaperCut to save scan files in the user’s cloud storage account.

PaperCut Hive sends an email with the link to the scan file in the cloud storage. Note that the email message informs that the scan file is in the folder Geography/Brazil/Rio.
2. Click Go to your scan.

The result of the scan configuration in Google Drive
See below that the file was deposited in the right folder structure defined by the admin, with the values input by the end-user at the MFD touchscreen.

Folder structure scenarios from different end-user inputs in the capture fields
Having in mind that the folder structure defined by the admin at the Quick Scan level is ${Subject}/${Subfolder}.
End-user input on MFD | Explanation |
Resulting folder:
| Since the admin made both fields empty, that is, they didn’t check the User must complete checkbox ☑, then filling out these fields is optional: the end-user may proceed with the scan without completing them. The use case is that a student may want to scan something personal that doesn’t belong to any of the predefined folder names the admin created with school subjects. The user might also just want to finish the scan quickly to quickly have the document digitally in the root folder of their cloud storage, without having to navigate folder levels. |
Resulting folder:
| Similar to above, the user might want to scan something that’s not related to a school subject, so they may skip the 1st level folder in the structure ${Subject}/${Subfolder} created by the admin and only use the /${Subfolder} field. This will create a folder in the root folder level. |
Resulting folder:
| |
Resulting folder:
| |
Resulting folder:
| Typing either the forward slash / or the backslash \ in the text box will create folder levels. |


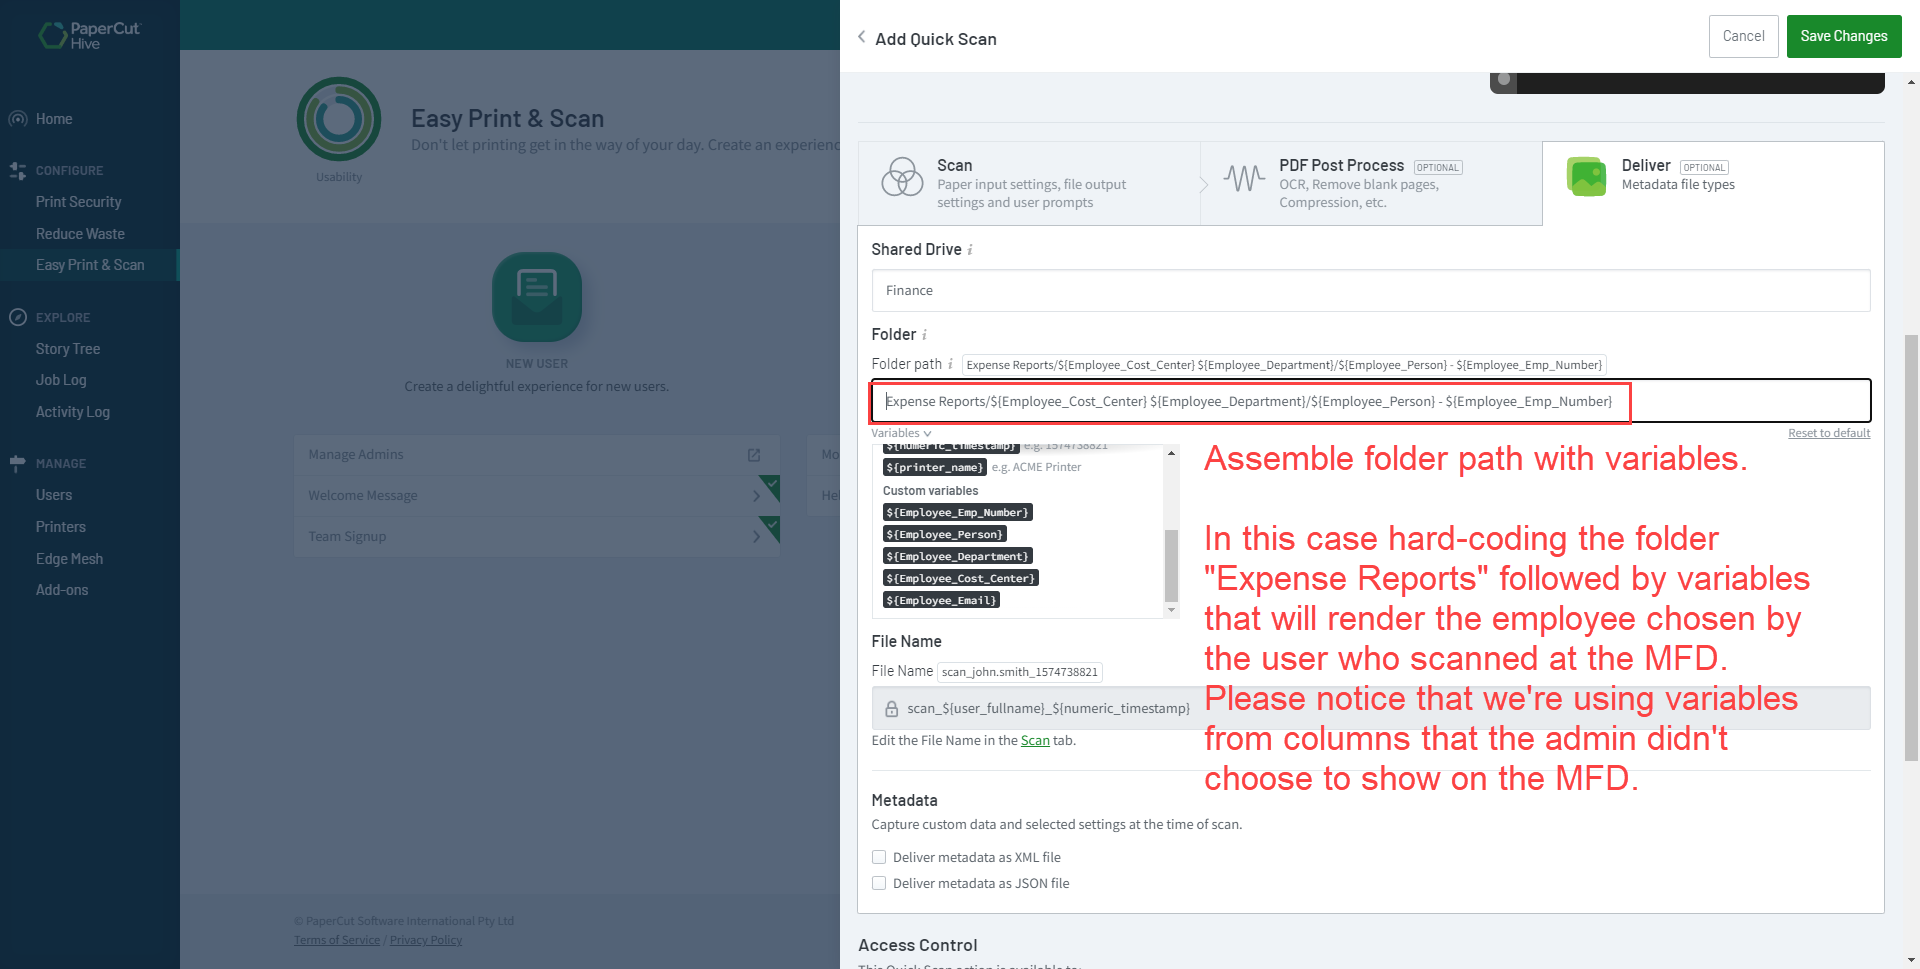
Scenario 2: Finance employee scans an expense report. On the MFD they search a directory for an employee name, and the scan is saved on the shared cloud drive in the employee’s folder
This example uses Google Drive as the destination but you can do the same for OneDrive, SharePoint, and Shared Google Drive.
All of these destinations have the field on the Deliver tab > Folder. However, SharePoint and Shared Google Drive have specific fields for them.
- SharePoint: Scan > SharePoint Document URL
- Shared Google Drive: Deliver > Shared Drive
Create a Data Source
Prepare a CSV or TSV file with the columns that are relevant to your address book.
There’s no template to follow; just be sure to follow the Data source file requirements below.
Emp_Number | Person | Department | Cost_Center | |
1001 | José da Silva | Finance | 10 | jose.da.silva@org.com |
1002 | Juan Pérez | Marketing | 20 | juan.perez@org.com |
1003 | John Smith | Sales | 30 | john.smith@org.com |
1004 | Francesco Rossi | Operations | 40 | francesco.rossi@org.com |
1005 | Jean Dupont | Finance | 10 | jean.dupont@org.com |
1006 | Jan Jansen | Marketing | 20 | jan.jansen@org.com |
1007 | Matti Meikäläinen | Sales | 30 | matti.meikalainen@org.com |
1008 | Otto Normalverbraucher | Operations | 40 | otto.normalverbraucher@org.com |
1009 | Ivan Ivanov | Finance | 10 | ivan.ivanov@org.com |
1010 | Fulano Sicrano | Finance | 10 | fulano.sicrano@org.com |
Data source file requirements
Upload a Comma Separated (.CSV) or Tab Separated (.TSV) file.
Supported data format
- The first row specifies the column names.
- Maximum of 10 columns and 10,000 rows.
- All rows have the same number of columns.
- File must be saved with UTF-8 encoding.
Configure the Quick Scan at the admin console - sequential screenshots
These screenshots show what you need to do. Screenshots current as of June 2023.


Ricoh only: If you want to use the auto generated variables from the fields, you must select the checkboxes in this column.


Continue the configuration at the MFD - sequential screenshots


Continue the configuration - email inbox - sequential screenshots


After the authorization, an email with the link to the scan file is delivered.


Comments