
To set up self-hosted Document Processing, you need to:
- Determine where to install Document Processing
- Install Document Processing
- Configure the host location and available languages
- Tuning Document Processing server performance
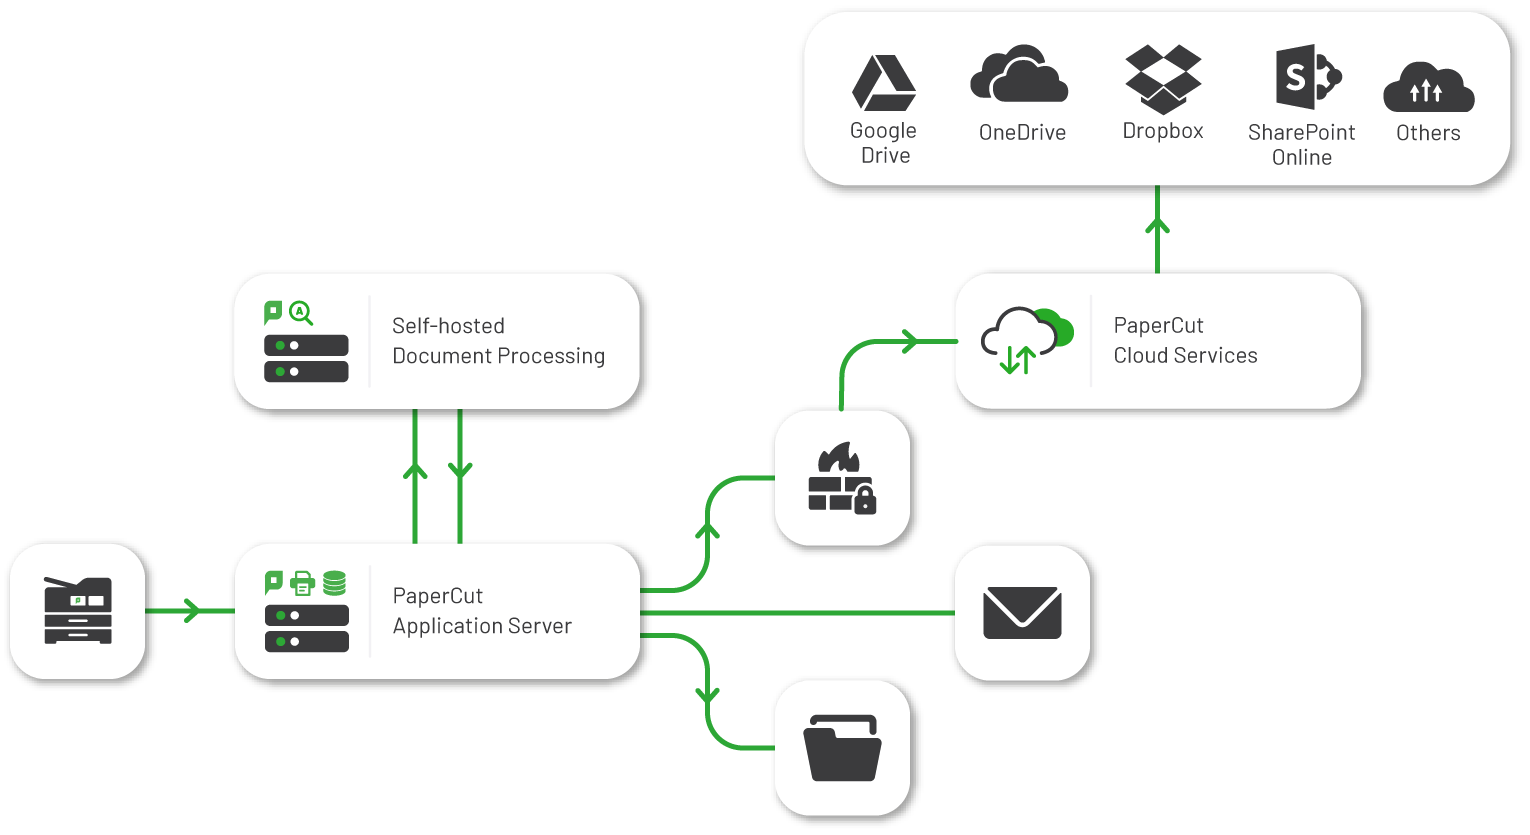
Document flow when using our self-hosted document processing
The below diagram shows how a scan document travels through the PaperCut MF system when using our self-hosted document processing.
Please note, documents delivered to a Cloud Storage endpoint (Dropbox, OneDrive, Google Drive, etc.) will continue to be delivered via our PaperCut Cloud Services
Step 1: Determine where to install Document Processing
For smaller environments, it makes sense to install Document Processing alongside the Application Server. In medium to larger environments, though, you can ensure optimum system and Application Server performance by setting up one or more dedicated Document Processing servers that the Application Server can contact.
See the table below for recommendations.
| Environment size | Approx. scan jobs per day | Recommended processors* | Recommended installation location | Benefits |
|---|---|---|---|---|
| Small | 0 – 50 | 2 | Application Server | Less infrastructure cost.Great for smaller business with occasional Document Processing load |
| Medium | 50 – 200 | 3 | Start on a well- resourced Application Server. Monitor and plan for a separate server on an as-needed basis. | Balances resource use, system performance, and Document Processing performance. |
| Large | 200+ | 4+ | One or more separate high performing Document Processing servers | Dedicated resources mean better handling of high scanning load, spikes, and multiple jobs. For example, in larger Enterprise or Education environments.Document Processing’s heavy resource requirements don’t interfere with the normal operation of the Application Server. |
*Recommended available processors to use (to support parallel jobs).
Keep in mind that the more storage and processing power available, the better Document Processing performs—make as much available as you can. For any environment size, we recommend:
- at least 10 GB available disk space
- 512 MB available memory
- running a 64-bit edition of Microsoft Windows.
For information about:
- supported Windows versions, see System Requirements
- performance tuning of a standalone or co-located installation, see the Tuning Document Processing server performance section below.
Step 2: Install Document Processing
-
Log into the PaperCut Admin interface.
-
Navigate to Options, then Capture.
-
Make sure the Hosting Configuration is set to Use Self-Hosted Document Processing.
-
Click Download Document Processing Installer.
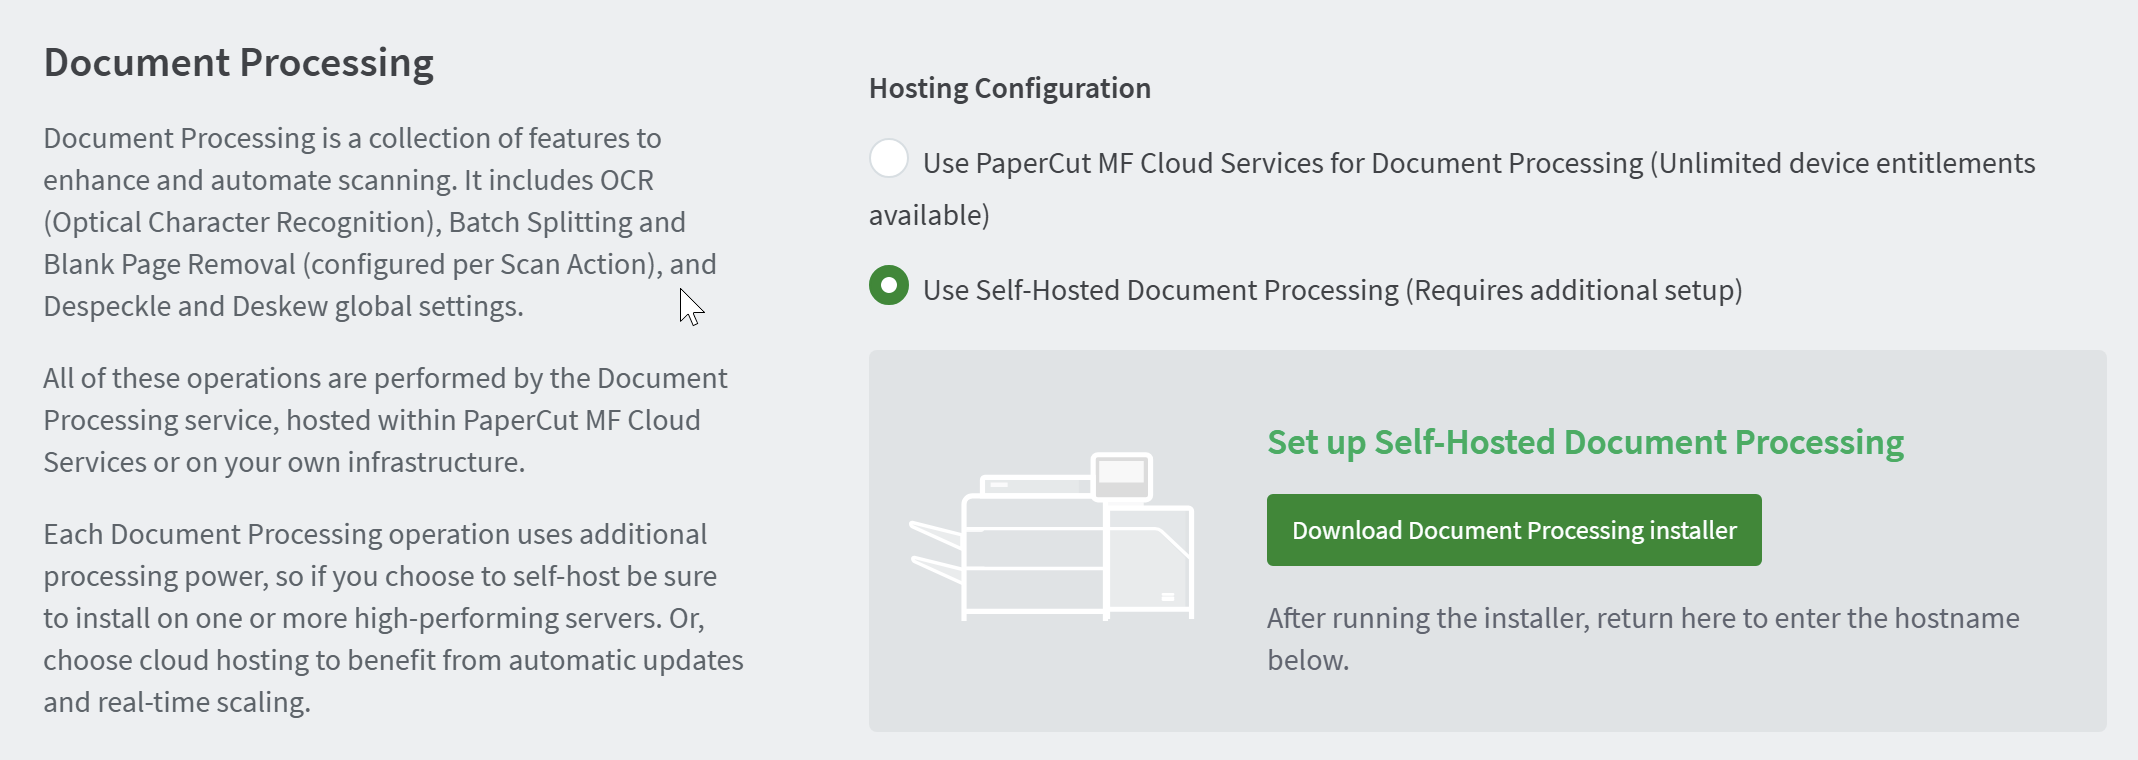
For offline installations, the installers can be downloaded manually here:- Document Processing (OCR) installer.
- GhostTrap (for processing PDF files)
- Pandoc (for processing DOCX files)
-
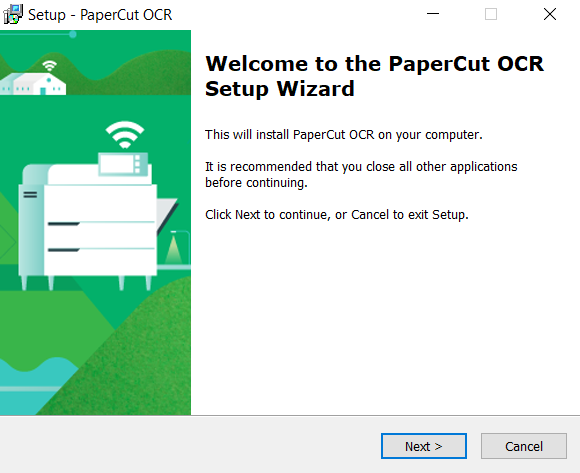
On the Document Processing server, run the pc-ocr-server executable. The Setup Wizard is displayed.
-
Follow the prompts during the install.
- Install the GhostTrap component to process PDF files.
- Install the Pandoc component to process DOCX files.
-
On Windows servers, the installer automatically configures the Windows Firewall. If you are using a non-Windows firewall, open port 9181 (inbound) to allow connections from the PaperCut MF Application Server.
-
Repeat the process for each Document Processing server you wish to add.
Step 3: Configure the host location and available languages
- Back in the PaperCut MF Admin web interface, navigate to Options, then Capture if not already there.
- Under Add Document Processing Server, enter the static IP address or fully qualified domain name of the server where you installed the Document Processing service.

- Click Add.
- The Hosting Configuration area should now update with the details of the new server and a status indicator.
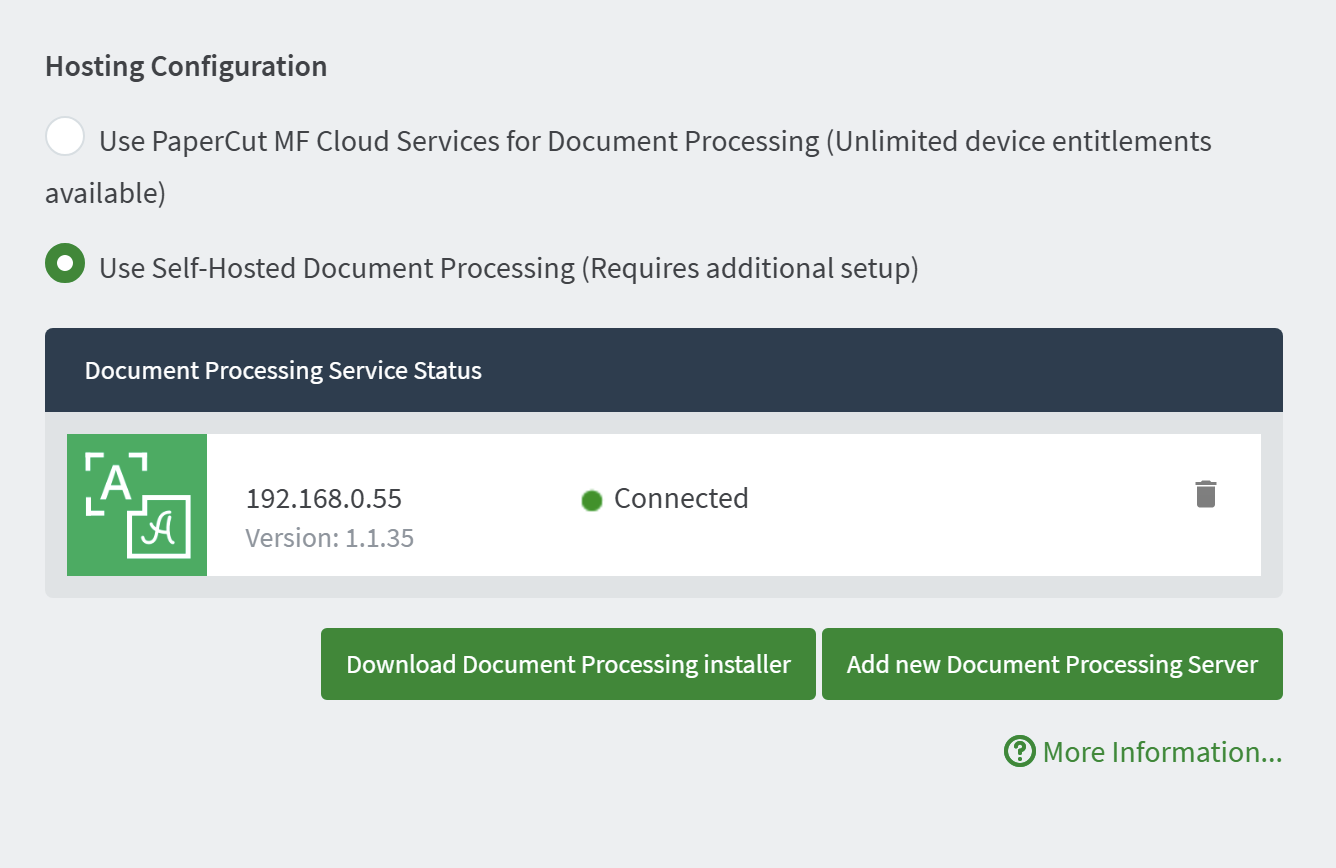
- Repeat the previous steps to add additional servers as needed.
- Lastly, make sure you have set up scan actions with Document Processing options enabled so you can test scanning a file.
Post setup: Tune Document Processing server performance
The approach to tuning a Document Processing server’s performance depends on whether it’s on a standalone system or co-located with other services.
By default, a Document Processing server processes two jobs in parallel, and they are processed with a normal CPU priority. As described below, you can change the default number of parallel jobs by modifying the configuration file at:
[ocr-server-path]/data/config/config.toml
After making changes to the config file, you’ll need to restart the Windows service: PaperCut OCR Server.
Tuning for installation on a standalone system
For best performance when installing the Document Processing server on a standalone system, it’s a good idea to maximize the number of jobs that can be processed in parallel.
The ideal number to use depends on many factors, such as the type and size of the documents being processed and the system architecture. A reasonable starting point is to use the total number of virtual CPUs (or cores times threads on a “bare metal” system) minus two.
Put another way, if you want to process four jobs in parallel and you’re installing Document Processing on a virtual machine, give it six virtual CPUs and adjust the below configuration key accordingly.
To make this change:
- In the
config.tomlfile, remove the # at the start of theMaxJobsInParallelline to uncomment the option and make it active. - Set the
MaxJobsInParallelline toMaxJobsInParallel = 4 - Restart the Windows service:
PaperCut OCR Server
Tuning for co-location with the Application Server
If your system has additional available processors (beyond what the Application Server is using), you might want to consider increasing the number of jobs that are processed in parallel from the default of two.
To make this change:
- In the
config.tomlfile, remove the # at the start of theMaxJobsInParallelline to uncomment the option and make it active. - Set the
MaxJobsInParallel = 3 - Restart the Windows service:
PaperCut OCR Server
Comments