
Use the table below to find your symptom and the recommended troubleshooting steps.
End users can't find any printers or "Failed to retrieve printer list" error... | |
First, follow these general troubleshooting steps... | - Make sure the Mobility Print server is running. Log on to the server running Mobility Print and ensure that you can log in to the admin interface http://localhost:9163/admin to confirm the service is running. Side note: We know from customer reports that two antivirus software suites disrupt the Mobility Print service. See our known issues: Trend Micro Antivirus causes Mobility Print server to go offline and Cylance Antivirus causes Mobility Print server to go offline. |
If Cloud Print is being used... | ... see Troubleshooting Mobility Cloud Print. |
If the discovery option is set to mDNS... | |
If the discovery option is set to DNS... | |
If the discovery option is set to Known Host... | |
For Chromebook troubleshooting specifically... | ... see Troubleshooting Chromebook issues. |
If this only happens after restricting printer access per subnet... | ... see Troubleshooting restricting printer access per subnet. |
If this only happens for macOS clients... | ... verify that your macOS print queue Name and Description don't include any CUPS forbidden characters. |
Some other symptom... | |
'Invalid username or password' when logging in... | ... see "Invalid Username or Password" when users log into Mobility Print . |
The Mobility Print server is stuck 'discovering your printers'... | |
For other Chromebook problems... | ... see Troubleshooting Chromebook issues. |
If the Windows client runs but no printer is visible afterward... | ... see Printers disappear after running the Windows Mobility Print installer. |
If jobs aren't printing or are being tracked as the wrong user... | ... see Troubleshooting missing print jobs. |
If Mobility Print is not able to import a large number of printers... | ... have a look at this article for some help on how to Troubleshooting large-scale import of printers into PaperCut Mobility Print on Linux. |
My problem isn't listed... | ... take a screenshot of the error or symptom and follow the steps to collect the Mobility Print logs for troubleshooting to share with your PaperCut support contact. |
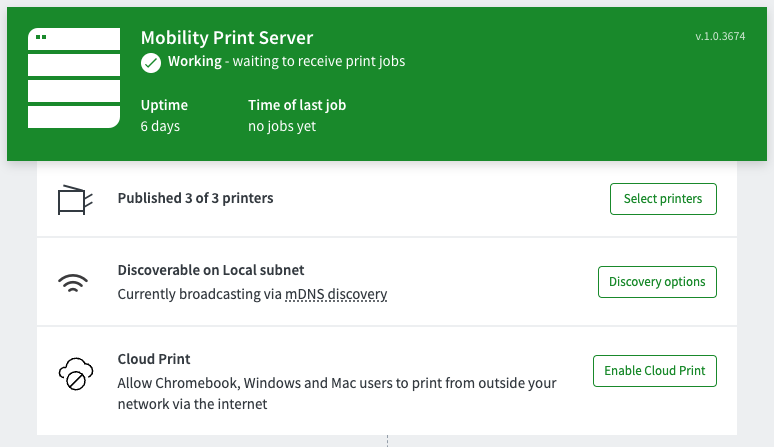
*How can you tell which discovery method is being used?
To check, log onto the Mobility Print server as an administrator. On the dashboard, the server may say “Currently broadcasting via mDNS discovery”, “Clients are currently configured with a known host”, or “Currently configured on DNS server”.
In the below example, Cloud Print has not been enabled, and the Mobility Print server is configured to broadcast printers via mDNS.
Comments