
Each option in a product or delivery options configuration has a “cost” attribute. This attribute specifies the amount by which a cost estimate is incremented if a customer selects that option. For example, you can assign a different cost to each paper stock option allowing you to charge more per sheet for heavier stock.
Allocate a cost to a product
If you have not already done so when you configured your products, you should allocate an estimated cost to each product configuration option.
- In the Operator interface, in the bottom left corner of the screen, click Settings.
- Click the Products tab.
- Configure the cost attribute for each option as required. See below for some examples.
- Click Save or Save and close.
Allocate a product cost - Example one
In this example, the paper cost for single sided documents is calculated (based on the formula specified in the cost script), as:
cost per sheet of paper * number of pages.
If the number of pages in the documents is 40, the order cost would be 40 * cost per sheet.
Product configuration file
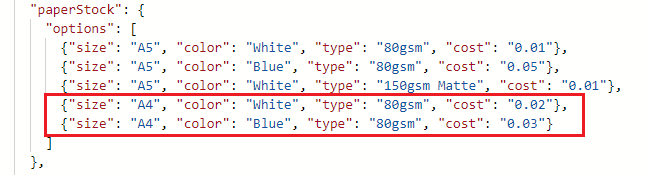
The product configuration file, showing the JSON set for this example.
New Order form (white paper)
If a customer selects A4, White, 80gsm as the Paperstock, the Printing Costs for a 40 page document would be 40 * $0.02= $0.80
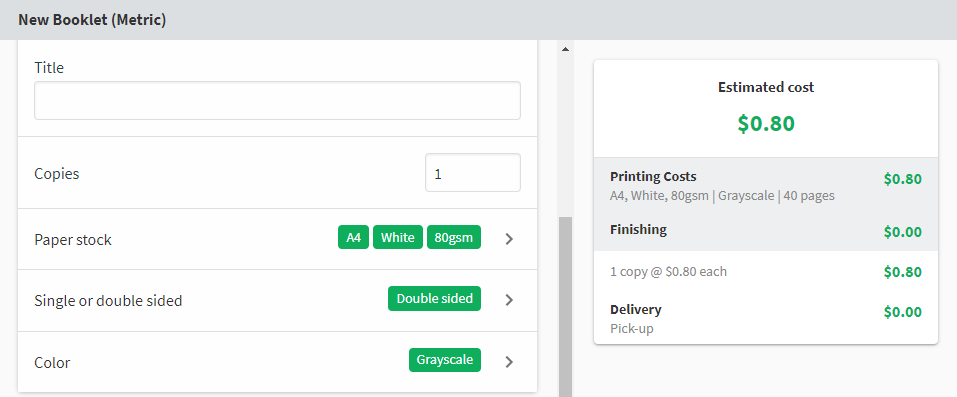
The new order form, showing that a 40 page document printed on A4, white, 80gsm paperstock is $0.80.
New Order form (blue paper)
If a customer selects A4, Blue, 80gsm as the Paperstock, the Printing Costs for a 40 page document would be 40 * $0.03= $1.20

The new order form, showing that a 40 page document printed on A4, blue, 80gsm paperstock is $1.20.
For Binding options, you can use a combination of costs in your calculation based on the options that a customer selects. You might want to have a base cost for the labor involved in each type of binding, and also a variable cost for the binding option sub-attributes selected by the customer.
Allocate a product cost - Example two
In this example, the base cost for Comb binding is $2.00. There is also an additional charge of $1.00 if the Binding Edge is Long, or an additional charge of $0.50 if the Binding Edge is Short. In the cost script, you would specify that the total binding cost is calculated as follows:
binding option cost + binding option sub-attribute cost
Product configuration file
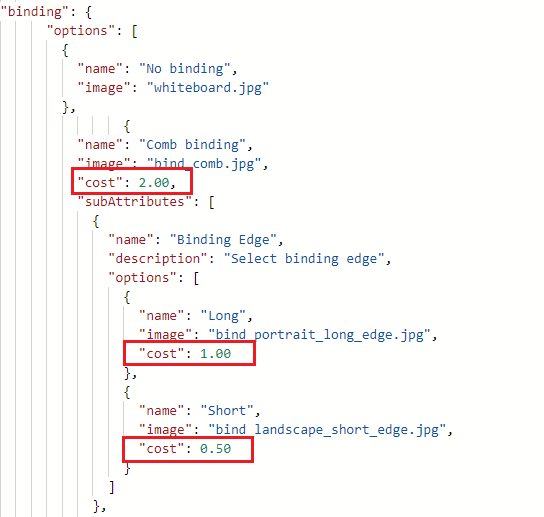
The product configuration file, showing the JSON set for this example.
New order form
If a customer selected Comb binding with a Binding Edge of Long, the total binding cost would be ($2.00 + $1.00) = $3.00.
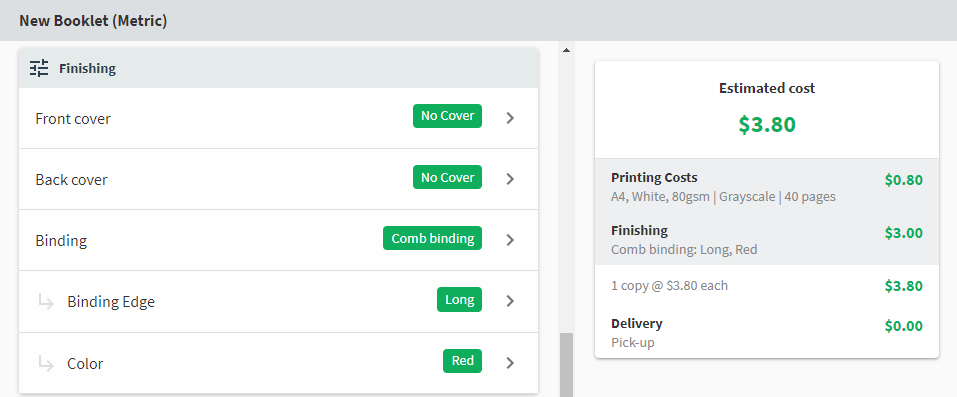
The new order form, showing that selecting Comb binding, with a Binding Edge of Long would cost $3.00.
You can also perform more complex calculations, such as charging a different amount for binding depending on the number of pages to be bound, for example $2.00 for binding up to 50 pages and $3.00 for binding more than 50 pages. This is done through the powerful cost script engine. For more information, see Step 3: Create or change a cost script.
Allocate a cost to delivery options
If you have not already allocated costs to your delivery options:
-
In explorer, navigate to the following folder:
<job-ticketing-install-path>/job-ticketing/config/rooms/room<number> -
In a text editor that supports syntax highlighting and JSON parsing (for example, ATOM), open:
delivery-options.json -
Configure the cost attribute for each option as required.
-
Save the file.
You have now added costs to your products and delivery options and are ready to create some costs scripts.
Next Step: Step 2: (optional) Set up draft products for testing
Comments