
Job Ticketing allows you to define your own print job workflow to support an existing order processing flow. The Workflow determines the stages (or status) through which jobs will progress.
Typically, you would define a status for each point in the process where work is waiting for another person. For example, you might have a status for jobs that are queued to print, and another status for jobs that are currently printing so that other operators in your print room do not print the same order. Or, you might want to stick with the default workflow, but change the name of some of the statuses to match your print room terminology. For example, you might want to change “Ready for delivery” to “Ready for pick up” if you do not offer deliveries.
The Workflow statuses are defined in a JSON configuration file.
- For more information about JSON, see: Using JSON.
- For examples of customized Workflows, see: Example customized Workflows.
Workflow attributes
[
  { "name": "New",
    "type": "New",
    "charging": false
  },
  {
    "name": "Waiting on response",
    "type": "InProgress",
    "charging": false
  },
  {
    "name": "Ready for printing",
    "type": "InProgress",
    "charging": true
  },
  {
    "name": "Printing",
    "type": "InProgress",
    "charging": true
  },
  {
    "name": "Ready for delivery",
    "type": "InProgress",
    "charging": true
  },
  {
    "name": "Completed",
    "type": "Completed",
    "charging": true
  },
  {
    "name": "Canceled",
    "type": "Completed",
    "charging": false
  }
]
Each status is defined by the following attributes:
| Attribute | Description |
|---|---|
| name | The name of the status as it is displayed in the Job Ticketing interface. Valid format: Text string |
| type | The type of status. The status type can be used to differentiate between how orders in a particular status type are treated. This is not visible in the Job Ticketing interface. Valid values are: New - Orders in this status type are considered unprocessed. You need at least one New status type in your Workflow. When an order is submitted, it automatically goes into the first New status that is defined. InProgress - Orders in this status type are currently being processed. Use of this status type is optional. Completed - Statuses with a Completed type will display only the last 20 orders. You need at least one Completed status type in your Workflow. |
| charging | Indicates whether or not a cost must be recorded in the order before being moved to this status. Valid values are: true - a cost must be entered by the operator. If an order is moved to a status that requires charging and there is currently no cost recorded in the order, a dialog is displayed prompting the operator to enter a cost. If a job is moved to a status that requires charging, and a cost has been entered in a previous stage, the Charging dialog is not displayed as it is already recorded in the order. false—a cost does not need to be entered for this status. |
Configuring the Workflow
-
In a text editor that supports syntax highlighting and JSON parsing (for example, ATOM), open the following file:
<Job Ticketing install path>/job-ticketing/config/rooms/room-01/workflow.json -
Modify the Workflow attributes as required. If you want additional statuses, copy an existing status object and change the values as needed.
-
Save the file.
-
Validate the Job Ticketing configuration:
-
In the Operator interface, in the bottom left corner of the screen, click Settings.
-
Click the General tab.
-
In the Room configuration area, click Refresh, and the configuration file will be validated.
-
If you have any errors, fix them; then click Refresh to check the files again.
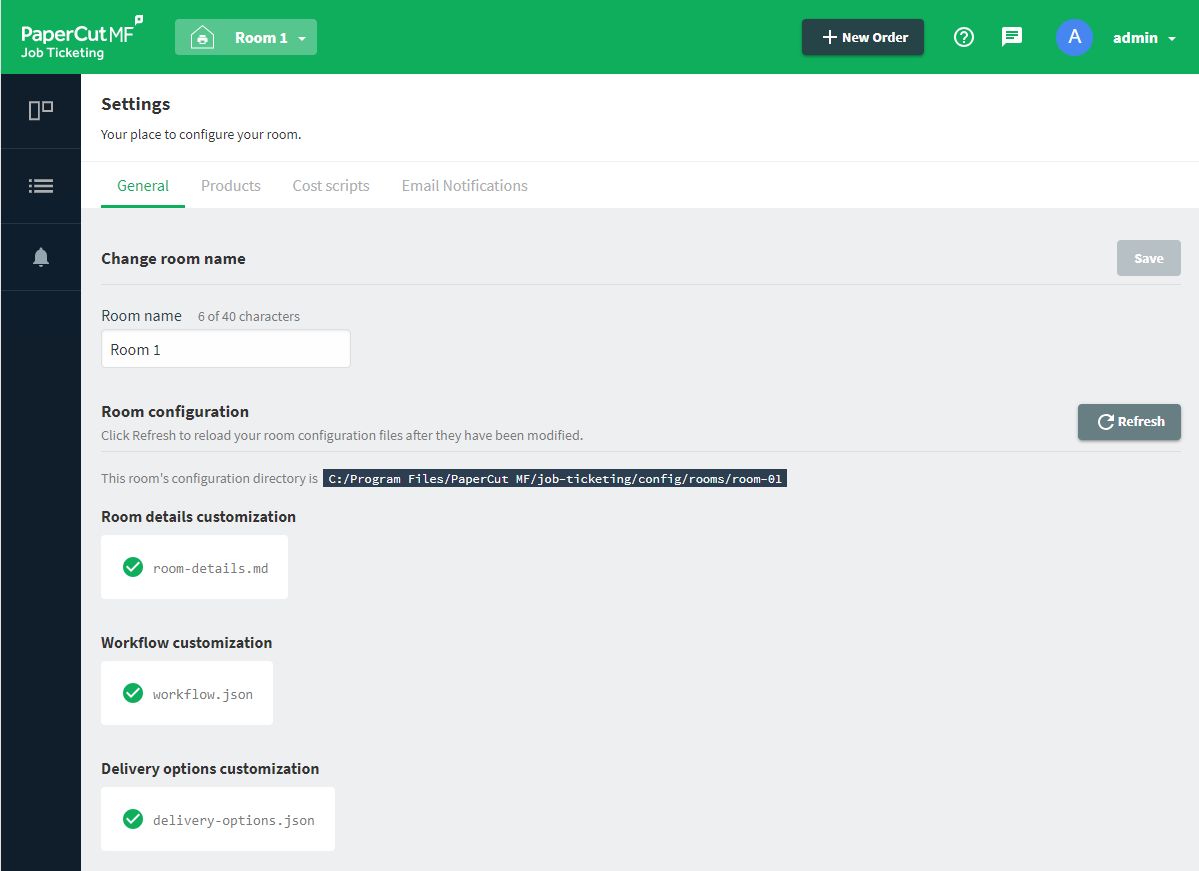
A print room showing validated print room configuration.
-
-
Check that the Workflow is correctly displayed in the Operator interface:
- Log in to the Job Ticketing Operator interface.
- Check that all of the Workflow statuses are displayed.
Next Step: Configure email notifications
Comments