
Clients can print only after they’ve discovered the available printers’ names, IP addresses, and supported features. The way clients discover these details depends on how the environment is set up to publish the printer details, as well as the client’s operating system.
So before you set up Mobility Print, you need to work out the best printer discovery method for your organization:
Choosing a discovery method
- If you have a super simple setup, with only one subnet and one Mobility Print server, then using mDNS discovery is probably the best option for you. Take a look at mDNS discovery for more information. Why? mDNS ‘just works’ on simple one-subnet networks. It’s the simplest method to use to test out Mobility Print too.
- If you have more than one subnet, or if you need more than one Mobility Print server (you’ll need a Mobility Print server on any print server where there are print queues you want to advertise) then you’re looking at the DNS discovery or Discovery with a known host options. How do you decide between them? It boils down to how friendly your DNS administrator is. If you have a DNS setup that you can configure easily then head down that route. If you don’t know what DNS is, or if you know that your DNS admin is way to busy right now, try out the Known Host option. The only downside with Discovery with a known host is this method is suitable for managed Chromebooks, but not BYOD Chromebooks.
TL;DR - find out more about mDNS discovery for super simple networks with 1 subnet and 1 Mobility Print server. Otherwise, check out Discovery with a known host - unless you’re needing BYOD Chromebook support - in which case DNS discovery may be more suitable.
mDNS discovery
mDNS is a local subnet protocol also known as Bonjour, zero-conf, or RFC 6762 to its friends. It’s the same protocol that iTunes uses to find your iPhone or your Apple TV.
This is the easiest option to get Mobility Print up and running, whether that’s to deploy immediately to your users or to try out Mobility Print for the first time.
By default, mDNS broadcasting occurs across only one subnet. Although it is possible to extend mDNS across subnets using mDNS ‘reflectors’ or ‘bonjour gateways’ and other methods, we recommend that for these multi-subnet environments you use one of the other Mobility Print discovery options (Configure printer discovery using DNS or Configure printer discovery with a known host).
mDNS is an open standard and uses UDP broadcasting. Shared printer information is broadcast and encoded into the mDNS packets.
Best for
- Small offices or businesses
- Small networks — primarily those with a single subnet
- Networks with one subnet per location
- Environments where a local DNS server does not exist
- Suitable for Type C class networks
- Networks that have low packet loss
Pros
- It’s on by default
- It supports BYOD ChromeOS devices
- It doesn’t require any additional setup steps for iOS and macOS clients
Cons
- May not be reliable on networks with high packet loss
- Not a good choice for large networks with multiple subnets
- Publishing many printers may result in discovery issues, depending on network configuration
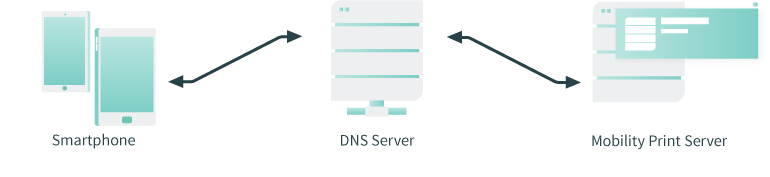
DNS discovery
DNS discovery, also known as ‘hierarchical decentralized naming system for computers and services’, is an alternative to mDNS. In short, the published printers are encoded in DNS records.
DNS uses an existing DNS infrastructure to transmit printer information. The information is broadcast and encoded with the DNS-SD standard.
The Mobility Print server has a mini embedded DNS server. You need to configure your local DNS server to forward printer discovery requests to the Mobility Print server’s embedded DNS.
DNS discovery connections
Forwarding is achieved using a method called ‘subzones’ or ‘delegated subzones’. This is an elegant solution because when you add or remove new printers, no local DNS configuration is required. It’s all automatic and delegated to the Mobility Print server.
Best for
- Medium to larger organizations (for example, universities or corporate offices)
- Where a local DNS server exists
- Where there are multiple print servers
- Networks with multiple subnets per location
- Networks that have high packet loss (and of course it also works well in low packet loss environments)
Pros
- It’s robust and works reliably on networks of all sizes
- Compared to printer discovery using a known host, this option makes print queues just appear for BYOD iOS and macOS users; no need to install a Configuration Profile or run the setup .dmg
Cons
- More complex to set up for the SysAdmin (probably you as you’ve got this far in this guide)
- You might need to make friends with your DNS admin!
Discovery with a known host
Use this method of printer discovery in environments with multiple subnets that don’t have a DNS server, or in environments with complex firewalls that might make it too hard for you to get Mobility Print up and running.
Printer discovery with a known host is easy to set up and works equally well in both simple and complex environments.
Best for
Environments that have:
- no BIND or Windows internal DNS server
- a DNS server that is not configurable
- complex firewalls in place that might be blocking the necessary DNS traffic
- one print server
- multiple subnets—with or without a DNS server
Pros
- Supports any network, no matter whether a DNS server is available or not
- Less firewall rules required
- Easier to set up in multi-subnet environments than DNS
Cons
- BYOD iOS/macOS devices require an additional step to set up print queues
- For now, users can only reach a single Mobility Print server at a time, except for Chromebooks, which supports multiple Mobility Print servers
- Works well for managed Chromebooks (via G Suite), but is not suited for BYOD Chromebooks
Want to know more about how printer discovery works with a known host for each type of client?
Printer discovery with a know host uses different printer discovery mechanisms for each platform.
macOS and Windows
Users click the client setup link sent to them by the System Administrator. A setup page is displayed where the end user downloads the Mobility Print installer containing the address of the Mobility Print Server.
During the installation the client reaches out to the Mobility Print server address for the list of print queues and to authenticate the user.
Chromebooks
For managed Chromebooks, the Mobility Print server address (or addresses for multiple Mobility Print servers) are loaded into G Suite via a configuration file. The Mobility Print app reaches out to the Mobility Print server for the list of print queues and authentication.
There are no setup steps for the users—they simply print to a printer with a green P next to it (a Mobility Print printer}.
iOS (iPhone / iPad)
Users download the Mobility Print profile via the client setup link sent to them by the System Administrator. A setup page is displayed with a Download button, which they click to download the Mobility Print profile. They then open the iOS Settings and install the profile.
For managed iOS devices, use your favorite Mobile Device Management (MDM) tool to push the Configuration Profile to devices. There are no setup steps for the users to install the profile—they simply print to a printer with a green P next to it (a Mobility Print printer}.
Android
Users download the Mobility Print Android app via the client setup link sent to them by the System Administrator. A setup page is displayed with an Install or update button that includes a deep link to the Mobility Print app in the Android App store. The deep link contains the Mobility Print server address, and the app reaches out to this address to get a list of print queues and to authenticate the user.
Comments