
Web Cashier is not enabled by default and must first be set up by the PaperCut NG/MF administrator. To set up Web Cashier:
-
Click the Options tab. The General page is displayed.
-
In the Web Cashier area, click Enable and set up Web Cashier.
-
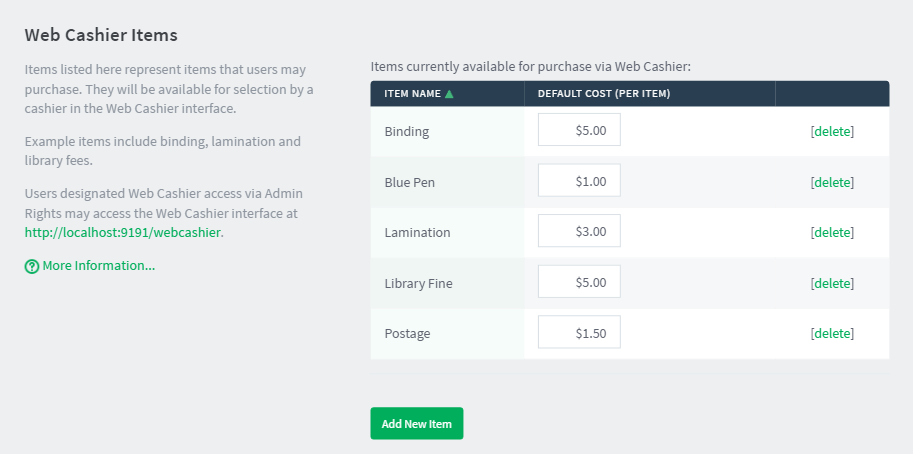
To set up Web Cashier to sell ad-hoc services or products (items)you should first define them. To add an item:
-
In the Web Cashier Items area, click Add New Item.
-
In Item Name, enter a name or description for the item.
-
In Default Cost (per item), enter a default cost.
-
Click Add Item.
-
-
Optionally customize the text displayed on the Purchase and Deposit screens or header of acknowledgment slips. Examples are provided. For more configuration details see Customize the Web Cashier interface text.
-
Access Web Cashier using the URL
http://[server-name]:9191/webcashier.This is the URL you provide to your Web Cashier users later (e.g. Office/Admin/Service-desk staff). -
Perform some test transactions and ensure Web Cashier is set up to your requirements.
-
Grant Web Cashier user privileges to the users who require access (i.e. teacher, office staff, librarian, etc.). To read more about assigning Web Cashier access to users or groups see Assign Web Cashier admin permissions
Comments