
This topic explains the steps to create print scripts. To learn more about what print scripts are all about, take a look at Print scripting / advanced scripting overview.
Enabling Print Scripting
You need to enable the feature for scripts to run.
-
In any operating system, open the
[app-path]\server\security.propertiesfile.Windows
a. In the Start menu, right-click Notepad and select Run as administrator.
b. From the File menu select Open.
c. Browse to and open the
security.propertiesfile.macOS/Linux
We recommend using
sudoorsuto open the file in your favorite editor as root. -
Find the
security.print-and-device.script.enabled=Nkey and set it toY. -
Save the
security.propertiesfile.
Create a print script
Before you start, make sure that Print Scripting is enabled.
-
In the Web admin interface, click Printers > [printer name] > Scripting. The Advanced Scripting page is displayed.
-
Create your script in one of the following ways:
- Importing a predefined recipe
- Using snippets to add functionality
- Combining print scripts
- Use common print scripts
- Create a print script from scratch
-
Click the Enable print script checkbox.
-
Click Apply.
-
Test your script to make sure it works as you expect.
-
Copy the script to your production printers.
-
On the Advanced Scripting tab, click Apply. Your script is immediately made live.
Importing a predefined recipe
Recipes demonstrate best practices. Consider them a starting point for developing your own scripts.
To use a recipe:
-
On the Advanced Scripting page, click Import Recipe.
A list of the predefined recipes is displayed. For example, the Print Policy Enforcement (warnings & automatic conversion) recipe, which:- discourages single-sided printing
- discourages printing of emails in color
- discourages printing of web pages in color
- discourages printing of emails that have more than one page

-
Click Import next to the recipe you want to use. A confirmation prompt is displayed.
-
Click OK. The recipe replaces what is currently in your script.
-
Click Apply.
Using snippets to add functionality
Code snippets are small code fragments that demonstrate how to use the scripting API (inputs, functions, and methods). Consider using snippets to add functionality to your script.
To use a snippet:
-
While editing a script in the script editor window, place your cursor where you want to insert the snippet.
-
Click Insert Snippet at Cursor.
A list of code snippets is displayed. For example, the Test if job is color snippet provides the code to check if a print job is being printed in color. This could be used as part of a script to perform an action on all color print jobs.
-
Click insert next to the snippet you want to use. A confirmation prompt is displayed.
-
Click OK. The snippet is added to your script.
-
If required, you can modify the code to suit your needs.
-
Click Apply.
Combining print scripts
If you have an understanding of JavaScript, you can combine parts of two or more print scripts.
A typical print script contains one printJobHook() function.function printJobHook(inputs, actions) {....some JavaScript code ...}
PaperCut MF calls printJobHook once per print job. If you want to have two recipes called for a job, then you must call them both from one printJobHook() function.
A simple way to call recipe 2 after recipe 1 is:
-
Copy the first recipe into your script and rename its
printJobHooktoprintJobHook1. -
Copy the second recipe into your script and rename its
printJobHooktoprintJobHook2. -
Below the two renamed recipes (at the very end of the script text) add a
printJobHookfunction that callsprintJobHook1thenprintJobHook2:function printJobHook(inputs, actions) {printJobHook1(inputs, actions);printJobHook2(inputs, actions);}
Troubleshooting a combined script
If your combined script does not work on your printer:
-
Check that recipe 1 alone works on your printer. You can do this by saving the combined script in a text editor and re-importing recipe 1.
-
Check that recipe 2 alone works on your printer. You can do this by saving the combined script in a text editor and re-importing recipe 2.
-
Confirm that it makes sense to call recipe 2 after recipe 1.
-
If the combined script still doesn’t work, there might be some JavaScript knowledge required. You should discuss your script with someone who knows more about JavaScript.
Using common print scripts
Large organizations with advanced print scripting requirements might need to share common code between different print scripts. Use advanced scripting techniques to build these common libraries.
Writing a common script involves creating a single JavaScript file on your PaperCut MF Application Server with all of the functions you want to reuse. These functions are created much like they would in the Scripting window for a single printer.
To create a common print script file:
-
In a text editor (such as Notepad++) create a new file.
-
Save the file as
print-script-common.jsin the following folder:[PaperCut MF install path]/server/custom -
Create the script on a test printer, testing all variables of the script to ensure it works as intended.
-
Once your script is working and you are happy with how it’s running, add it to the
print-script-common.jsfile. -
Call this function in the print script by adding a line below the main function that calls the function in the
print-script-common.js. In the example below, the function inprint-script-common.jsis calledDuplexAndGrayScale.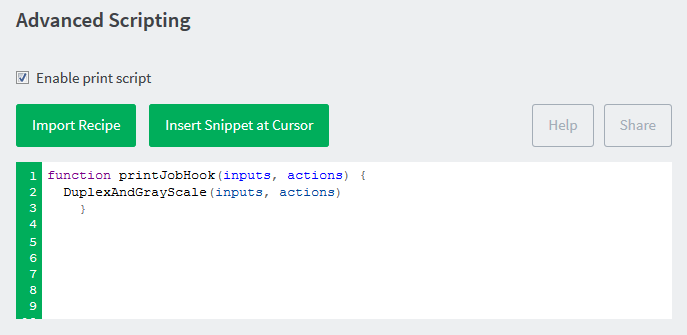
-
Test that your print script works before deploying to a live printer.
Comments