
-
Nominate a system to host the printers and the PaperCut NG/MF server software.
-
On the nominated host system, ensure that the
Guestaccount is disabled.- Select Start > Control Panel > Administrative Tools > Computer Management > Local Users and Groups > Users.
The Local Users screen is displayed. - Right-click the
Guestuser; then select Properties. - On the General tab, select Account is disabled.
- Click OK.
- Select Start > Control Panel > Administrative Tools > Computer Management > Local Users and Groups > Users.
-
This should also be performed for any system running a Release Station.
-
On the nominated system, set up user accounts for all users.
-
Install the PaperCut NG/MF server software and complete the configuration wizard.
-
Print from another workstation. The job should list in PaperCut NG/MF under the user “guest”.
-
Click the Users tab.
The User List page is displayed.
-
In the Actions menu, click Bulk user actions.
The Bulk User Operations page is displayed.
-
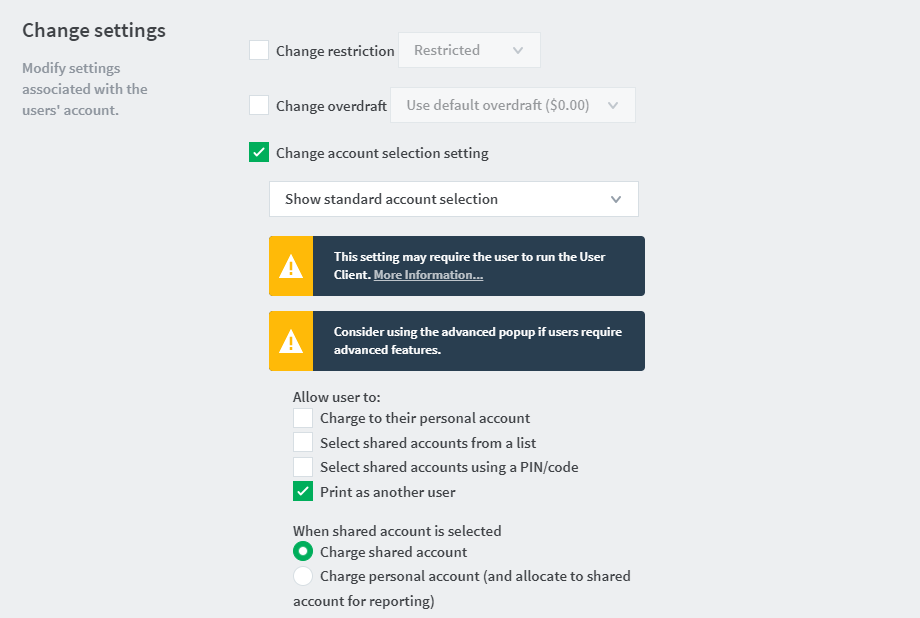
In the Change settings area:
-
Select the Change account selection setting check box.
-
Select Show standard account selection.
-
Clear the Allow user to charge to their personal account check box.
-
Select the Allow user to perform printing as another user check box.
-
-
Install the client software on each workstation. See User Client.
-
When the user prints to the shared printer, a popup now asks the user to enter a username and password.
Option 2: Authenticating via popup
This page applies to:
Last updated September 30, 2025
Comments