
Enabling and configuring multiple personal accounts is quite simple. However, before enabling this feature it is recommended that you read this section and understand the concepts involved.
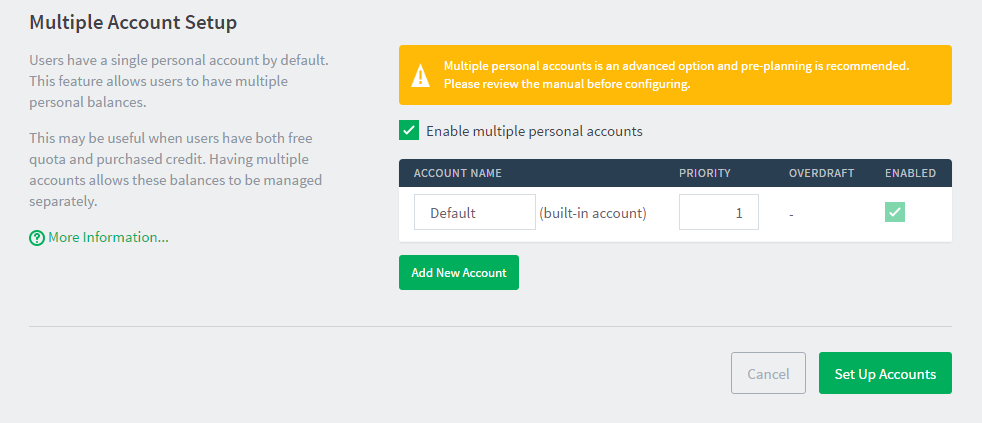
Enable multiple personal accounts
To enable multiple personal accounts:
-
Select Options > Advanced. The Advanced page is displayed.
-
In the Multiple Personal Accounts area, click the Go to multiple personal account setup link.
-
Enable the Enable multiple personal accounts option.
-
The built-in default account is where initial credit is assigned and quota allocated.
-
Click Add Account to add a new account. A new account is added to the list with a blank description, and default options for priority and overdraft.
-
Enter a descriptive name for the account. You can change this at any time.
-
Edit the account priority to change the order in which the account balances are used. Accounts at the top of the list (i.e. the lowest priority number) are used first. You can change the priority at any time. For more information on priorities see How account priorities work.
-
(Optional) Edit the overdraft value. This allows this account to go into negative. e.g. If the overdraft is set to $5.00, then the account is allowed to go to $5.00 into negative.
-
Repeat these steps adding accounts as necessary. Take care to add only the accounts you require (See Why can’t I delete accounts?).
-
When the accounts are configured as required, click the Set Up Accounts. This starts the process of creating the new accounts for all of your users.
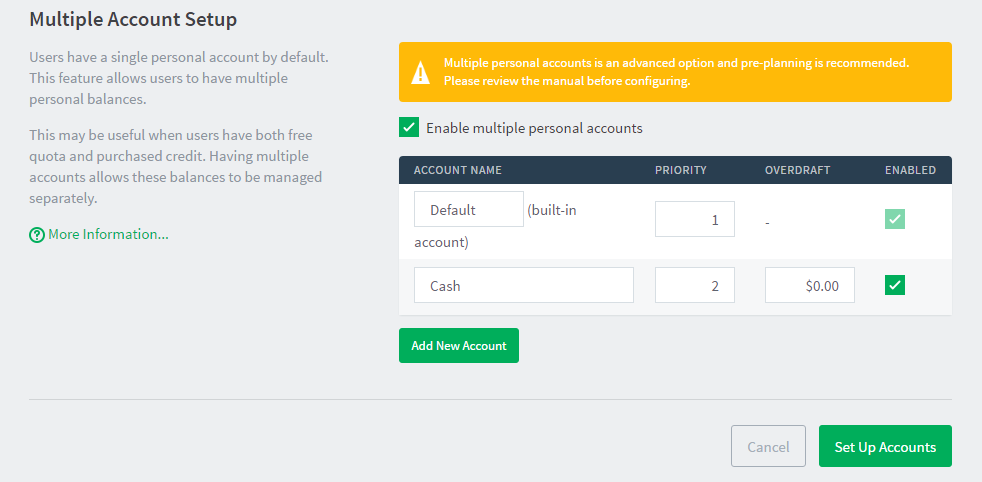
How account priorities work
When a user has multiple accounts it’s important to have a well-defined order for how the balances are used. If one account is used for cash and the other for quotas, the quota credit should be used first before cash. The account priority defines this order. This is best explained with some examples.
The account priorities are configured with the “Default” account first and the “Cash” account second (as shown in the screenshot below).
-
Example 1:
If a user has $1.00 in each of the “Default” and “Cash” accounts, and a $0.25 job is printed the cost of the job is deducted from the “Default” account, leaving a balance of $0.75. -
Example 2:
If a user has $1.00 in each of the “Default” and “Cash” accounts, and a $1.30 job is printed the cost of the job split between both accounts. First, the $1.00 available in the “Default” account is used, then the remaining $0.30 is deducted from the “Cash” account. The user is then left with $0.00 in the “Default” account and $0.70 in the “Cash” account.
Whenever a print job is refunded, the credit is refunded to the accounts in the reverse order.
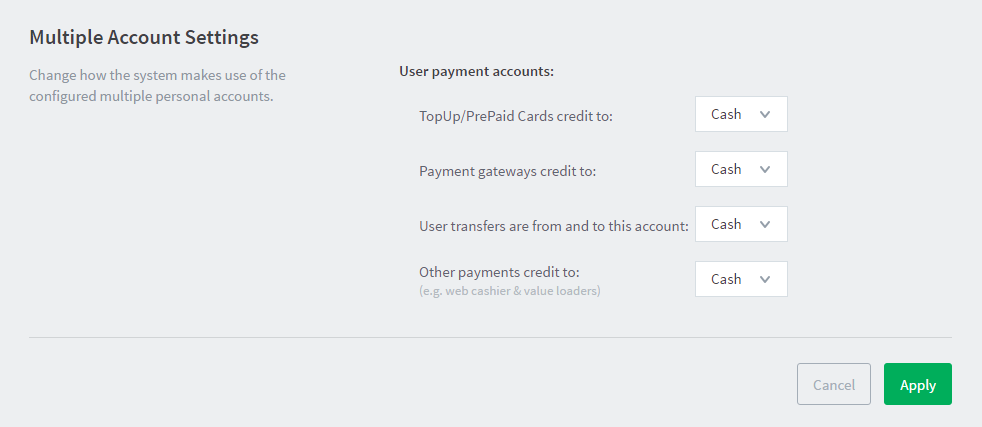
Configure payment accounts
When a user has multiple personal accounts, you can configure user payments to credit different accounts for different payment sources:
-
Payment gateways (such as PayPal or Authorize.Net),
-
User transfers
-
Other payments, including web cashier, value loaders, etc.
To configure the “Cash/Payment” account:
-
Select Options > Advanced. The Advanced page is displayed.
-
In the Multiple Personal Accounts area, click the Go to multiple personal account setup link.
-
In the Multiple Account Settings area, select the accounts you want to use for each of the payment types using the User payment accounts.
-
Click Apply.
Why can’t I delete accounts?
Once an account is configured and created it cannot be deleted. Once an account is created it can be used immediately by users for their printing activity. If you could delete an account, you would also need to delete any transaction associated with that account, resulting in a confusing transaction history for the user.
Although you cannot delete an account, you can disabled an account. Disabling the account means that it is no longer available to the user, nor displayed in their account details. From the perspective of the user the account no longer exists, and any associated balance is also no longer available. If the account is later re-enabled any previous balances are made available to the user again.
Other options
By default the User web interface displays just the total of all of the user accounts. To display an itemized list of each of the account balances:
-
Click the Options tab. The General page is displayed.
-
In the User Features area, select the Itemize multiple personal accounts check box.
-
Click Apply.
To change the available personal accounts or the order that they are used, use the Advanced Printer Scripting feature. For more information, see Example 2: Department/faculty quotas (advanced).
Comments