
Keeping Print Deploy up to date ensures your printing environment stays secure and running smoothly. This guide walks you through enabling or disabling automatic updates for both servers and clients, as well as how to trigger a manual update via the command line.
Enable or disable auto-updates on the server
Print Deploy updates are progressively rolled out to environments with auto-updates enabled over the course of about two weeks. You can enable or disable auto-updates at any time. Auto-updates are automatically disabled if there are no printers imported and no additional zones created.
To enable auto-updates:
- Clone your first print queue. To learn more, see How Print Deploy works - the basics
Or
-
Click Enable Printing to go to the Print Deploy page.
-
Click the Settings tab.
-
Click Configure auto-updates. A popup is displayed.
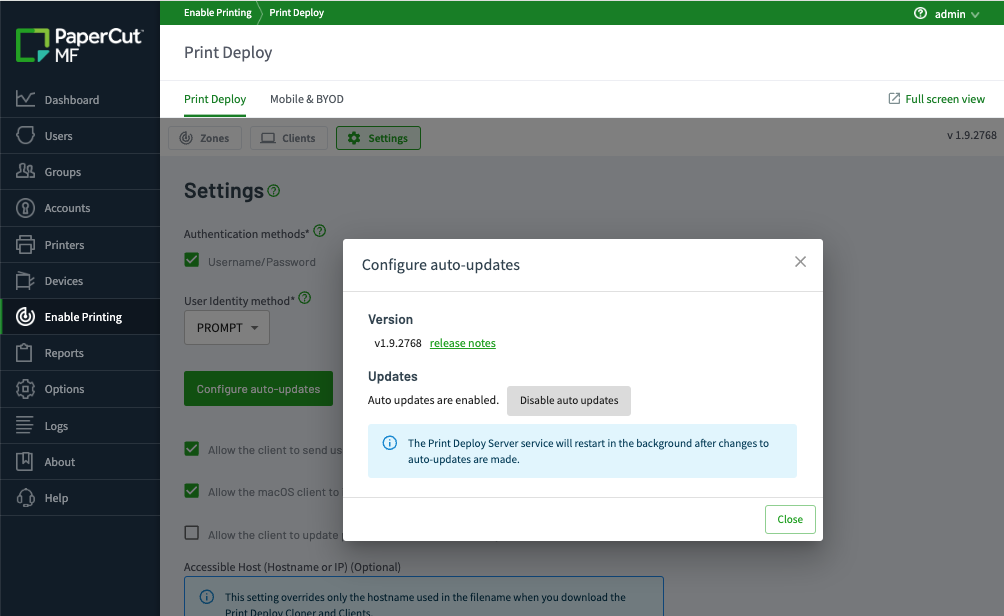
Configure auto-updates popup
The update downloads in the background. The time taken varies based on internet speeds. The service will then update and restart.
-
Click Close.
Enable or disable auto-updates on the clients
By default, Print Deploy clients automatically update to the latest version compatible with your Print Deploy server version.
To switch off auto-updates on clients:
- Open
[PaperCut Print Deploy Client app directory]/data/config/client.conf.toml. - At the top of the toml file, in the general section, add a new key
ClientUpgradesEnabled: false. - Restart the Print Deploy server.
Manually update the Print Deploy server to the latest version
To update immediately, we recommend you Enable auto-updates on the server.
For environments where auto-updates are not desired, but the latest release is needed, you can trigger the auto-update as follows:
-
On the Application Server, run the terminal or command prompt with administrative privileges and navigate to
<PaperCut MF/NG install directory>/providers/print-deploy/<os>/.This directory contains an executable binary called pc-updater.
-
Run the following command:
-
Windows - in an elevated command prompt window, run: ** **
pc-updater.exe https://update.cloud.papercut.com/check-update/pc-print-deploy-server-win/latest -
macOS - Run this command as the user
papercut:./pc-updater https://update.cloud.papercut.com/check-update/pc-print-deploy-server-macos/latest -
Linux - ** ** Run this command below as the user
papercut:./pc-updater https://update.cloud.papercut.com/check-update/pc-print-deploy-server-linux-gnu/latest
-
-
Your server is updated to the latest version. The clients may take another 24-48 hours after the server has updated, depending on their connectivity to the Print Deploy server.
-
If you want to find out what the latest version is, go to the Print Deploy release notes page.
Comments