
Setting up
The video below summarizes how to set up Cloud Print on Windows. This will enable you to print from anywhere over the internet. The detailed steps are below.
After you’ve created an invite link, as described in Step 1: Configure Cloud Print in the Mobility Print server, send the link to your users. Now your users have this link, all they have to do is click it and follow the steps below. We recommend you also follow these steps on your Windows computer to familiarize yourself with the user’s process.
-
On your Windows computer, click the URL. The following setup page is displayed.
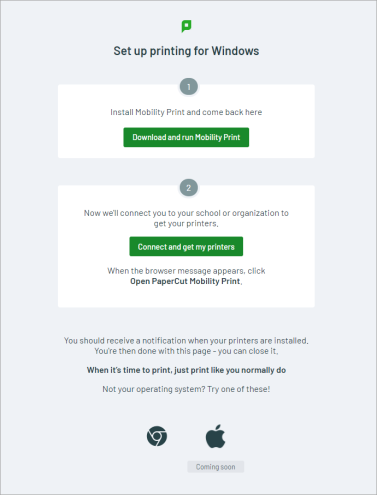
Setting up printing through Mobility Print on Windows
-
Click Download and run Mobility Print. The Mobility Print installer is downloaded.
-
Run the Mobility Print client installer and follow the prompts.
-
After installing the Mobility Print client, return to the setup page, where you’ll see a popup asking you to open the PaperCut Mobility Print client. If you don’t see the popup, click Open PaperCut Mobility Print Client.
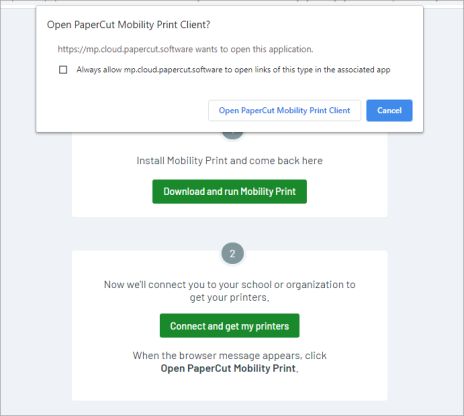
Launching the Mobility Print client
The setup page passes the necessary secret information to your Mobility Print client, which immediately establishes a secure peer-to-peer connection with the your Mobility Print server to fetch and install the printers.
When it’s done, you’ll see a notification popup at the bottom of the page.
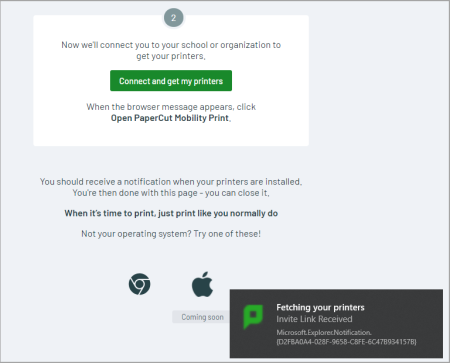
Toast notification showing the progress of printer fetching!

Toast notification showing that the printers have been successfully installed!
What’s next?
Print.
Ctrl + P
Seriously, that’s it.
After you select the Mobility Print printer you want to print from, you’ll be asked to enter your printing username and password. Then your print job will be sent and that’s it!
Troubleshooting and feedback
If you have an issue or want to provide feedback, the best thing to do is send us the logs so we can get to understand the problem or behavior.
You can always contact the Mobility Print team with any questions or concerns via PaperCut Support.
Please consider grabbing both of these logs when testing.
-
The new Windows client logs is here:
C:\Program Files\PaperCut Mobility Print Client\data\logs -
The list of invite links and printers the client has available for your users is here:
C:\Users\<username>\AppData\Local\PaperCutMobilityPrintClient
Comments