
Great news: PaperCut Pocket and Hive do the heavy lifting to discover USB and networked printers in your organization.
Read on to find out how PaperCut Pocket and Hive find your printers, help organize them, and publish them seamlessly to your users.
The printer discovery process in a nutshell
The printer discovery process is part of the edge node component. It starts automatically when a sysadmin installs PaperCut Hive or Pocket for the first time.
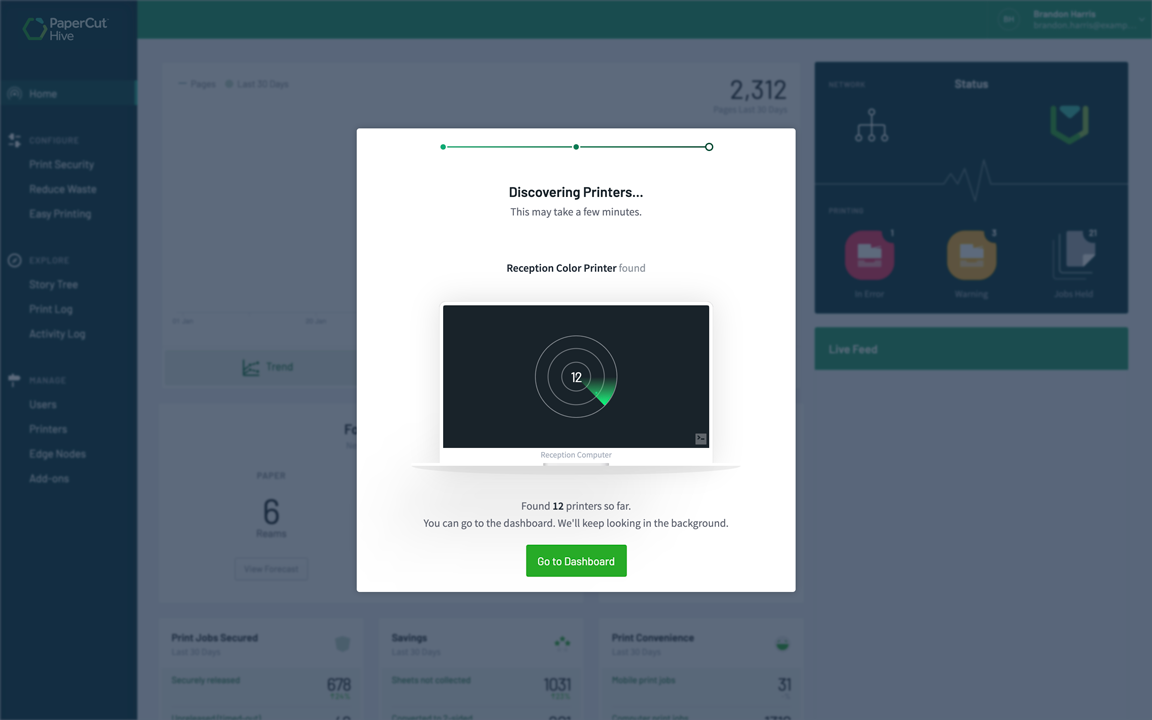
Discovering local or network printers when running the PaperCut Hive and Pocket discovery tool as an administrator for the first time.
Here’s a summary of the printer discovery process:
- Scan - The scanner finds things that look like printers on the network or on locally connected printers on your computer.
- Probe - The probe follows behind the scanner and when something’s found, checks what kind of printer it is, as well as what it’s capable of (for example, does it have a duplexing unit?).
- Validate - Details from the probe are checked and printers are further interrogated and verified.
- Report - Details about the newly found and verified printer are sent to the cloud.
In the cloud, the printer details are stored in the Printer Registry. This is the ‘printer database in the sky’. It keeps track of which printers are associated with a specific organization, as well as all the capabilities and properties of the printers.
Scan - Are there any printers out there?
The scanner’s primary responsibility is to identify sources that look like printers on the computer (Windows or macOS queues) - or somewhere on the network. There are two types of scanning: local queue scanning and network scanning.
Local queue scanning
The local queue scanner talks to CUPS (on macOS or Linux) or the Print Spooler (on Windows) to get information about locally configured print queues. The local queue scanner also moonlights as the ‘probe’ for local queue information.
Network scanning
The network scanner starts by picking up clues from local print queues to prioritize which network addresses to scan. It then scans the network for devices that look like printers. When it finds something, it uses SNMP queries to check that the device found is actually a printer, and if so, what type of printer.
Probe - What printer details are available?
The probe uses SNMP and IPP to collect as much data as possible about the printer candidates that the scanner found. The probe isn’t too picky or judgemental about what it finds - all it’s doing is gathering as much information as possible to hand over to the validator.
Validate - Is it definitely a printer?
The validator uses SNMP or IPP requests to further validate the previous findings, and to gather capabilities of the printer. Can it do 2-sided prints? Is it out of toner?
For network printers, the validator needs to be able to retrieve at least an IP address, MAC address, and make or model of the printer before it can say ‘yes this is a printer’. If it’s definitely a printer, it reports it to the cloud.
For locally configured queues on the edge node, the validator looks for the ConnectionURI (the connection string) in the local queue configuration (for example, CUPS).
Report - Tell the cloud about the printers
The reporter sends the printer candidate (and all the additional SNMP or IPP data found) to the printer registry in the cloud. It’s worth repeating here that everything sent to the cloud - no matter how ‘innocent’ - is encrypted and sent over secure protocols. In this case, HTTPS.
Printer Registry - Making sense of all the printer data
The Printer Registry receives the printer candidate requests and starts putting together a ‘definition’ for each of the printers. This definition includes the printer’s:
- location (including the IP address for network printers, or which machine it’s connected to for a locally-attached printer)
- make and model
- capabilities.
From this information, it starts to build a big picture of the printer landscape.
It also creates a coordinator map, detailing which edge nodes have access to which printers. This is especially important for local printers (for example USB printers) - you can’t print to a USB printer unless you’re sending the job from the computer it’s plugged into! However, it’s also important for network printers - organizations might have VLANs and other networking obstacles in place, which means that some printers are only accessible from certain computers.
If the Print Registry doesn’t have enough information about a printer to build a genuine printer definition, it filters that printer out. It also applies filtering to printers that shouldn’t be registered, like PDF queues (Virtual printers), fax queues, test printers, PaperCut MF monitored print queues, and PaperCut Mobility Print URIs.
Deduplication/printer matching
The printer matching algorithm finds matches for already-known printers. It looks at qualities such as IP addresses, ConnectionURIs, MAC addresses, hostnames, and serial numbers. If there are enough details to consider the printer is a match, the printer will automatically get updated with any new incoming information.
For example, you’ve moved the printer’s IP address to a different location in your office. The printer will match against its MAC address, ConnectionURI & serial number. However, we detect that it has a new IP address. The IP address will get updated accordingly.
Printer registration
If the Printer Registry doesn’t find a match, it registers the device as a new printer. It chooses a new name for the device based on the metadata it received.
Ongoing printer discovery
For the first 24 hours after signing up, all your printers are found and published automatically.
After all printers are discovered for the first time, the edge node continues to scan and look for new printers. You can turn scanning off if you like in Easy Print & Scan > Auto Printer Discovery.
When it discovers a new printer, it adds it to the Newly Discovered printers list.
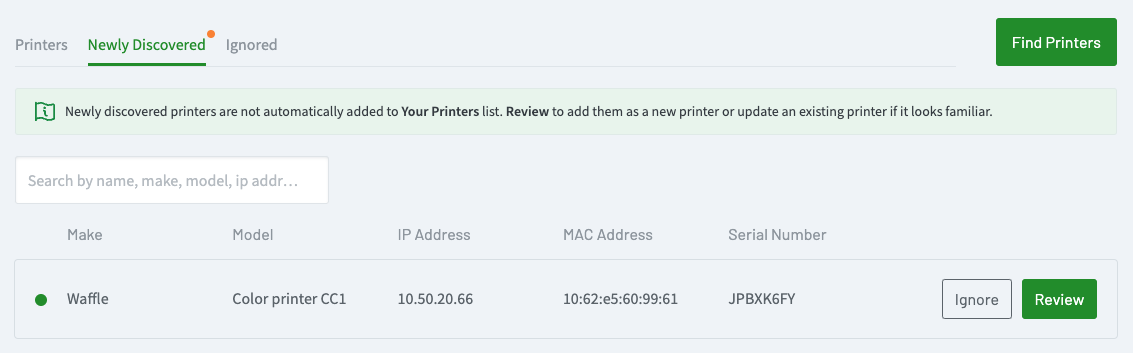
A new printer in the **Newly Discovered** list
There are three options for what to do with the newly discovered printer:
- Review it and add it to the Printers list.
- Review it and update an existing printer with the new information.
- Add it to the Ignored list.
The options are described below. For steps on how to do each option, go to Managing (adding, removing, publishing, unpublishing) printers.
Add a printer to the Printer list
Do this when, for example, you know that you’ve just received the new printer in the office and you need all of your users to be able to print to it.
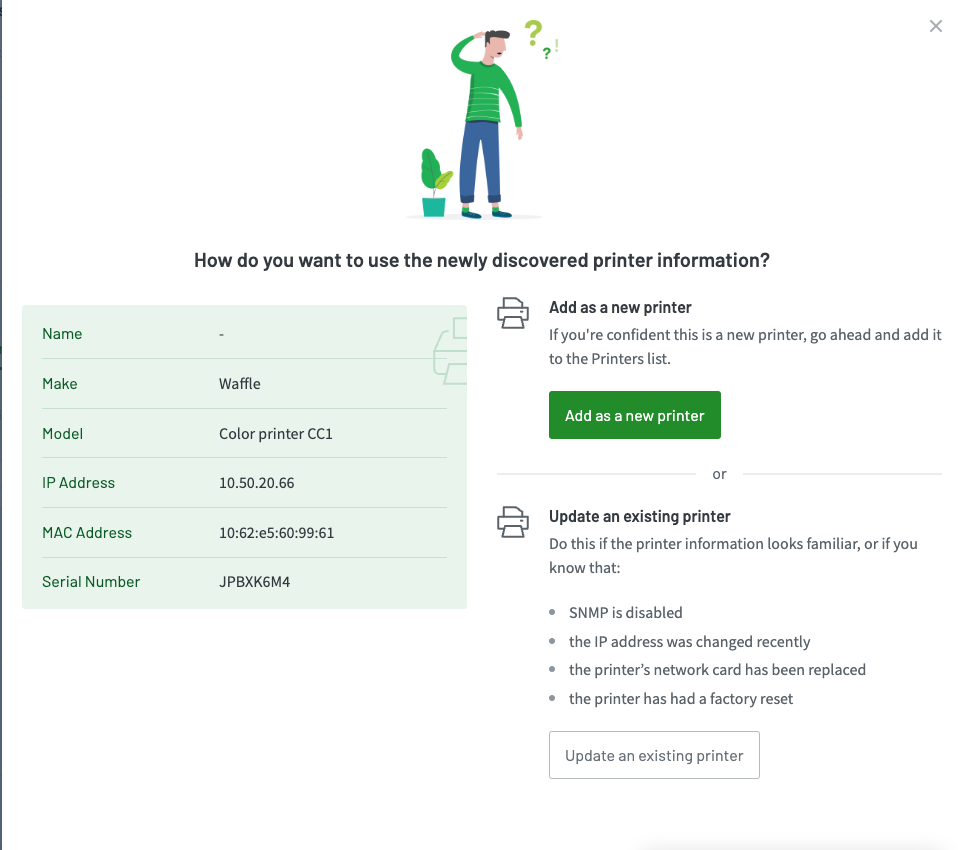
The newly found printer's details are displayed for you to review before you add the printer.
Update an existing printer
Sometimes printers send incomplete information. If you think the printer looks familiar to an existing printer, you can choose to update the existing printer, essentially merging the existing printer to the new printer. The new printer will inherit all of its existing printers setup such as:
- printer labels
- printer apps
- PrinterId (used for troubleshooting)
- print queues on edge nodes (make sure your queues on compatible!).
Ignore a printer
This adds the printer to the Ignored list. It won’t be monitored anymore and no jobs (print, copy, fax, or scan) will be tracked. You can always move it back to the Printers list if need be.
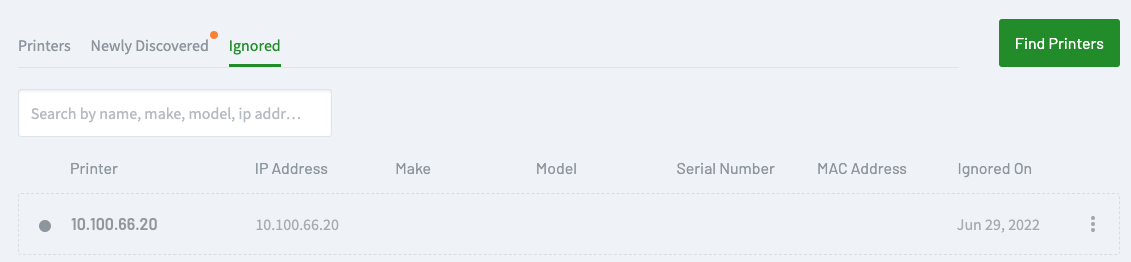
A printer that has been sent to the **Ignored** list
Printer discovery frequently asked questions (FAQs)
Do all the users have to run the discovery tool?
No! As an administrator, when you first set up PaperCut Pocket or Hive, you’ll run through the discovery process because at that point it doesn’t know anything about the printers on your network. When users join your organization and install the client, the edge node is also installed and it will unobtrusively look for new or updated printers in the background. No interaction or waiting needed.
How often does the discovery process happen after the first install?
During working hours (9 am to 5 pm in whichever timezone the edge node is located), the discovery process for locally-attached printers happens every 10 minutes and the discovery of network printers happens around once an hour.
Outside of working hours, discovery is less frequent. (We don’t want to keep looking if there’s no-one in the office!). Checking for local printers happens once an hour, and checking for network printers happens every 12 hours.
I just renamed one of my print queues on my edge node. How long will it take to update in the admin interface?
Trick question! Actually, the new name will not be reflected in the PaperCut Pocket or Hive admin console. The first print queue name discovered from the system is the default “friendly name”. You’ll need to update the name of the printer manually, under Manage > Printers.
I just installed a new printer. How long until it shows up in the admin interface?
Your newly added network printer should show up within 60 minutes, or if it’s locally attached it should show up within 10 minutes. If you want to hurry this process along, restart the edge node service, which kick-starts the discovery process.
I don’t see my network printer listed - why not?
PaperCut Pocket and Hive use SNMP V1/V2 and IPP to discover printers. We also use your local printer queues as hints for where to start the subnet scan. For example, if you have a printer at address 10.100.80.60, we will scan subnet 10.100.80.0/16.
We also need ports for SNMP 161/162 and 631 for IPP (check out the System Requirements - Firewall ports page for more details). If these ports are blocked, we will not discover a device. Ports might be allowed on a specific subnet but may be blocked from crossing onto other subnets, so if your printer is on another subnet that we cannot scan with SNMP or IPP ports, it’ll remain hidden to the discovery process.
I don’t see my local printer listed - why not?
If we can't find enough information about your printer, we might not realize your printer is real! Check to see the criteria mentioned in the Printer Registry section above.
How are printers deleted?
You can’t delete printers manually, but you can un-publish printers so users can't use them to release print jobs.
How do you choose a name for a printer if someone has a printer defined as ‘Closest printer’ and someone else has it named as ‘Library Basement’?
Great question! It’s basically a ‘who told us first’ situation. Whichever edge node tells us about the printer first, uses the name discovered to populate the ‘Printers’ page in PaperCut Pocket and Hive. However, you can rename the printer to something more suitable on that same page if needed.
What if I use a private SNMP community string?
At the moment PaperCut Pocket and Hive use the public SNMP community string, so we can’t query the printer or MFD for information.
Does the discovery process support SNMP v3?
PaperCut Hive and Pocket only supports SNMP V1 and V2.
Why is the IPP status missing on a printer?
If a printer shows Internet Printing Protocol (IPP) as unavailable in PaperCut Hive, the printer might have had IPP disabled when PaperCut Hive first discovered the device. PaperCut Hive captures printer capabilities, including IPP support during the discovery process. If the device does not have IPP enabled during the initial discovery, the printer object does not reflect IPP support until you re-discover the printer.
Re-discovering the printer to update capabilities
Before you start, ensure that IPP is enabled on the printer by referring to the printer manufacturer's documentation. Re-discovering the printer updates the printer object with the current capabilities of the device.
To re-discover the printer, perform the following steps:
In the admin console, go to Manage > Printers.
Click Discover a printer. The Discover a printer panel is displayed.
In the Printer IP address field, type the IP address of the printer.
In the Edge node dropdown, select an edge node that has network access to the printer.
Click Start discovering. The discovery process updates the printer capabilities within 10 minutes.
Comments