
🔎 Admin console: Easy Print & Scan
Before you start
Ensure you have QR code labels printed and attached to their respective printers. That’s because one way users and guests can request printing access is by scanning the QR code on the MFD.
Configuring the signup process and email content
-
In the admin console, go to Easy Print & Scan > Team Signup. The Team Signup panel is displayed.
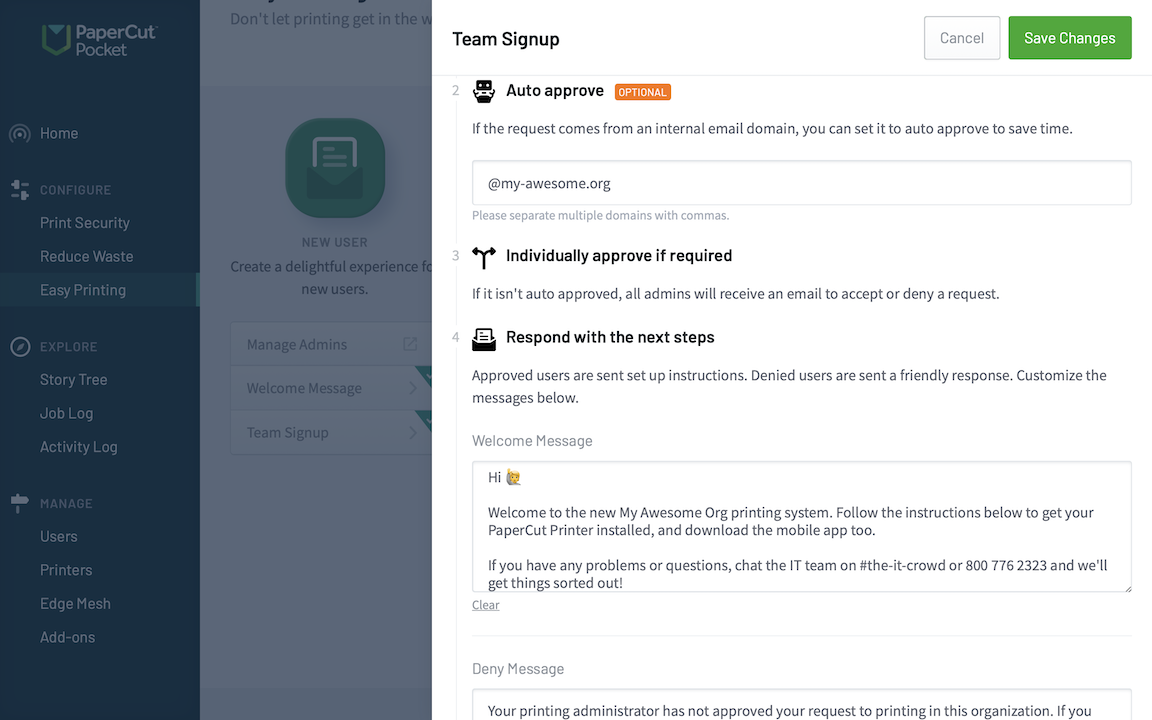
Setting up team signup rules can help unload approval work from administrators, and make it even faster for users to sign up.
-
If you want to automatically approve signup requests that come from one or more specific domains, in the the Auto approve section type the required domain(s), separated by commas.
| Action | Result | |
| Approve | The user is added to the Users list and receives the Welcome message configured above. They’ll then be able to continue to set up their PaperCut Printer and mobile app. | |
| Deny | The user isn’t added to the Users list and receives the Deny message configurable below. |
-
In the Welcome Message box, type the content for the welcome email that’s sent to all approved users.
-
In the Deny Message box, type the content for the email that’s sent to all denied users.
-
Click Save changes.
Comments