
This topic covers:
How to install a public CA (Certificate Authority) on your Print Deploy server
How to install a Private Self-Signed Certificate for Print Deploy
How to install a public CA (Certificate Authority) on your Print Deploy server
The certificate and private key used by the PaperCut NG/MF Print Deploy server for HTTPS connection are in PEM-encoded format. To use an existing trusted SSL key:
Step 1: Export the existing certificate and key to PEM-encoded format
To start with you’ll need to separate the components of the certificate key bundle using PEM encoding for the key. The process depends on the type of bundle you have. Also, you’ll need to know the bundle’s import password because you’re going to need it soon.
Windows certificate store
-
If you already have a .pfx file, skip this step. Otherwise, export the certificate and key as a PFX bundle by following the steps in the PaperCut NG/MF help for Step 1: Export the existing certificate with key.
-
Export the PEM-encoded key and certificate.
A PKCS#12 file (*.p12/*.pfx)
-
Run the command
openssl pkcs12 -in certname.pfx -nocerts -out tlspw.pemto export the key from the certificate key bundle. -
Run
openssl rsa -in tlspw.pem -out tls.pemto remove the PEM pass phrase from the last step. -
Run
openssl pkcs12 -in certname.pfx -nokeys -out tls.certo export the certificate from the certificate key bundle.
Step 2: Configure the Print Deploy server certificate
-
On the PaperCut NG/MF Application Server, stop the Print Deploy service.
-
Place the custom certificate (tls.cer and tls.pem files) in the
[app-path]\providers\print-deploy\[os]\data\cert-custom folder.(Create the
cert-customfolder if it does not exist). -
Start the Print Deploy service.
-
Verify the installation:
-
Navigate directly to the Print Deploy web interface. Use the Common Name (or Host Name) that you specified in the certificate on the dedicated Print Deploy port, for example: https://print-server.company.lan:9174/
This is not the usual PaperCut NG/MF Administration console and is useful for testing.
-
Check that the browser displays an animated coffee cup and no security warnings. If the cup displays, everything’s fine.
-
To check that it was picked up by the server in the logs, navigate to
[app-dir]/providers/print-deploy/[os]/data/logsand open theprint-deploy-server.logfile. You should see a log line that looks like this:using certificate for server at /Applications/PaperCut MF/providers/print-deploy/mac/data/cert-custom/tls.cer with private key at /Applications/PaperCut MF/providers/print-deploy/mac/data/cert-custom/tls.pemVerify that the path of the certificate is in
data/cert-custom.
-
How to install a Private Self-Signed Certificate for Print Deploy
On Windows computers
At a high level, you can install the Print Deploy server self-signed certificate to the Trusted Root Certification Authorities on a Windows Client. In a managed Windows environment you can use your own toolset to deploy the certificate according to your existing workflows.
For an individual machine, follow these steps:
-
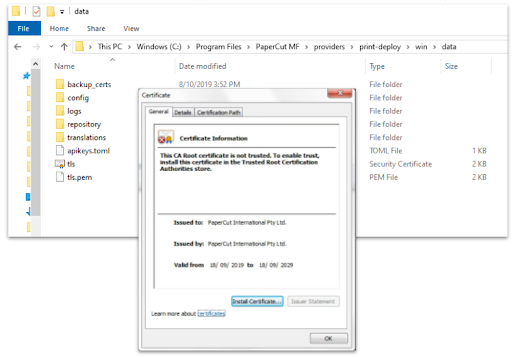
On the server with PaperCut NG/MF, navigate to
<PaperCut NG/MF install path>\providers\print-deploy\<os>\data. -
Copy the tls.cer file to your target machine.
-
On the target machine, double-click tls.cer.
-
Click Install Certificate.
-
On the Welcome to the Certificate Import Wizard screen, click Next.
-
Select the Place all certificates in the following store option; then click Browse.
-
Select Trusted Root Certification Authorities; then click OK.
-
Click Next.
-
Click Finish.
-
Click OK.
On managed Chromebooks
For Chromebook clients to be able to talk to the Print Deploy server using HTTPS, the Print Deploy server must either be using a CA-signed certificate (recommended) or a trusted self-signed certificate with a valid chain.
The default self-signed certificate that comes with the Print Deploy server isn’t chained, so you’ll need to sign your own certificate using your own certificate authority and public key infrastructure. There are several tools you can use to do this, including OpenSSL and certstrap.
After you’ve generated your chained self-signed certificate and its private key, follow the steps below to set up your certificate on the Chrome Enterprise admin console:
-
If you haven’t already, convert your certificate to a Base-64 encoded X.509 (.cer) file.
-
Navigate to
<PaperCut NG/MF install path>\providers\print-deploy\<os>\data. You’ll see the following:-
tls.pem (private key file)
-
tls.cer (certificate file)
-
-
Make a backup of the current tls.cer and tls.pem by renaming them both to .old so you have a copy of the original files.
-
Copy your certificate and private key to this folder.
-
Rename your certificate file to tls.cer and the private key file to tls.pem.
-
Restart the PaperCut Print Deploy service.
-
On the Google Chrome Enterprise Help page, follow the instructions on how to set up your certificates on Chromebooks.
-
After setting up your certificate on the Chrome Enterprise admin console, test your changes by accessing https://<your Print Deploy server’s hostname or IP>:9174 from one of your managed Chromebook’s browsers. If everything is fine, the browser displays an animated coffee cup with no security warnings.
Comments