
By default, PaperCut NG/MF syncs and authenticates users from Active Directory with sAMAccountName as the username. Although this works well for single domain environments, it does not cater for environments with multiple domains, which have a greater chance of duplicated usernames, leading to username clashes.
For example, an organization might have two different employees, working in different locations, who happen to have the same username, mary.jane. Within their own domain, they are unique but when both usernames are imported into PaperCut NG/MF, there will be no way to tell the two apart. This can lead to issues including one Mary Jane releasing the other’s print jobs.
To solve this, Windows Active Directory identifies users using a more suitable username attribute called a UPN (User Principal Name), which consists of a:
-
login name
-
separator (@ symbol)
-
domain name
For example, using UPNs, Mary Jane’s UPN in Domain A would be mary.jane@companyA.com, while in Domain B it would be mary.jane@companyB.com.
1. Verify the prerequisites
-
Ensure that your multi-domain environment complies with: Multiple domain security configuration.
-
Determine the domain or location for the PaperCut NG/MF Application Server.
-
Determine the domain(s) to be included in the PaperCut NG/MF multi-domain setup.
-
Depending on the default trust relationship between your domains, you might need to ensure that PaperCut NG/MF has adequate permissions to query all the domains. For more information and instructions, see multiple domain security configuration.
2. Install the PaperCut NG/MF Application Server
If you haven’t already installed PaperCut, follow the install instructions in the manual.
3. Enable UPN
-
In your file system, navigate to:
[PaperCut MF or NG Install Location]\server\data\conf -
Create a new empty text file named:
features.properties -
Using a text editor, open the file and add the following line (to enable the UPN feature):
UPN_AUTHENTICATION=true -
Save the file.
4. Import users into PaperCut MF/NG
-
Log in to the PaperCut MF/NG Admin web interface (that is,
http://localhost:9191/admin). -
Navigate to Options > User/Group Sync.
-
In Sync Source > Primary sync source select Windows Active Directory.
-
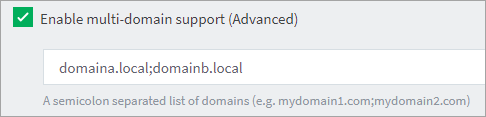
Select the Enable multi-domain support (Advanced) checkbox.
-
Enter at least one domain or a semicolon-separated list of domains from which users are to be imported. For example, mydomain1.com;mydomain2.com
-
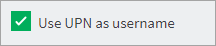
Select the Use UPN as usernamecheckbox.
-
Select the users to import:
-
Import all users—Import all users from all domains listed above.
-
Import users from selected groups—If you select the option, click Select Groups; then select the groups/OUs you want to import. This is useful if the domain contains old users or users who do not print.
-
-
Click Test Settingsand verify the import process.
-
Click Synchronize Now.
-
Navigate to Users.
-
Verify that all your users are now imported and identified with their UPN username.
5. Migrate users from sAMAccountNames to User Principal Names
The UPN feature is best suited to new installs (that is, installing PaperCut NG/MF for the first time). This is because:
-
the “user” object or entity in PaperCut NG/MF is a separate record in the database, making the username the primary unique user identifier and GUIDs do not apply
-
sAMAccountName users cannot be migrated to UPN users.
That means that when the UPN feature is enabled, new users are created and not merged with existing users based on sAMAccountName. There are multiple instances/records for the same user – one with their old username and one with their new UPN username.
Using this manual workaround, you can purge the duplicated records and merge users:
-
Back up your entire user database.
-
Log in to the PaperCut MF/NG Admin web interface (that is
http://localhost:9191/admin). -
Navigate to Users.
-
Each user will now have two records, one sAMAccountName and one UPN username. For each user you need to rename their old sAMAccountName username with their new UPN username.
For each user:
- Find the record with the new UPN username.
- Take note of the UPN username.
- Delete the UPN user record.
- Find the old sAMAccountName user record.
- Rename the user’s old sAMAccountName username with their new UPN username (that is, the username you noted in step 4b).
You can automate this process using either the server-command or PaperCut’s XMLRPC web services API.
6. Configure additional settings
There are two paths for additional configuration, depending on your print server installation. Either you have:
- one shared print server managing multiple domains, in which case you need to ensure this print server receives the full UPN username
- separate, dedicated print servers for each domain, in which case the print server can determine the domain of the user.
Configure Shared Print Server installations
Configure print queues
In Windows printing environments, a user’s sAMAccountName is attached to the user’s print jobs. PaperCut MF/NG uses this information to link a print job to its user. If a user’s UPN username format does not include their sAMAccountName, their print jobs cannot be linked to them by simply appending domain name information to the default sAMAccountName.
In multi-domain environments using a shared print server, you must configure all your user-facing print queues to be Unauthenticated Printers. That way, when a user prints to one of these printers for the first time, they are prompted with a pop-up for authenticationAs a result, users are identified with their UPN username, and their print jobs are linked accurately to their correct UPN username account.
To configure a printer to be an unauthenticated printer:
-
Log in to the PaperCut MF/NG Admin web interface (that is,
http://localhost:9191/admin). -
Navigate to Printers > then each relevant print queue.
-
For each print queue, in Advanced Configuration, select the Unauthenticated printer (enable pop-up authentication) checkbox.

Deploy and configure the PaperCut MF/NG User Client
You need to deploy the PaperCut MF/NG User Client to enable the authentication pop-up to display when users print to the Unauthenticated Printers print queues for the first time. As a result, users are identified with their UPN username, and their print jobs are linked accurately to their correct UPN username account.
To deploy the PaperCut MF/NG User Client, follow the steps in Install the User Client on Windows.
For more information, see:
After deploying the PaperCut NG/MF User Client, you can configure it as required, for example:
Ensure users can log in to the PaperCut MF/NG User Client with their UPN username
Allow users to have options to cache their credentials (via client.config.auth.ttl-values in the config.properties file), which allows the user’s UPN authentication to be remembered.
For more information, see:
Configure dedicated Print Server installations
Install PaperCut MF/NG Secondary Print Server or Site Servers
In multi-domain environments with dedicated print servers, you must install the PaperCut MF/NG secondary Print Server or Site Server on every domain and ensure that it points back to the PaperCut MF/NG Application Server that is already installed.
You must also share printers associated with a specific domain’s print server only to workstations and users of that same domain. Users belonging to other domains can’t print to these printers.
To install a secondary Windows Print Server, see Configure a Windows secondary print server.
Configure PaperCut NG/MF Secondary or Site Servers
Next you must configure each domain’s secondary print server’s print-provider.conf file. This adds domain details to the sAMAccountName for any print jobs sent to the print server. This ensures that domain-specific print jobs are linked accurately to their corresponding users via the correct UPN username.
-
Navigate to:
[The domain’s PaperCut MF or NG Secondary or Site Server Install Location]\providers\print\win -
Using a text editor, open the file:
print-provider.conf -
If this is an existing install (that is, you are upgrading an existing PaperCut MF/NG installation), then manually add:
# UPN (User Principal Name) Prefix:# Default: "" (empty)## UPN suffix (domain) the users are associated with. Will be appended# to username with @ in between when reporting to AppServer.# Ex: UPNSuffix=papercutsoftware.com# For a user name, johndoe the UPN is johndoe@papercutsoftware.com# Maximum length is 256 characters.# When empty just the username is used (A UPN is not constructed).UPNSuffix= -
Locate the line:
UPNSuffix= -
Add this domain’s name (that is, the domain with the dedicated print server from which users print). For example:
UPNSuffix=papercut.com
→ This appends “@papercut.com” to all sAMAccountNames of print jobs printed to the print server of this domain – “papercut”
UPNSuffix=mydomain1.com
→ This appends “@mydomain1.com” to all sAMAccountNames of print jobs printed to the print server of this domain – “mydomain1”
-
Save the file.
-
Restart the PaperCut MF/NG Print Provider Service. For more information, see Stopping and Starting (Restarting) PaperCut Services.
7. Test
After installing and configuring PaperCut MF/NG in your multi-domain environment, you must test it. For more information, see Testing the installation.
Some tips to ensure UPN usernames are working correctly:
-
Authentication:
- Attempt to login to the PaperCut Admin web interface with a user from each of your domains using the UPN username.
-
Print job logging against correct users:
- Print a test print job with a user from each domain. Ensure that each print job is correctly allocated to each of these users.
Comments