




Co-Developed Content: Special thanks to the technical team at ConnectWise® for their expert input and contribution to this knowledge base guide.
Summary of deploying the client (edge node)
- The computer app is run with elevated privileges, so it doesn’t require the user to be logged in.
- The computer app creates the PaperCut Hive or Pocket edge node processes and PaperCut Printer object.
- The edge node can be deployed without a print client. For example, you can install a super node on a Windows Server.
- The edge node must be deployed before installing the print client.
Summary of deploying the print client
- The computer app creates the print client processes for print job submission.
- It installs files and processes in the Users Security Context.
- The install runs as “Run as current Logged on User”.
- After successful execution, it requires the user to perform the linking process. This can be automated by following our guidance on How to use the command line to automate user sign in for PaperCut Hive and Pocket, clicking “Get Started” in their email invitation, or logging into the task tray icon as pictured below.
Prerequisites
- Workstations managed through ConnectWise RMM
- PaperCut Pocket/Hive Org
Bulk deployment for Windows
Download the installation file for PaperCut Hive/PaperCut Pocket
- In the admin console, go to the Edge Mesh section.
- Select Add edge node > Manually Deploy Edge Nodes.
- Download the executable file.
Get the System and User Keys
-
In the admin console, go to the Add-Ons section.
-
Select the Intune add-on; then click Add to add it to your organization.
-
Click Manage > Follow these instructions. The instructions page is displayed.
-
Go to step 3 of the Intune guide and copy the install command. This command contains the system key and the parameters to pass into the ConnectWise Platform.

-
Go to step 4 of the Intune guide and copy the install command to get the user key.

Create the Automation in ConnectWise RMM for Windows
This section explains how to deploy the PaperCut Hive and PaperCut Pocket via ConnectWise RMM.
Edge node installation
-
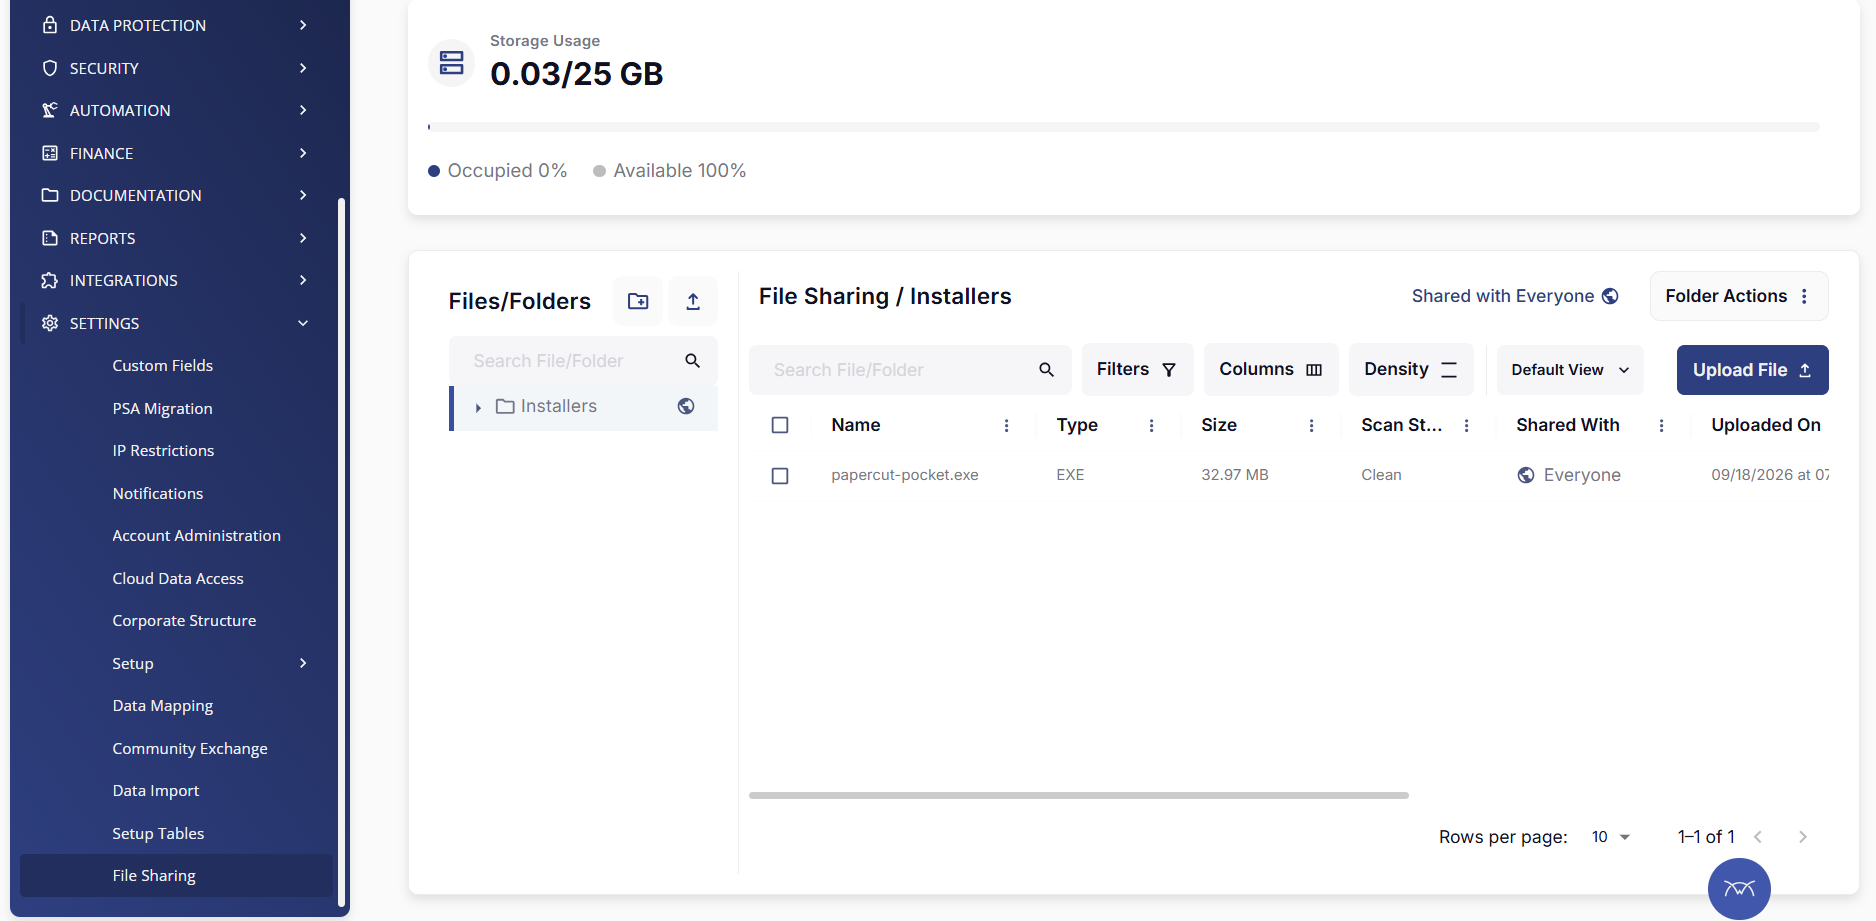
In the left navigation bar, go to Settings > File Sharing.
-
Create a folder named
Installersand upload the PaperCut.exefile.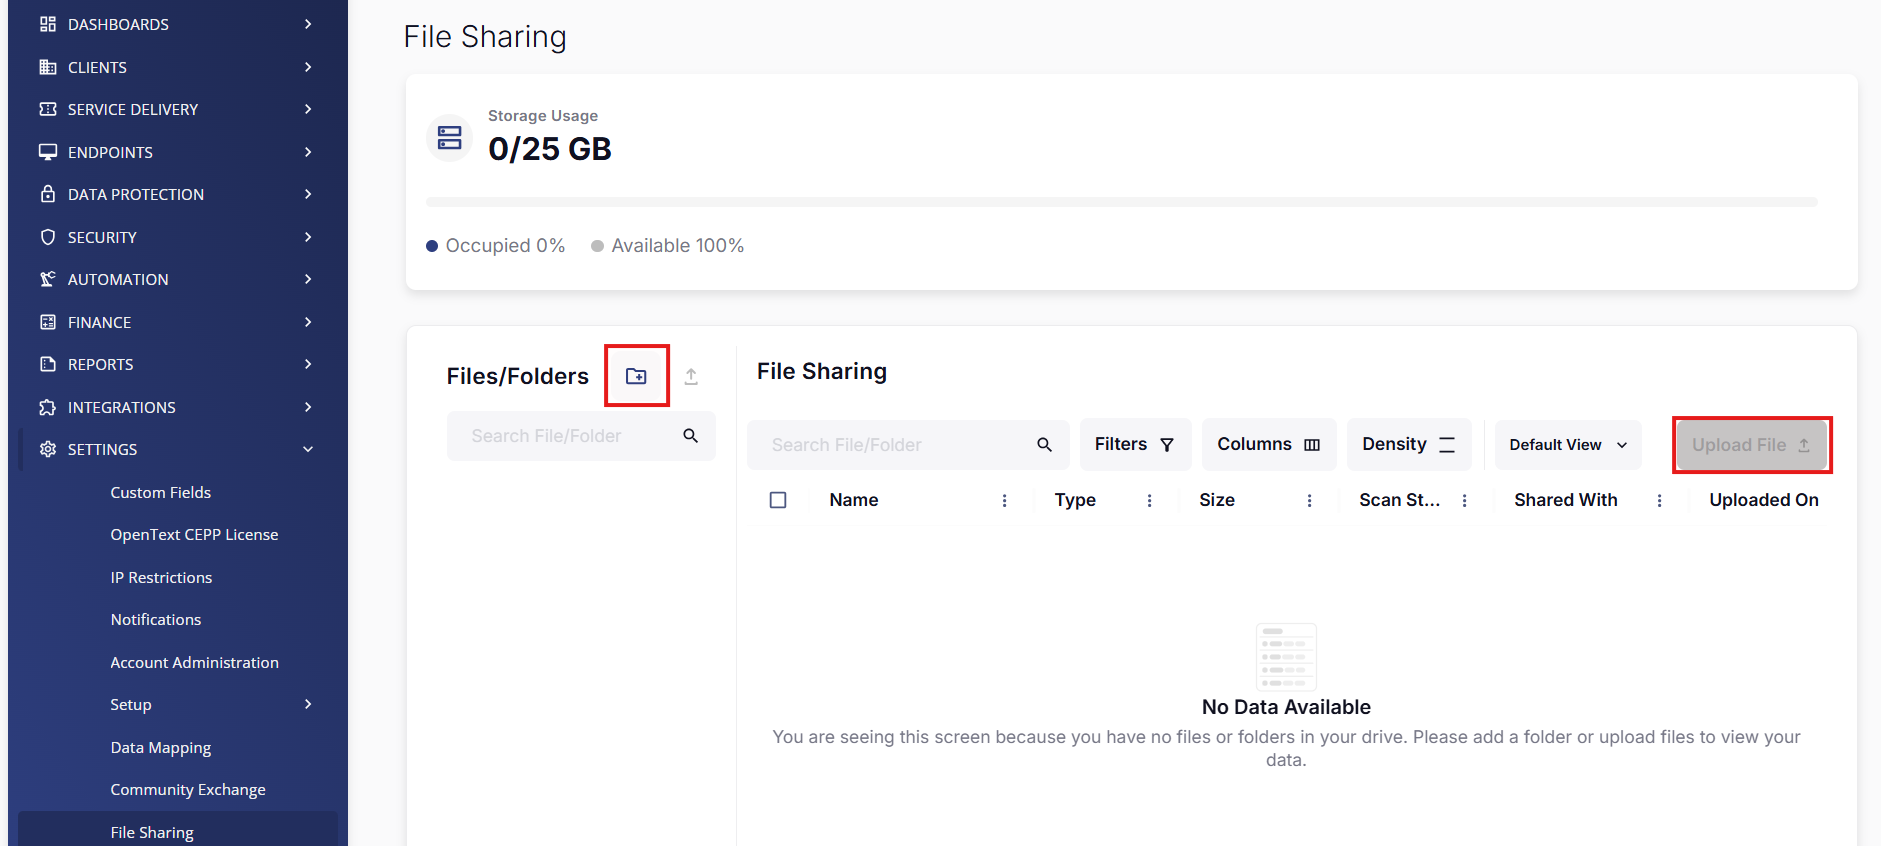
-
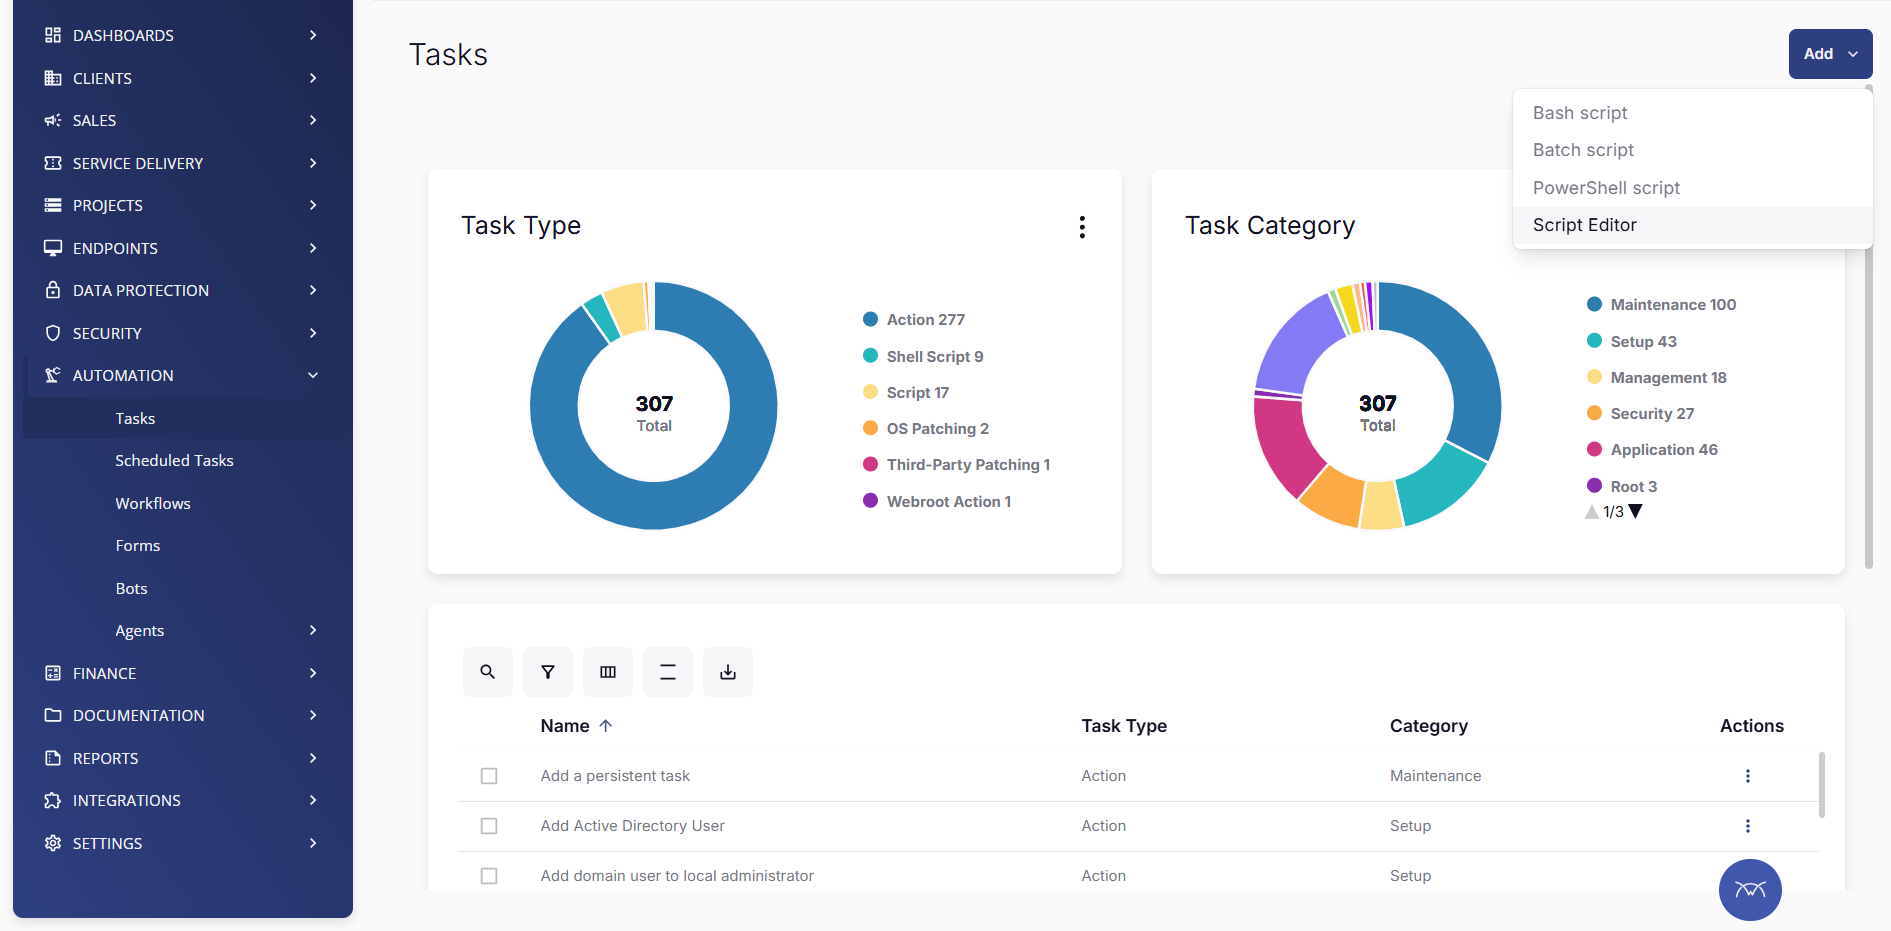
In the left navigation bar, go to Automation > Tasks.
-
In the top right, select Add > Script Editor.
-
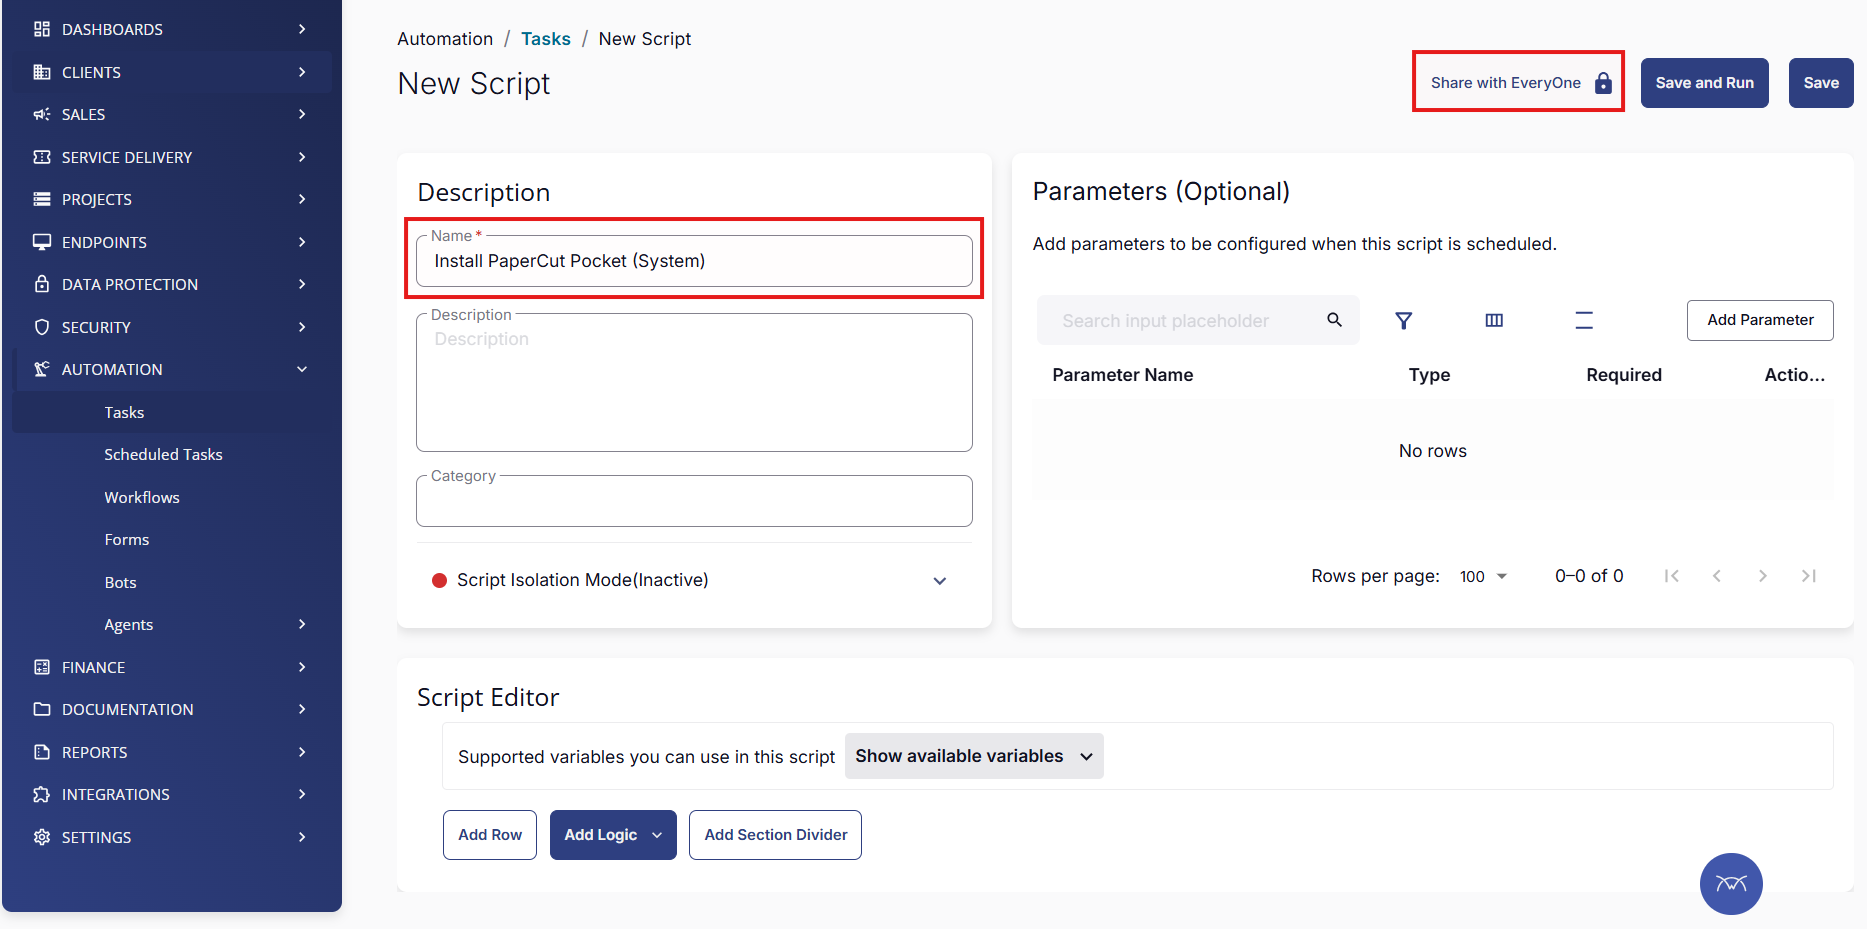
Type a name for the script, for example: “Install PaperCut Pocket/PaperCut Hive Edge node”
-
Then change the Script Permissions to the group of users who require access to the script.
-
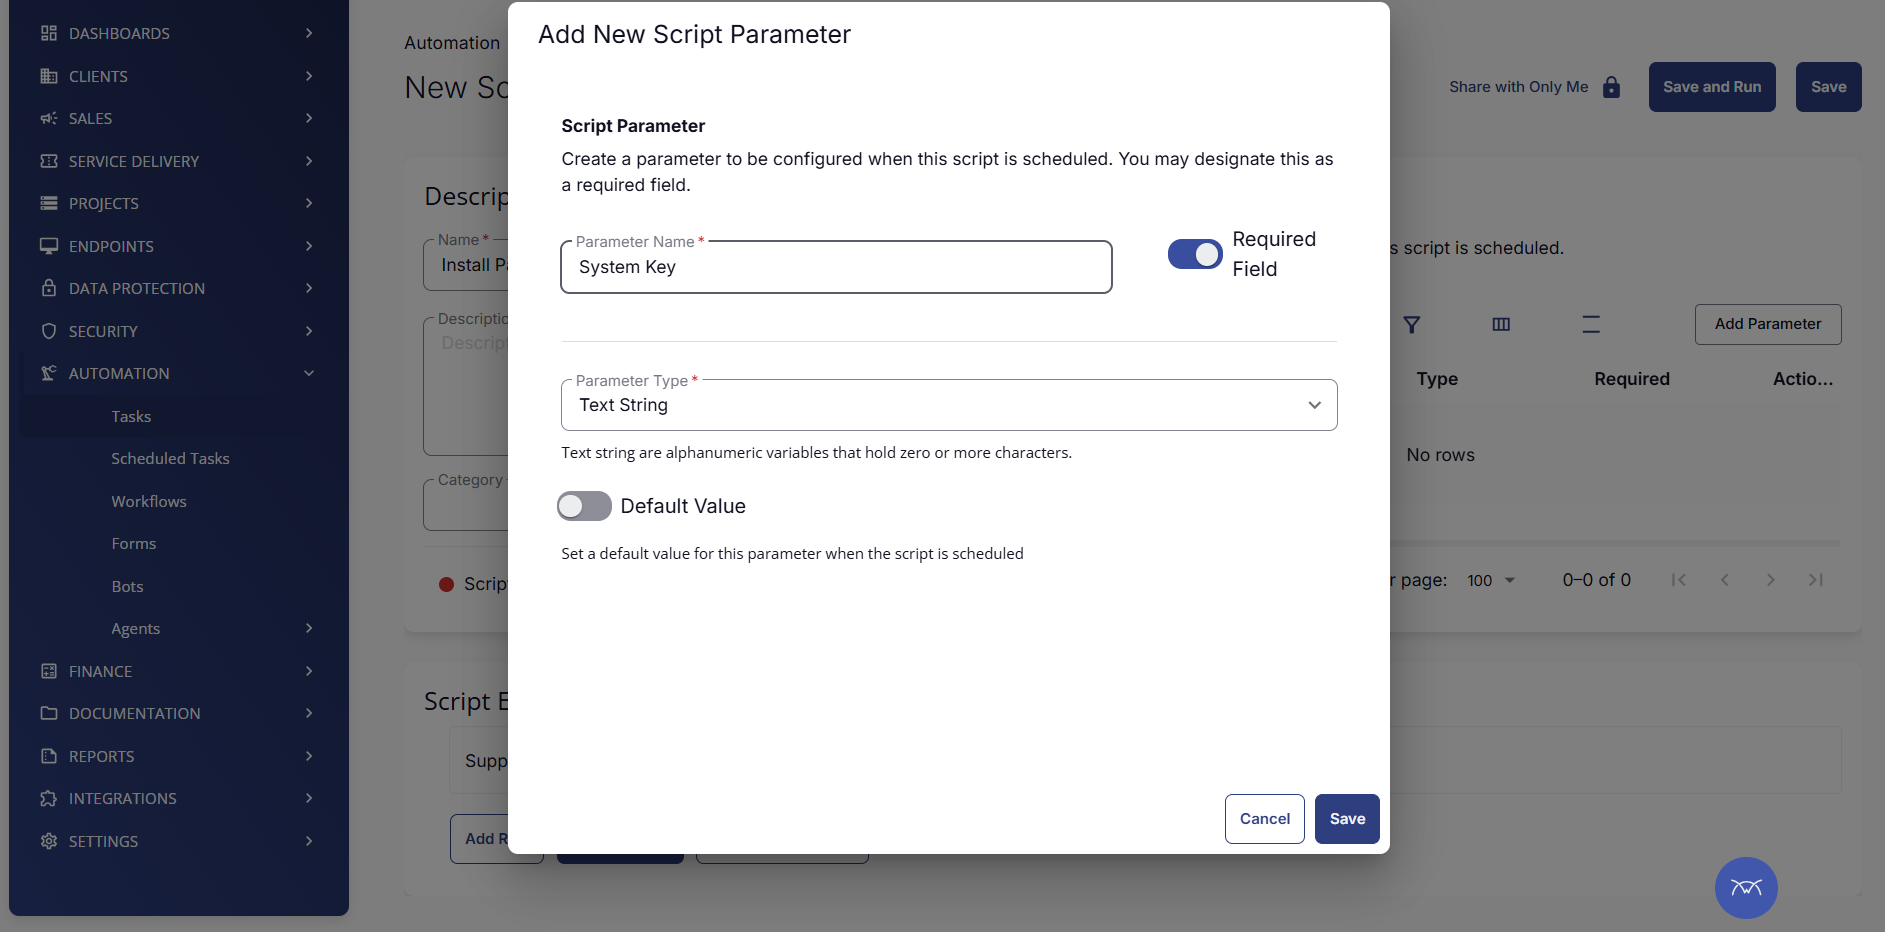
On the right, select Add Parameter to create a parameter called System Key:
- Select the Required Field checkbox.
- In the Parameter Type dropdown, select Text String.
- Type your System Key in quotes ("") as the default value. Copy in your System Key in quotes (“) as the default value.
-
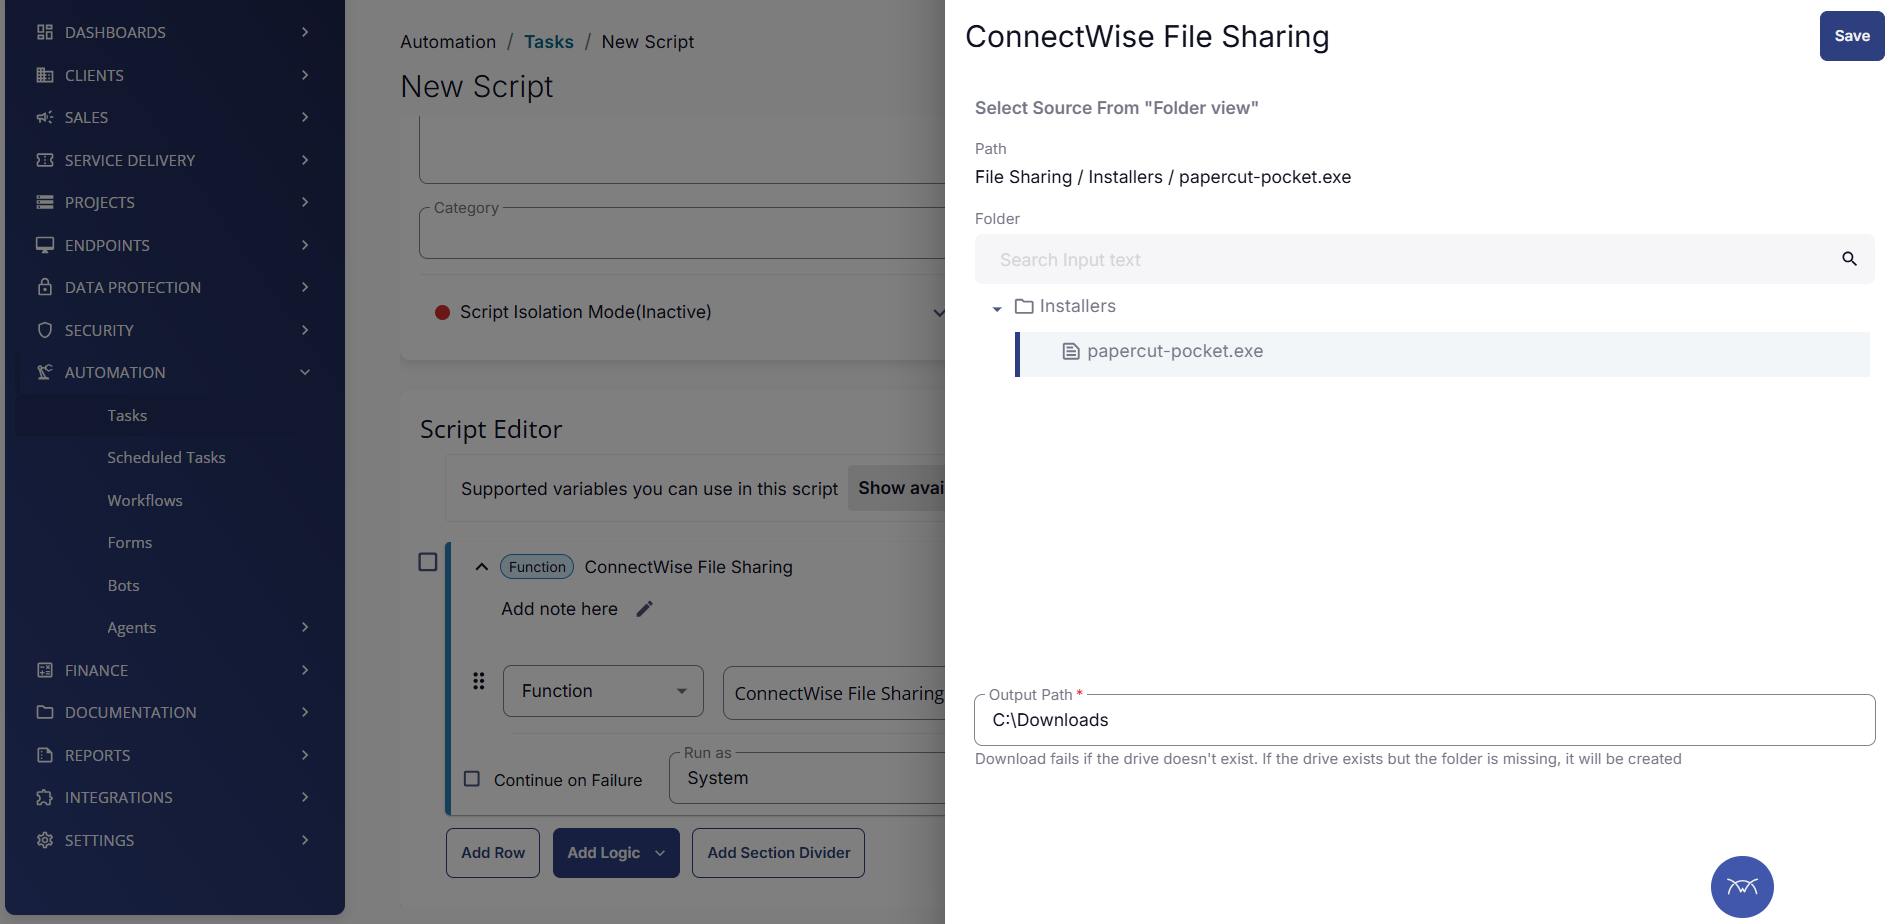
Select Add Row and search for ConnectWise File Sharing
- Change the Run as setting to System.
- In the Operating System dropdown, select Windows.
- Select papercut-pocket.exe from the list.
- Type the destination path on the device, for example, C:\Downloads.
- In the top right, select Save
-
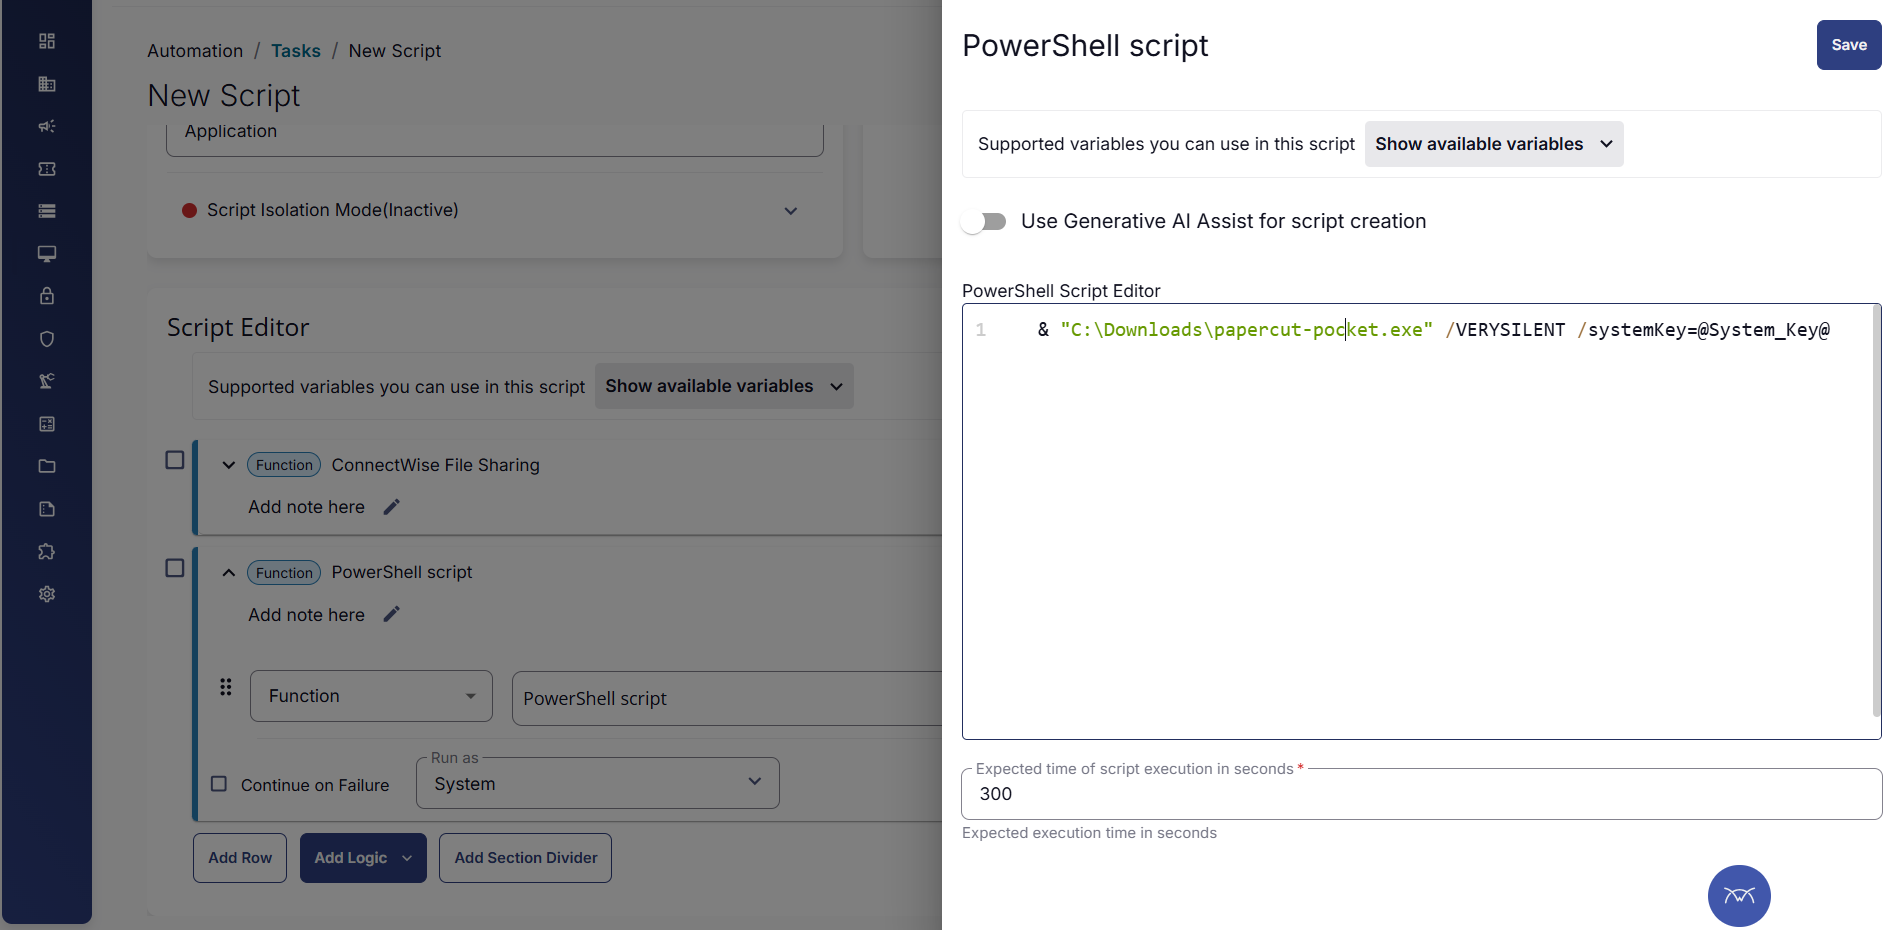
Select Add Row and search for PowerShell Script:
-
Change the Run as setting to System.
-
In the Operating System dropdown, select Windows.
-
Type the following command to copy the System Key parameter:
& "C:\Downloads\papercut-pocket.exe" /VERYSILENT /systemKey=@System_Key@ -
In the top right, select Save.
-
Save the Automation with the Save button in the top right.
Print Client Installation
-
Go to Automation > Tasks.
-
In the top right, select Add > Script Editor.
-
Type the name Install for example: “Install PaperCut Pocket/PaperCut Hive Edge node”
-
Then change the Script Permissions to the appropriate users.
-
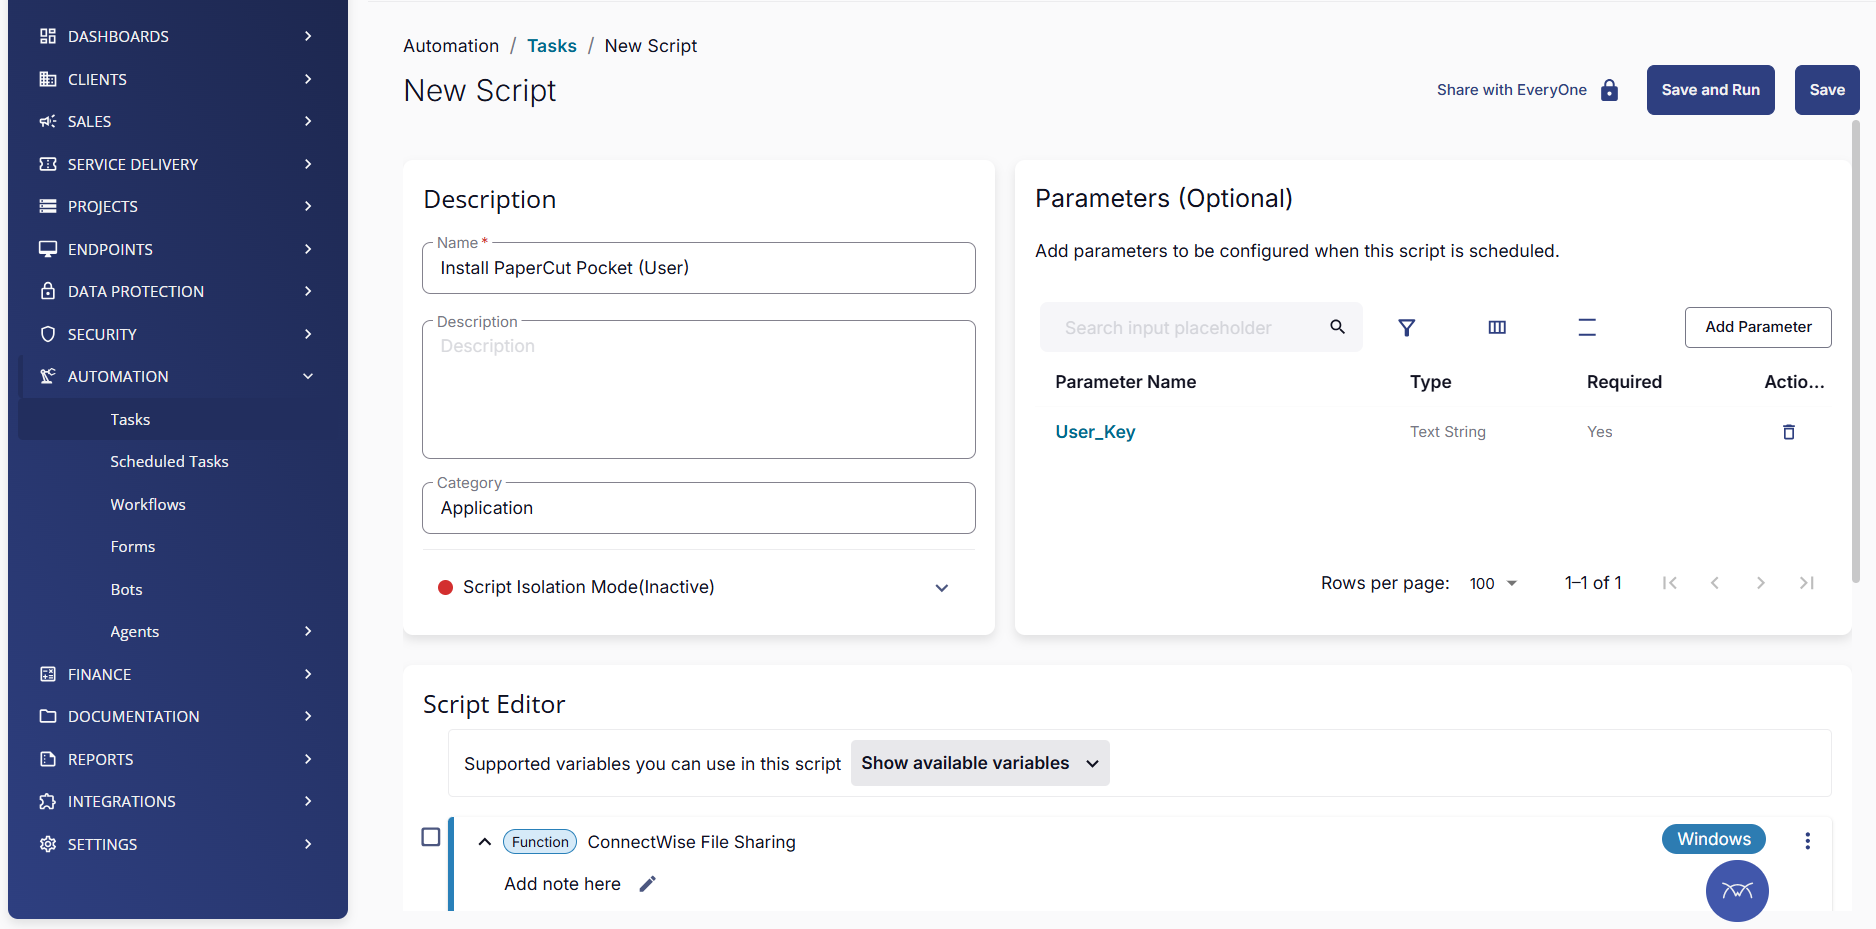
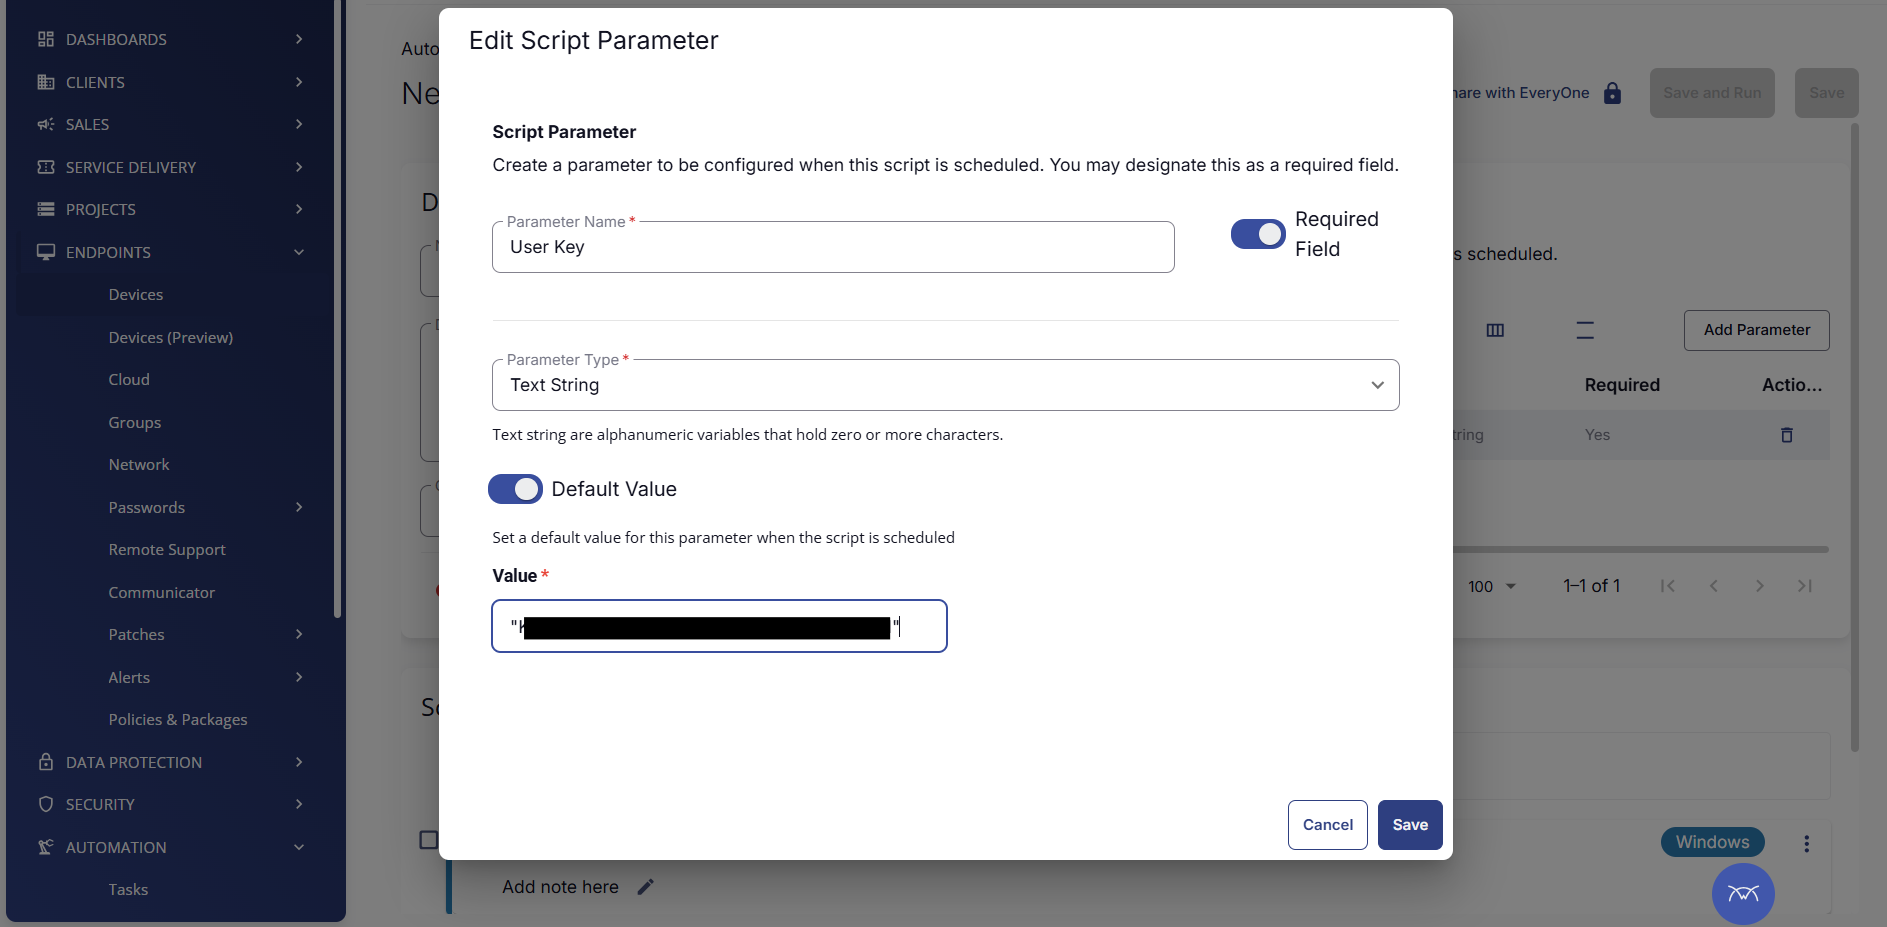
Create a new parameter called User Key:
- Select the Required Field checkbox.
- In the Parameter Type dropdown, select Text String.
- Type the User Key in quotes ("") as the default value.
-
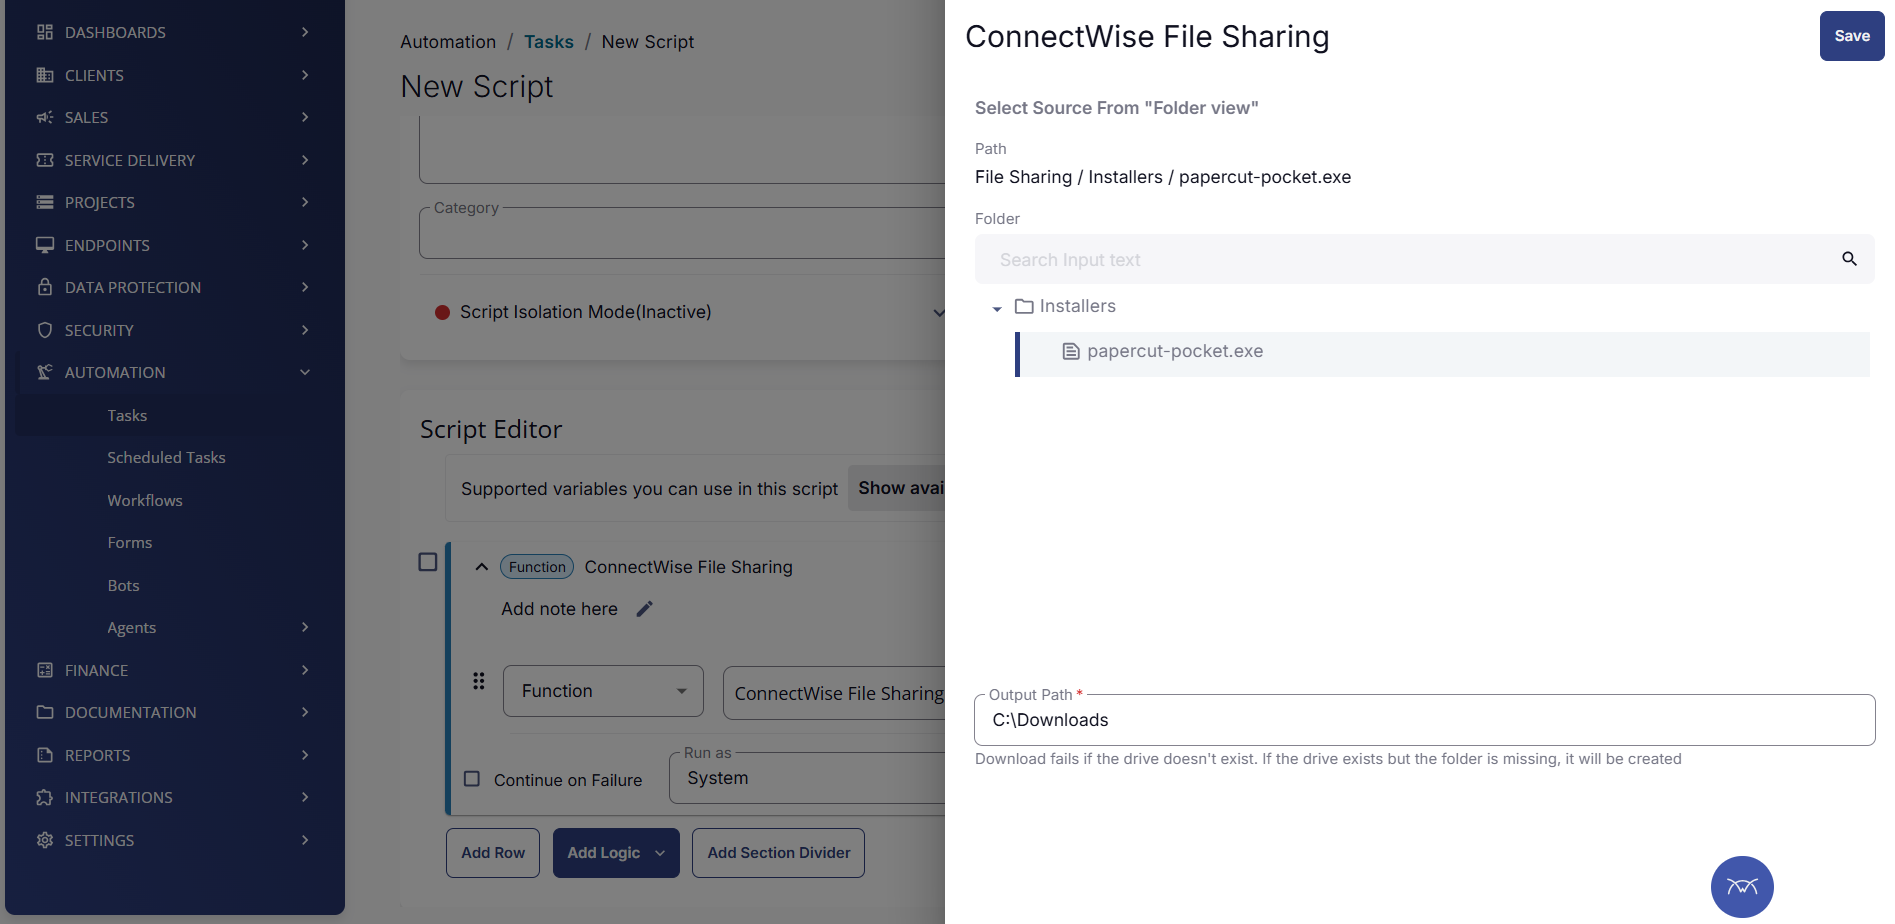
Select Add Row and search for ConnectWise File Sharing:
-
Change the Run as setting to System.
-
In the Operating System dropdown, select Windows.
-
Select papercut-pocket.exe from the list.
-
Type the destination path on the device, for example, C:\Downloads.
-
In the top right, select Save.
-
-
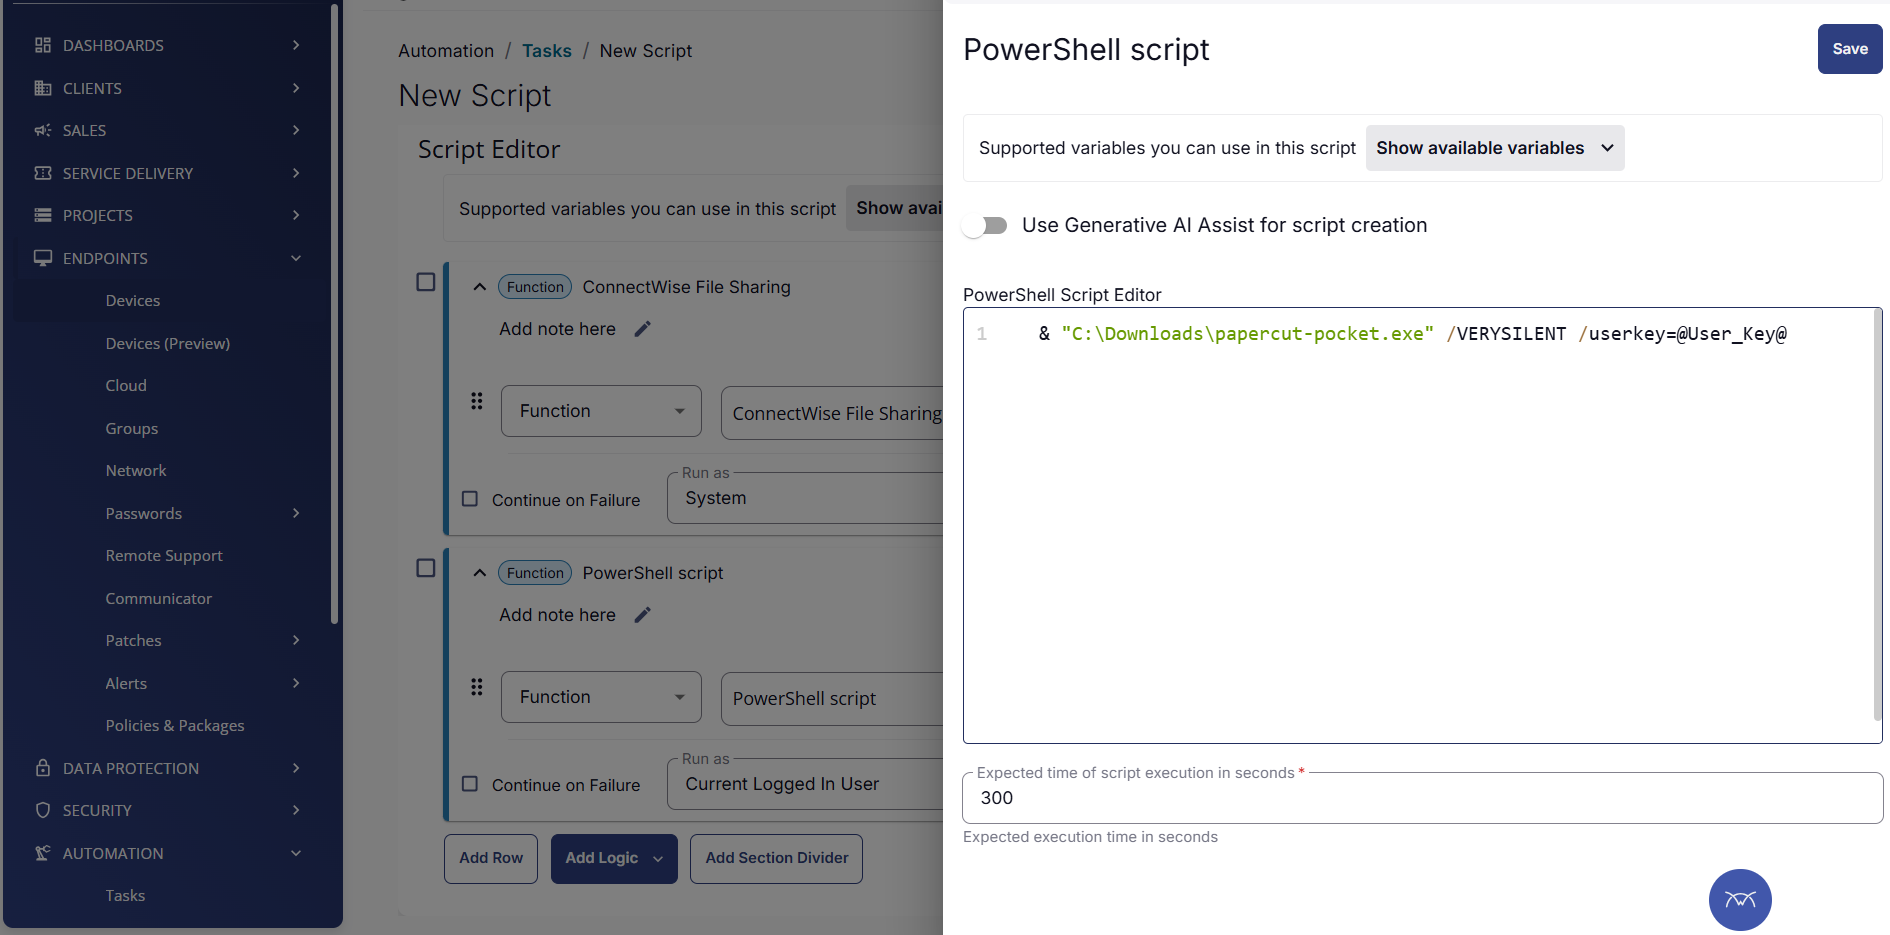
Select Add Row and search for PowerShell Script:
-
Change the Run as setting to Current Logged In User.
-
In the Operating System dropdown, select Windows
-
Type the following command to copy the User Key parameter:
& "C:\Downloads\papercut-pocket.exe" /VERYSILENT /CURRENTUSER /userkey=@User_Key@ /orgId=@Org_ID@ -
In the top right, select Save.
-
Create the Monitor in ConnectWise
This section explains how to configure a monitor that detects missing installations of PaperCut Pocket/PaperCut Hive and triggers the installer script automatically.
-
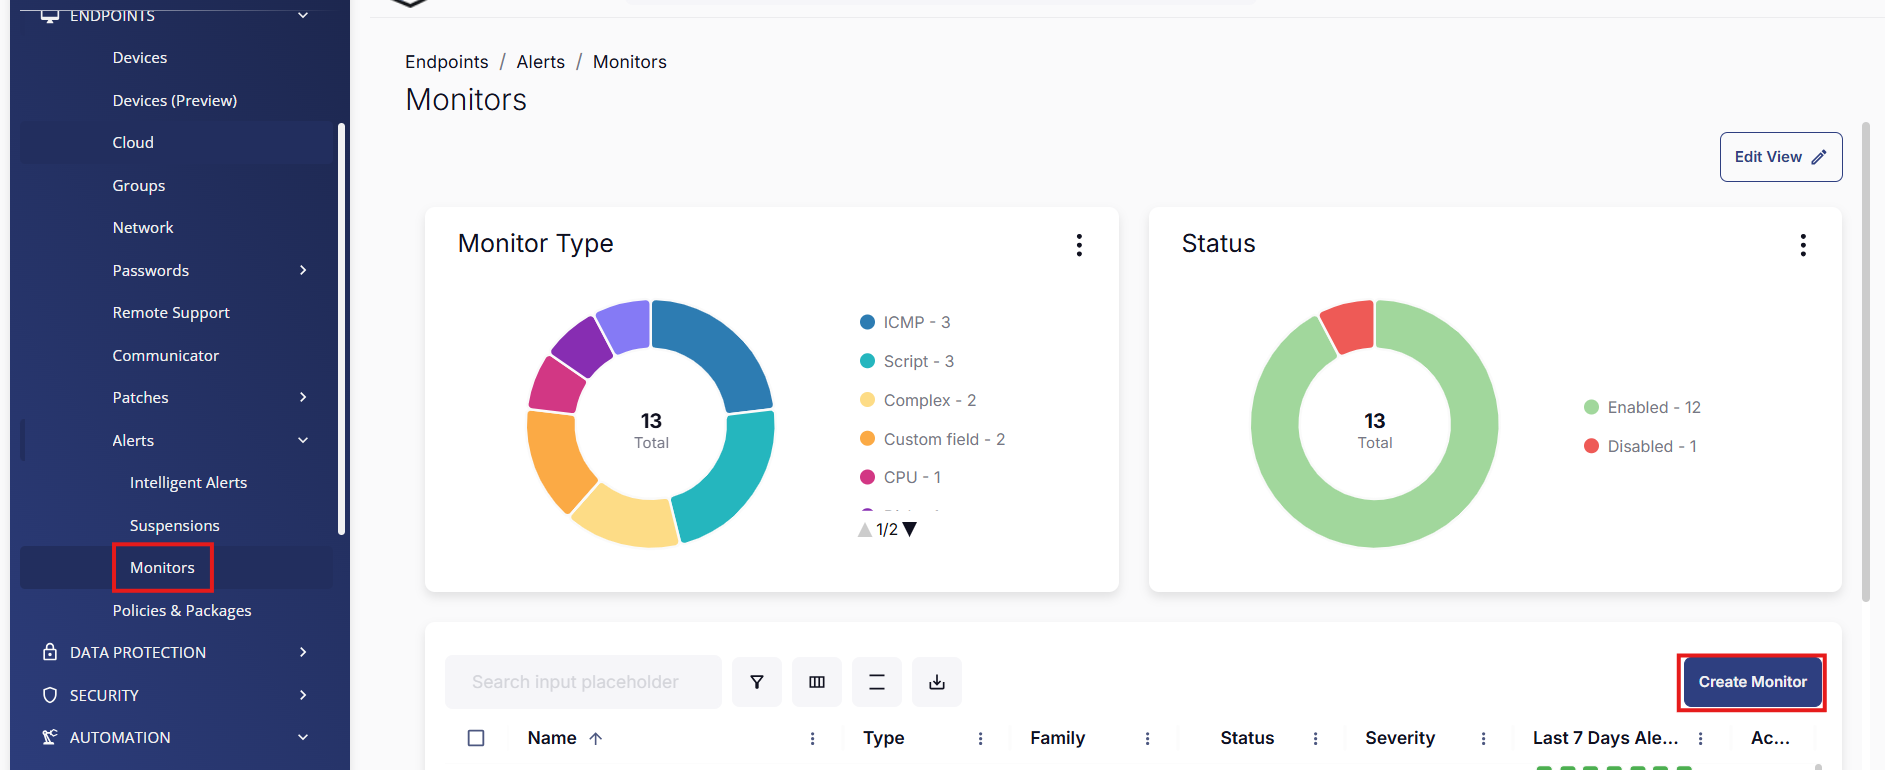
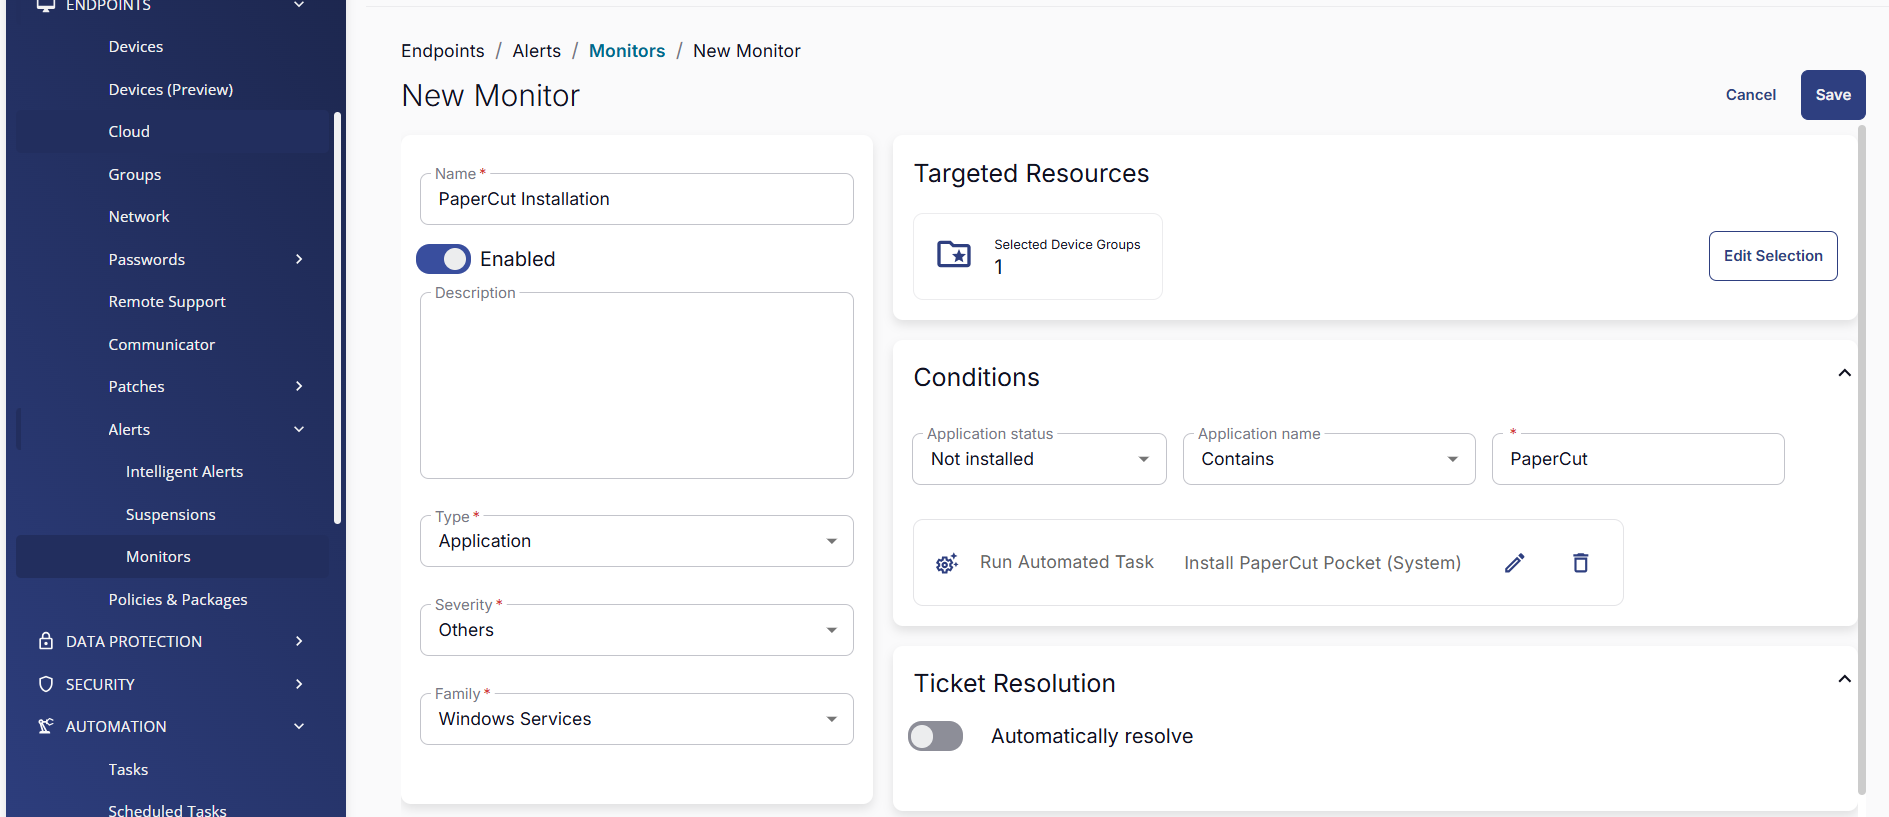
In the left navigation bar, go to Endpoints > Alerts > Monitors.
-
On the right, select Create Monitor.
-
In the Name field, type PaperCut Installation.
-
In the Type dropdown, select Application.
-
Set the condition to detect when PaperCut is not installed.
-
Select Add Automation and select the script you created using the process above.
-
Under Targeted Resources, select the group of devices you are checking for this condition.
-
In the top right, select Save. The affected ConnectWise RMM agents will start checking their devices and running the installer script if PaperCut is missing.
Post-deployment checks
After both components are deployed, spot-check your test computer to ensure the following:
- In Task Manager, check the
pc-edgenode-serviceis running.
The Windows PC requires this service to perform Edge Mesh activities such as receiving, replicating, or printing jobs if the PaperCut Cloud Service calls upon it. - In Task Manager, check that
pc-print-client-service.exeis running.
This is the print client needed to link the end-user to PaperCut Pocket or PaperCut Hive and submit jobs via the PaperCut Printer. This process must be running in memory. It provides the functions the user needs to print jobs via the PaperCut Printer.
If either of these are not running, contact your PaperCut Reseller and provide copies of the logs.
Locations of logs
- Edge node service and setup logs:
C:\Program Files\PaperCut Hive\data\logsorC:\Program Files\PaperCut Pocket\data\logs - User print client logs:
%AppData%\Local\Programs\PaperCut Hive\data\logsor%AppData%\Local\Programs\PaperCut Pocket\data\logs - User client set up logs:
%AppData%\Local\Programs\PaperCut Hive\data\logsor%AppData%\Local\Programs\PaperCut Pocket\data\logs%AppData%\Local\Temp
Comments
Comments are not available in this preview environment. On papercut.com, this space shows the live Disqus comment thread for this page.