
Contents
- Overview
- Our best server migration advice
- Preparation checklist
- Cutover checklist
- 1. Set up and test the print queues on the new server
- 2. Install the same version of PaperCut NG/MF on both servers
- 3. Review and copy the server.properties file to the new server
- 4. Migrate other PaperCut features and components as needed
- 5. Inform users of the scheduled downtime for the migration
- 6. Deactivate the installation on your old server to release entitlements
- 7. Migrate the database to the new PaperCut server
- 8. Apply your license or subscription to the new server
- 9. Power off the old server, or disable the network interface
- 10. Post migration considerations
- Further assistance
Plan your PaperCut Application Server Migration
THE PAGE APPLIES TO:
Last updated April 13, 2026
Contents
- Overview
- Our best server migration advice
- Preparation checklist
- Cutover checklist
- 1. Set up and test the print queues on the new server
- 2. Install the same version of PaperCut NG/MF on both servers
- 3. Review and copy the server.properties file to the new server
- 4. Migrate other PaperCut features and components as needed
- 5. Inform users of the scheduled downtime for the migration
- 6. Deactivate the installation on your old server to release entitlements
- 7. Migrate the database to the new PaperCut server
- 8. Apply your license or subscription to the new server
- 9. Power off the old server, or disable the network interface
- 10. Post migration considerations
- Further assistance
- Overview
- Our best server migration advice
- Preparation checklist
- Cutover checklist
- 1. Set up and test the print queues on the new server
- 2. Install the same version of PaperCut NG/MF on both servers
- 3. Review and copy the server.properties file to the new server
- 4. Migrate other PaperCut features and components as needed
- 5. Inform users of the scheduled downtime for the migration
- 6. Deactivate the installation on your old server to release entitlements
- 7. Migrate the database to the new PaperCut server
- 8. Apply your license or subscription to the new server
- 9. Power off the old server, or disable the network interface
- 10. Post migration considerations
- Further assistance
“I’m a Systems Administrator about to set up a new print server on a newer/different operating system and I want to know how to migrate the PaperCut Application Server. What are the best steps to take?”
Our best server migration advice
-
Read this article end-to-end before you start.
-
Do the Preparation Checklist tasks first.
-
Schedule downtime and perform the Cutover Checklist tasks when you are ready to transition to the new server.
-
Have a backup plan and be ready to revert to the old server in an emergency. Before you migrate, ensure you have a full system backup and a disaster recovery plan that you have tested. A backup ensures you can roll back safely if the upgrade fails or unexpected issues occur. See Manage system backups for detailed instructions on creating a backup.
-
To keep things simple, give the new PaperCut server the same IP address and Hostname as the old one (but don’t let them be online at the same time to avoid an IP address conflict). This is so that other PaperCut components on the network won’t need to be reconfigured (like the User Client, MFPs running the PaperCut embedded application, Direct Print Monitor, Secondary Servers, Site Servers, Payment Gateways, Web Print Sandboxes, etc.). Changing the IP address of your PaperCut server is a totally different task that we recommend you tackle separately — follow the instructions in these additional articles:
-
For PaperCut MF customers, we recommend you contact your PaperCut Partner for consultation and technical assistance (their contact info is listed on the Help tab (or About tab in older versions) of your PaperCut MF admin web interface).
-
There are different steps in this article depending on whether your PaperCut server is configured to use an internal database or an external database (like SQL). If you have an external database, be sure to “comment out” the database connection details in Step 3, so that you won’t wind up with two servers connecting to the same database! Alternatively, if you’re only looking to migrate your external database (for example, from database server 1 to database server 2), have a look at Migrating your database server.
-
Migrating to a cloud-hosted server? Check out our Best Practices for Private Cloud Hosting for some extra homework before continuing!
-
Know where your existing PaperCut server installer is, and, if you’re upgrading to a higher version, where your new server installer is.
-
Watch our server migration video for a high-level overview of the process. Keep in mind this shows how to migrate the database, but there are other components (certificates, Mobility Print, Payment Gateways, etc…) documented in this article which contain additional steps.
Preparation checklist
Set up and test the print queues on the new server
- Install the same version of PaperCut NG/MF on both servers.
- Review and copy the
server.propertiesfile to the new server. - Migrate other PaperCut components as needed.
Cutover checklist
- Inform users of the scheduled downtime for the migration.
- Deactivate the installation on your old server.
- Migrate the database to the new PaperCut server.
- Apply your license or subscription to the new server.
- Power off the old server, or disable the network interface.
1. Set up and test the print queues on the new server
If PaperCut NG/MF and your print server are one and the same, then make sure you set up all of the print queues on the new server and test printing before installing PaperCut. These steps will vary depending on whether you have a Windows, macOS, or Linux print server.
On Windows, this means opening Print Management Console on the new server, then adding your printers using the Add Printer Wizard one by one. Or you can use the Print Server Migration feature built into Windows to quickly migrate all your queues, drivers, ports, and settings.
We recommend that you name the print queues on the new server identically, otherwise, clients on the network that print through this server may have trouble connecting to the hosted print queues.
If the printer names or server hostname are going to change as part of the migration, you might want to rename the existing printer entries in PaperCut NG/MF so that the printing history and settings are maintained and you don’t end up with two separate entries for each printer. See the article How to Rename a Printer for more details.
If you have queues using the LPR protocol or have the PaperCut LPD Service installed previously on your original Print Server, you will need to reinstall the PaperCut LPD Service on the new Print Server that you are migrating to. This will ensure LPR jobs submitted from macOS and Linux clients can be understood and accepted by the Windows Print Server, allowing the hosted queues to pass on the jobs to the printing devices. Check out this article for more information. Some organizations can skip these steps if no printing is done through the PaperCut server. This is more common in larger organizations that have a dedicated PaperCut server and track printing only through PaperCut Secondary Servers, Site Servers, or the Direct Print Monitor.
2. Install the same version of PaperCut NG/MF on both servers
When migrating PaperCut NG/MF, we recommend you use the same version of PaperCut on both the old and new server.
The easiest way to ensure they are the same is to upgrade to the latest version of PaperCut NG/MF:
- Log in to your server as Admin.
- Navigate to the About page.
- Click Check for updates to get the latest version.
- Download the installer and run it on both the old and new servers.
- Follow the prompts to finish the installation wizard and synchronize users with your directory.
- Test and confirm:
- After installing PaperCut on the new server, navigate back to the About page to check your server version and confirm it is the same version as the old PaperCut server.
- Make sure that PaperCut on the new server can communicate with your user directory: navigate to the Options page, click User/Group Sync, and scroll down to the Test Settings button.
Note that your new server will be running in ‘Trial mode’ at this point. That’s fine — we’ll apply your license or subscription in a later step.
To upgrade, your PaperCut Maintenance and Support agreement must be up to date. Having a current Support agreement will also ensure timely support if anything goes awry. Please check our upgrade policy if you have questions.
If upgrading before the migration is not an option (which may be the case if your PaperCut server is still running on a 32-bit OS), you can still obtain older versions of PaperCut. PaperCut NG customers can still download past versions from our website, while PaperCut MF customers need to reach out to their PaperCut Partner for past versions.
3. Review and copy the server.properties file to the new server
This file contains many important configurations and customizations that might have been made on your previous PaperCut server. These include:
- hashed admin credentials
- custom SSL/TLS Certificate details (if any have been installed)
- listening ports (like 80 and 443)
- security settings, like the allowed Ciphers and Protocols list
- database configuration details (if an external database is used).
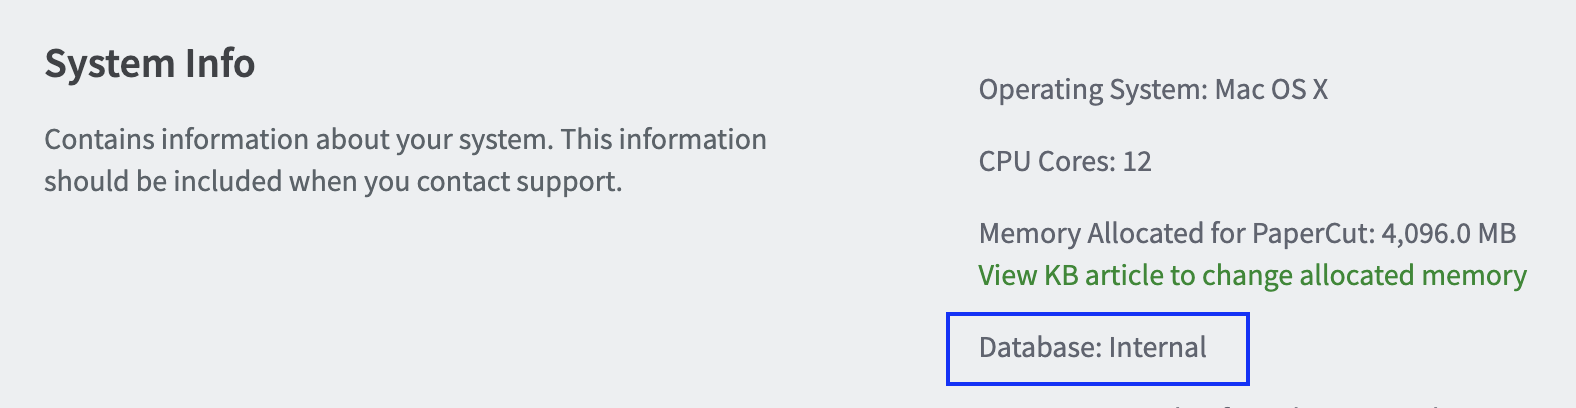
These exact steps vary depending on whether PaperCut NG/MF is configured to use the default built-in Derby database or an external database (like SQL Server, PostgreSQL, Oracle). Look on the About page next to System Info to see what type of database you have.
-
Log in to the old server running PaperCut NG/MF.
-
Navigate to the server folder in where PaperCut is installed:
[application-directory]/server/.
(On a 64-bit Windows server running PaperCut NG/MF it isC:\Program Files\PaperCut MF\server\.) -
Copy the
server.propertiesfile to the new server. -
Only if PaperCut is configured to connect to an External Database: Edit the new copy of the
server.propertiesfile so that the database connection details are “commented out”, by putting a # symbol at the beginning of each line as shown in the example below. This prevents your new PaperCut server from prematurely connecting to the database. Later, when it is time to cut over to the new server, you will un-comment these lines.#database.type=SQLServer #database.driver=com.microsoft.sqlserver.jdbc.SQLServerDriver #database.url=jdbc:sqlserver://dbsrv01:1433;databaseName=Papercut #database.username=PaperCut_DB #database.password=1234 -
Restart the new PaperCut server or Stop and Start the PaperCut Application server service for the change to take effect.
-
Test and confirm: The simplest way to check if this was successful is to successfully log in to your new PaperCut server using the same admin password as the old PaperCut server.
Be aware that if your organization has installed a custom SSL certificate specified in the server.properties file, you might need to follow the steps in the next section to move the KeyStore file before the new server can start.
4. Migrate other PaperCut features and components as needed
Some of these next steps will be optional depending on what PaperCut features your organization uses.
Custom certificate and KeyStore
If your organization still uses the default self-signed certificate, you can skip this section.
If your organization installed a custom SSL certificate on the PaperCut server, you need to copy the Keystore file from your old PaperCut server to the new one.
On the old PaperCut server, navigate to where the Keystore is saved in the PaperCut application directory. This is usually
[application-directory]/server/custom.
(On a 64-bit Windows server running PaperCut MF it isC:\Program Files\PaperCut MF\server\custom.)
The exact KeyStore path and file name is defined in theserver.propertiesfile on the line#server.ssl.keystore=custom/my-ssl-keystore.Copy the KeyStore file to the same folder on the new server.
Restart the new PaperCut server or Stop and Start the PaperCut Application Server service for the change to take effect.
Test and confirm: To verify the new certificate works, open a web browser on the new server, navigate to https://localhost:9192, then check the certificate details in your browser.
Payment Gateways
If your organization doesn't use Payment Gateways, you can skip this section.
If your organization has configured PaperCut to use a Payment Gateway like PayPal or Authorize.net, make sure to reinstall the Payment Gateway module and copy the configuration files.
Download the Payment Gateway Module.
Install it on the new PaperCut server.
Copy any files located in
[application-directory]/server/lib-ext/from the old server to the new one.
(On a 64-bit Windows server running PaperCut MF this isC:\Program Files\PaperCut MF\server\lib-ext.)Restart the new PaperCut server, or Stop and Start the PaperCut Application Server service.
Test and confirm: Your organization probably has port forwarding rules or IP address whitelisting in place to ensure traffic from the Payment Gateway provider goes to your old PaperCut server. You’ll have to amend these rules to work with the new server. The best time to test and confirm that Payment Gateway transactions succeed is after completing the Cutover (described below). Consider doing a test cutover outside normal business hours. In other words:
Complete the server migration or name change.
Verify your network security implementation has the new PaperCut server addresses.
Try adding credit to a user account.
Refer to the Quick Start Guide for your type of Payment Gateway if you have any follow-up questions.
Mobility Print
If Mobility Print is not installed or runs on a separate server like a Secondary Server, you can skip this section.
If PaperCut Mobility Print is installed on the same server as PaperCut NG/MF, there are a few steps you need to take to migrate the application and your settings to the new server.
Download PaperCut Mobility Print.
Install it on the new PaperCut server.
Copy and overwrite the entire contents of the folder
[application-directory]/data/from the old server to the new server. This folder contains configuration files that define several important details, including whether specific printers are enabled or disabled, whether per-job authentication is enabled, rules to restrict printer access by subnet, and an authentication token. (On a 64-bit Windows server running PaperCut Mobility Print this isC:\Program Files (x86)\PaperCut Mobility Print\data\).Restart the new PaperCut server or Stop and Start the PaperCut Mobility Print Server service for the change to take effect.
Test and confirm: Log in to the web interface of Mobility Print on the new PaperCut server, ensure the printers are published, and the right discovery method (such as mDNS) is selected.
Print Archiving
If your organization does not Archive Print jobs, you can skip this section.
If your organization uses Print Archiving to retain a history of printed jobs, you might want to migrate your Print Archive.
Follow the instructions in the manual to install GhostTrap and enable Print Archiving per the instructions in the manual.
The next steps depend on whether your Print Archive is in the default location or you have created a Central Archive.
Default location: copy the files from the Archive directory,
[application-directory]/server/data/archiveto the same directory on the new server. (On a 64-bit Windows server running PaperCut MF this would beC:\Program Files\PaperCut MF\server\data\archive.)Central Archive: (on a networked file share for example) follow the instructions in the manual so that the new server is configured to use the Central Archive.
Test and confirm: Try printing a job from your new print server. Confirm that a thumbnail for the job appears in the PaperCut MF Job Log.
Web Print
With a standard Web Print setup you shouldn’t need to do anything during the migration. However, if your organization has Web Print Sandbox servers, you need to disable the Web Print service on the main PaperCut server.
You should also be aware that Web Print Sandboxes will also communicate with the PaperCut server using a file share called the Hot Folder. If your organization moved the Hot Folder to a custom location, you may need to consult the manual section for the Web Print Sandbox. Confirm the share is set up with the proper permissions and that the Web Print Sandbox user is mapped to this file share.
Open services.msc by pressing Windows key + R**, then type** services.msc’ and press the Enter key.
Right-click on the PaperCut Web Print Server service, choose Properties, then set the Startup type to Disabled.
Make sure that the Web Print Hot Folder is correctly mapped for the logged in Web Print Sandbox user.
On the Web Print Sandbox, stop and then restart the Sandbox application.
Test and confirm: Try printing a job through Web Print. Confirm that the job prints out successfully.
Print Deploy
If you are using Print Deploy to deploy print queues in your organization, follow the steps below.
In the original server, navigate to the Print Deploy directory
Windows:
[application-directory]/providers/print-deploy/winmacOS:
[application-directory]/providers/print-deploy/macLinux:
[application-directory]/providers/print-deploy/linux
Copy the entirety of the data folder.
Go to the new server you’re migrating to and stop the Print Deploy server.
Paste the data folder onto the same directory of Print Deploy in the new server, that is,
[application-directory]/providers/print-deploy/<os>. Overwrite any existing files.Test and confirm:
In the new server, log in to the PaperCut NG/MF page as an admin.
Navigate to the Print Deploy tab of the Enable Printing section.
Check that you can see your old zones and print queues in the interface.
On a client’s machine, check that the Print Deploy client is now pointing to the new address of the server by opening
[PaperCut Print Deploy Client app directory]/data/config/client.conf.toml. The key namedServerBaseURLshould have been set to the new server’s hostname. If not, uninstall all the clients first and redeploy.You should also be aware that Web Print Sandboxes will also communicate with the PaperCut server using a file share called the Hot Folder. If your organization moved the Hot Folder to a custom location, you may need to consult the manual section for the Web Print Sandbox. Confirm the share is set up with the proper permissions and that the Web Print Sandbox user is mapped to this file share.
Open services.msc by pressing Windows key + R**, then type** services.msc’ and press the Enter key.
Right-click on the PaperCut Web Print Server service, choose Properties, then set the Startup type to Disabled.
Make sure that the Web Print Hot Folder is correctly mapped for the logged in Web Print Sandbox user.
On the Web Print Sandbox, stop and then restart the Sandbox application.
Test and confirm: Try printing a job through Web Print. Confirm that the job prints out successfully.
Job Ticketing
If you are using Job Ticketing within your organization, please follow the steps below:
Stop the Job Ticketing service on the original server
Navigate to the Job Ticketing Directory:
[Application-Directory]/job-ticketing.It’s possible that the database for Job Ticketing has been moved to a different directory. If this is the case, then the DB needs to be located and copied over.
Copy the entirety of the
dataandconfigfolders.Ensure that Job Ticketing is installed on the new server and stop the service.
Paste the
dataandconfigfolders into the[Application-Directory]/job-ticketingon the new server, overwriting the existing directories.If in step 2 your database was in a different directory, the new server’s
application.propertiesfile may need to be updated if the if you choose to relocate the DB again.Start the Job Ticketing service on the new server.
Test and confirm: Navigate to the Job Ticketing interface and check that all the expected print rooms are present, and that all products and orders have been transferred over.
The security.properties file
In rare cases, you might want to migrated one additional configuration file — the security.properties file found in [application-directory]/server. The majority of PaperCut NG and MF customers do not need to move this configuration file for security-sensitive features. Primarily, customers who use Print Scripting, Device Scripting, or other advanced scripting features might need to review these settings and move the file to the new server. For more information on this configuration file, see Security for advanced features.
Fast Release network card readers
If you are using Fast Release card readers, ensure they are deleted from the old server before adding them to the new server. Simply disabling the fast release station on the old server is insufficient, as the service may continue to communicate with the hardware. Removing the entry entirely prevents the two servers from 'fighting' for control of the reader during the migration.
5. Inform users of the scheduled downtime for the migration
Let your users know before you begin that normal printing services will be unavailable during the scheduled period. Tell them that any jobs currently in a Hold/Release or Find-Me printing queue will not be transitioned across to the new installation, so they should release their jobs prior to the planned outage.
6. Deactivate the installation on your old server to release entitlements
You need to release the entitlements (for example device entitlements, Print Deploy Zones etc.) from your old server, so you can use them on your new server:
- Log in to the PaperCut NG/MF admin web interface on your old server.
- Go to About > Registration > License Info, then click Deactivate Installation.
This releases the entitlements from this server. For more information, see Managing entitlements (Releasing all entitlements from an Application server).
7. Migrate the database to the new PaperCut server
Last chance to remind you to back up your database, before you proceed further!
The exact steps will vary depending on whether PaperCut NG/MF is configured to use the default built-in Derby database, or an external database (like SQL Server, PostgreSQL, Oracle).
To determine which type of database your PaperCut server runs, log in to the admin web interface as an administrator. then go to the About tab. The database type is listed under System info.
Next, depending on your configuration follow the steps for an Internal database migration or External database migration below.
Internal database migration
Follow these instructions if your PaperCut environment uses an internal database (default configuration).
- Follow the steps on Manage system backups to export the database from the old server.
Note: This requires some knowledge of command line tools. Refer to the video at the bottom of this page to see how this process is done. - Stop the PaperCut services on the old server.
- Follow the steps on this page of the manual to import the backup into the new server.
- Test and confirm: Log into the web interface of your PaperCut server and check in the Job Log to ensure print history carried over successfully.
External database migration
Follow these instructions if your PaperCut environment uses an external database.
- Stop the PaperCut services on the old server.
- Stop the PaperCut services on the new server.
- On the new server open the
server.propertiesfile in a plain text editor like Notepad. - Remove the # symbol from the beginning of the lines with the database connection details.
- Save the file.
- Start the PaperCut Primary Application Server service on the new server for the change to take effect.
- Test and confirm: Log in to the PaperCut NG/MF admin web interface of your PaperCut server. Check the Job Log and ensure print history carried over successfully.
8. Apply your license or subscription to the new server
The steps differ depending on whether you’re using a perpetual license (this is the default if you’re using version 23.x or earlier) or a subscription.
If you applied your license/entitlements through a license file (perpetual customer license)
You need to get your new server licensed to run PaperCut NG/MF by copying the license file from the old server and installing it on the new one.
If you have the original license file handy, re-upload it.
- On version 24.0 or later, go to About > Registration > Register.
- On version 23.0 or earlier, go to About > Register.
For more information See Installing a license .
If you don’t have the original file:
- Log in to the old server running PaperCut.
- Navigate to the server folder in where PaperCut is installed:
[application-directory]/server/.
(On a 64-bit Windows server running PaperCut MF this isC:\Program Files\PaperCut MF\server\.) - Copy the file named
application.licenseto the same location on the new server. - Log in to the new server’s admin web interface as administrator.
- On version 24.0 or later, go to About > Registration.
On version 23.0 or earlier, go to About. - Next to Register, choose to install the license file that was copied previously.
- Click Install License.
- Test and confirm: Verify your license information is correctly listed in the About page.
If you applied your PaperCut MF subscription through an activation key
- In this case you need to re-apply your activation key on the new server via About > Registration > Register. For more information, see Activating/renewing a subscription .
- Test and confirm: Verify your license or subscription information is correctly listed in the About page.
9. Power off the old server, or disable the network interface
Now that the data has been migrated successfully, you need to make sure that users don’t keep printing to your old PaperCut server. Power off the old server or disconnect it from the network.
What if you’re not ready to power off the old server? Consider uninstalling PaperCut NG/MF and converting it to a PaperCut Secondary Server. This way, if users are still printing through the old print server jobs will continue to be tracked by PaperCut.
Test and confirm: After disabling the network interface of your PaperCut server, try pinging this server from a separate workstation to be certain it is offline.
10. Post migration considerations
We recommend keeping the old PaperCut NG/MF server for a few weeks even after a successful migration. If it turns out later that something wasn’t moved over correctly then it may be handy to keep this server for reference.
We’ve also heard of people keeping their old print server around but they turn it into a PaperCut secondary server, so that any clients still printing through the old print server will continue to have their jobs tracked. We love this idea, but think it only works when the old server gets to keep it’s IP address and hostname and the new server gets a new one. So, we’ll leave it up to you to decide if this is the right strategy for your environment.
Test and confirm: After the data had been imported and the Application Server restarted, check that all data has been migrated across correctly and the system works as expected. For a checklist of testing steps, have a look at our Post Upgrade Test Plan.
Further assistance
Need help? Let us know. We take pride in our documentation and want to make sure that it’s helping you to do your job. Feel free to leave a comment below or visit our Support Portal for further assistance.
Category: How-to Articles
Subcategory: Installing, Uninstalling and Migrating
Keywords: migrate, migration, upgrade, move, moving to a new server, changing servers, transfer
Comments