
Use Advanced Scanning to Lookup user’s email address from PaperCut user list
THE PAGE APPLIES TO:
Last updated January 6, 2026
People who scan often need to send the document to another person instead of themselves. With the release of PaperCut MF’s Advanced Scanning , it’s now possible to let users search for email address already within PaperCut at the panel of the copier.
This article gives you simple, step-by-step instructions on how to use PaperCut MF’s Advanced Integrated Scanning feature to create a “Lookup email address using Advanced Scanning” button.
This setup lets users type the full, or part of a specific email address they need directly on the copier screen every time they scan, for PaperCut to search its users list to return any matching email address to use as the “To” address.
Let users Lookup an email address:
-
Log into the PaperCut MF admin interface.
-
Navigate to Devices, select Scan Actions, and click Create new scan action.
-
For the type Type of scan action, leave as Email.
-
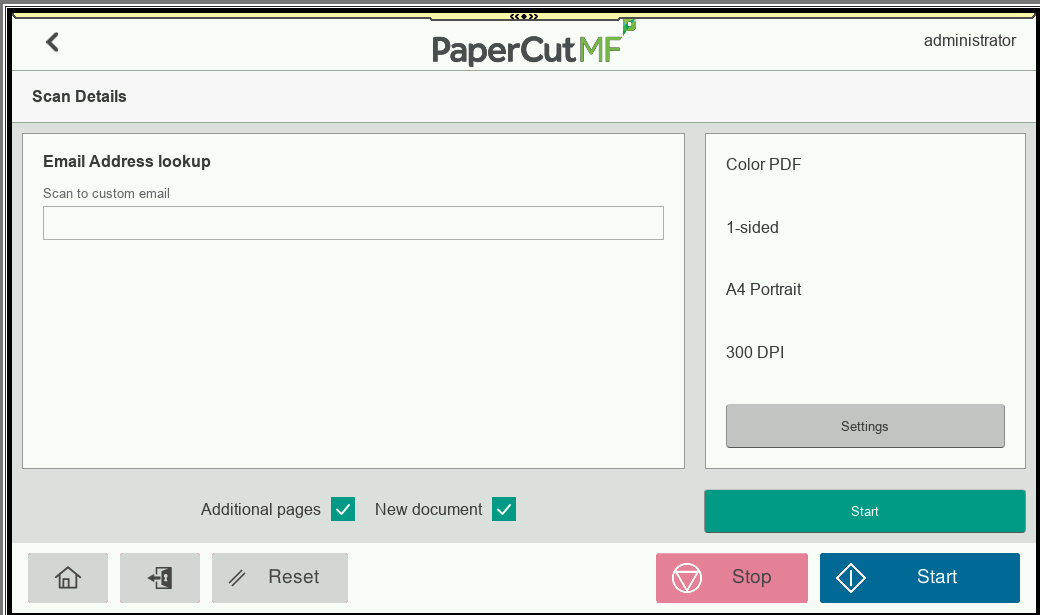
Set the Label to a descriptive label users will see on the MFD, such as “Lookup email address”.
-
Under the Metadata section, Choose the Advanced tab to open the detailed configuration options
-
Fill out the User Fields. This section creates the text input box for the user on the device screen.
-
ID:
CustomEmail -
Label:
Scan to a custom email -
Field Type:
User Lookup -
Placeholder:
Leave Blank -
User Lookup:
All -
Email to:
{{fields.customemail.email}} -
Filename:
As required or leave as default -
Email Subject:
As required or leave as default -
Email from:
{{user.email}} or set email address if required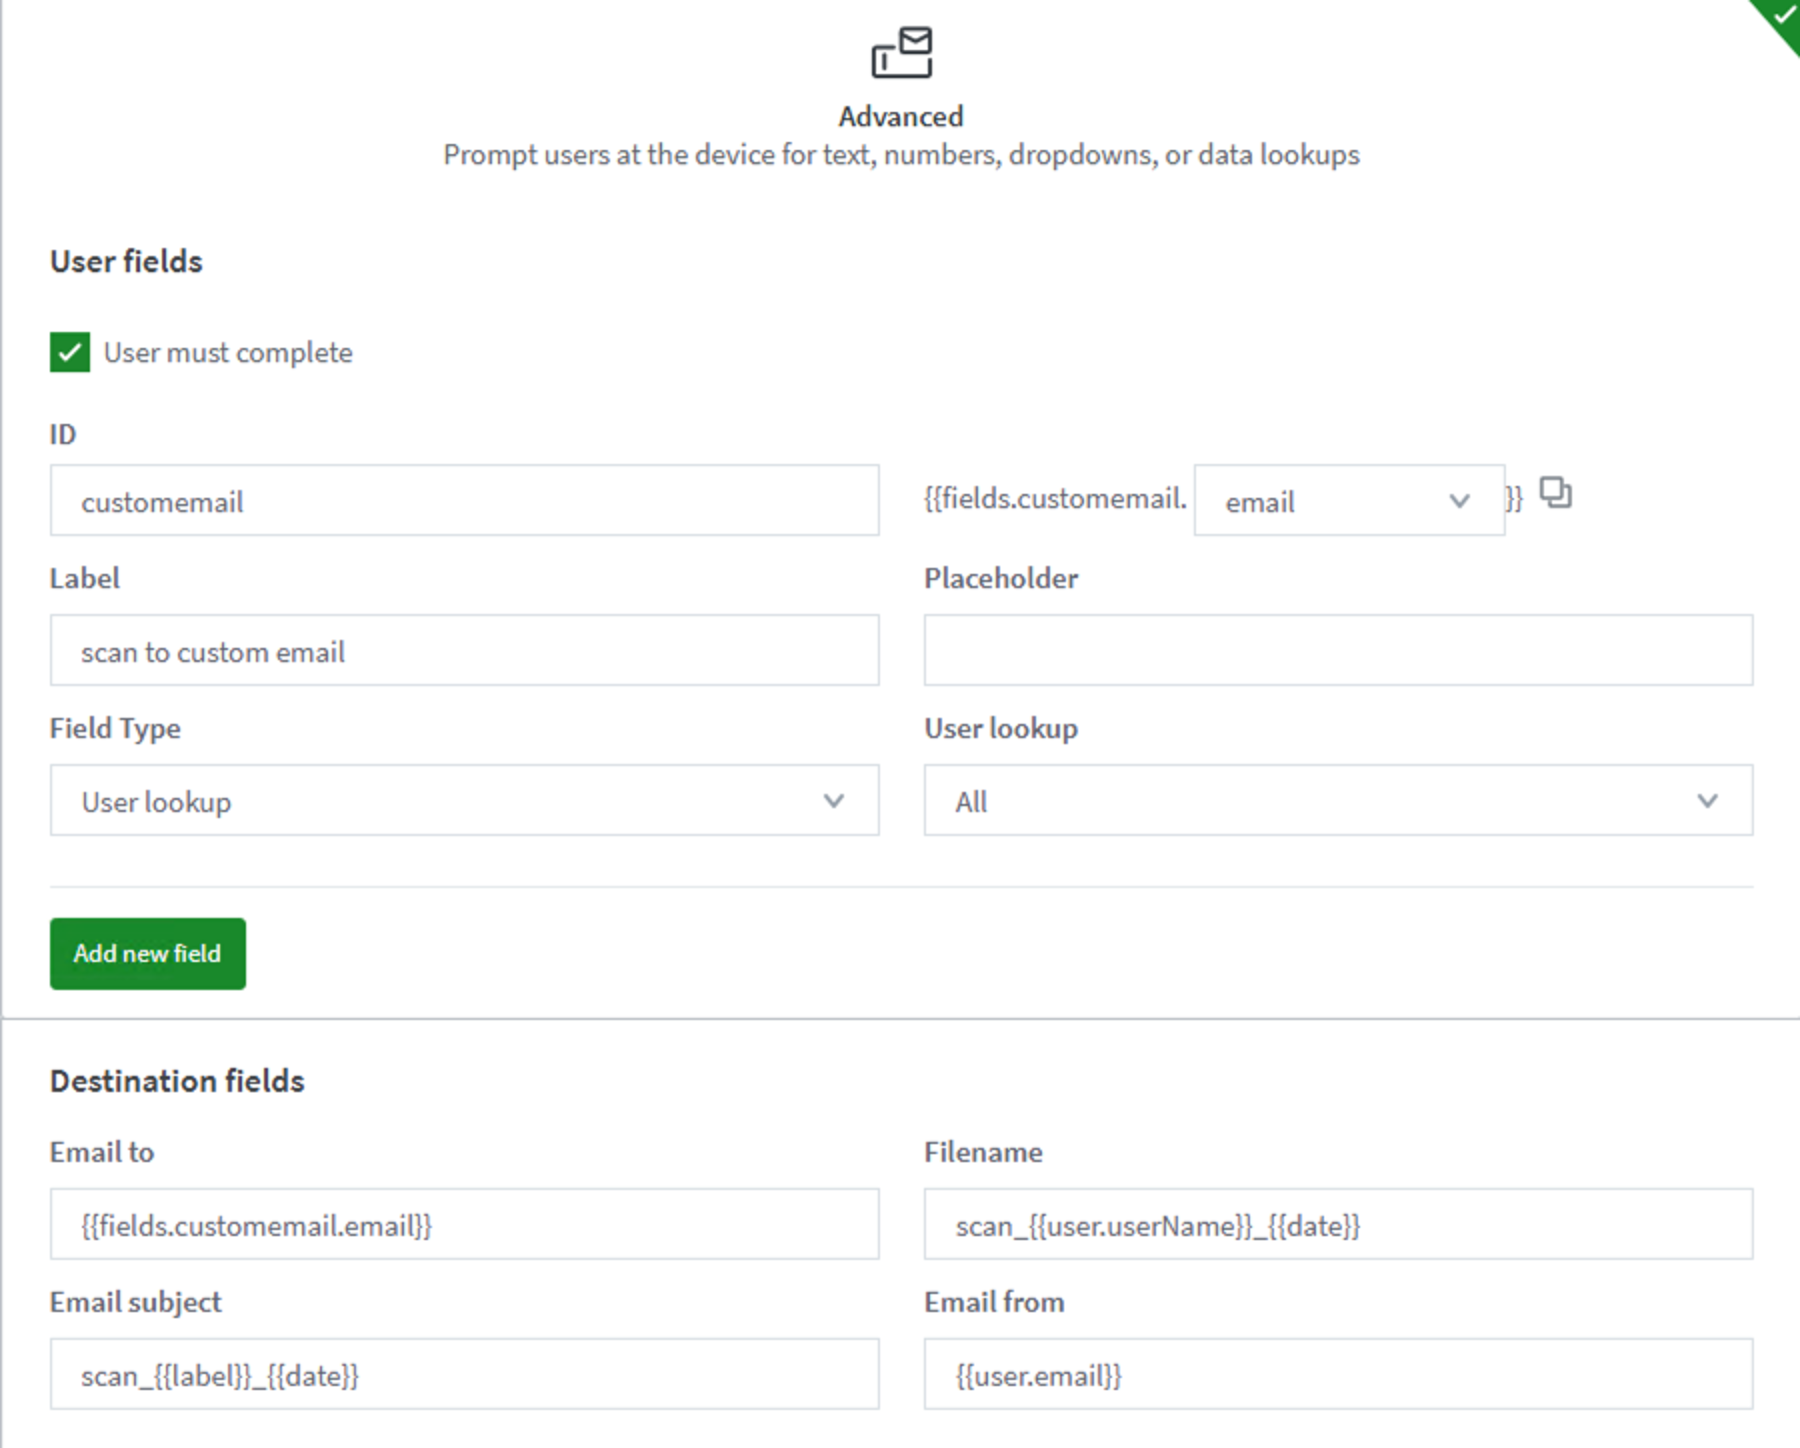
-
-
Scroll to the bottom and click Save & configure access.
-
Follow the steps on screen to assign the scan action to a group as needed.
-
Lastly, log onto a copier running PaperCut MF as a user and confirm the scan works as expected.
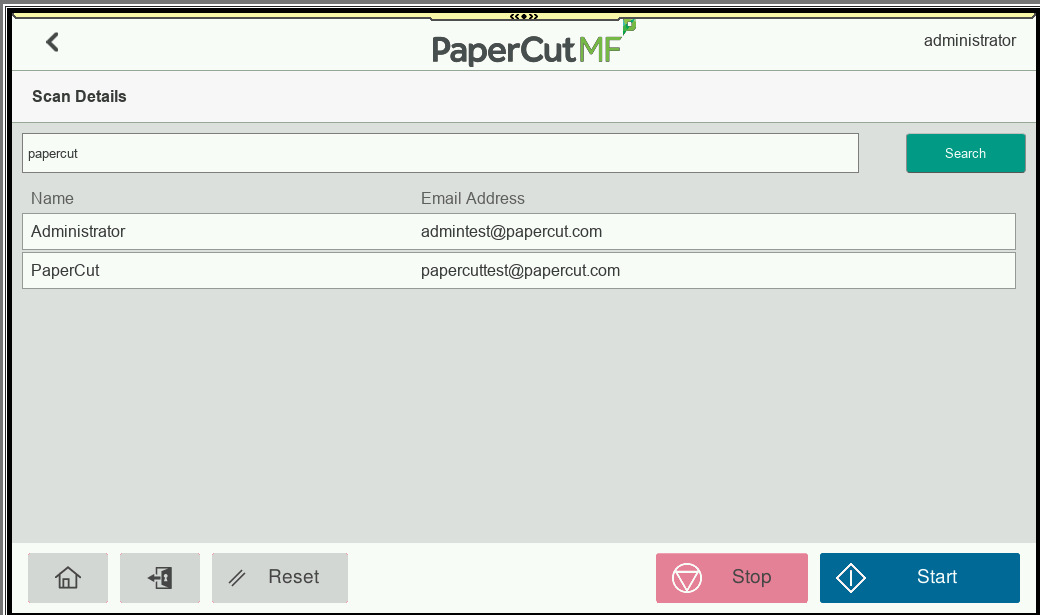
Now when you log into the device and go to the new scan action you will be able to enter part of an email address and the lookup will display all matching emails available to select (if you don’t see an address you expect to, please make sure the user has been imported from the sync source and has the address within the user details in PaperCut).
Category: How-to Articles
Subcategory: Integrated Scanning
Comments