
Paper jams, toner problems, and print quality issues always occur. Larger organizations require a policy to address these situations and under what conditions a print job can be refunded. The assessment to give a refund or not is subjective and needs to be managed by responsible administrators. To streamline and partially automate the process PaperCut NG/MF provides a browser based refund management process.
Highlights include:
-
Users can request refunds via a simple form and track their status.
-
Administrators can quickly approve/deny requests with one click.
-
Administrators can be alerted via email when requests are pending.
-
Issue partial and manual refunds.
Enabling end user refunds
Users request refunds via the end user web pages. This feature is enabled as follows:
-
Click the Options tab.
The General page is displayed. -
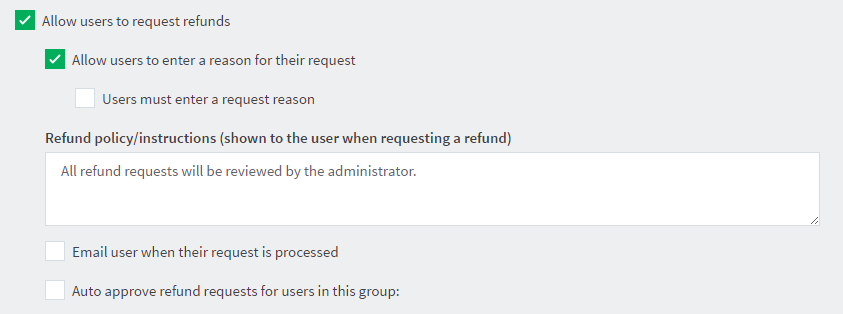
In the User Features area, select the Allow users to request refunds check box.
-
If you want users to enter a reason for the refund request:
-
Select the Allow users to enter a reason for their request check box. You might want to disable this feature to prevent users writing inappropriate comments.
-
If you want to force a user to enter a request reason, select the Users must enter a request reason check box.
-
-
In Refund policy/instructions, enter your formal refund policy details. This text can also include basic HTML markup, such as a link to an external policy page.
-
If you want an email to be sent to the user requesting the refund:
-
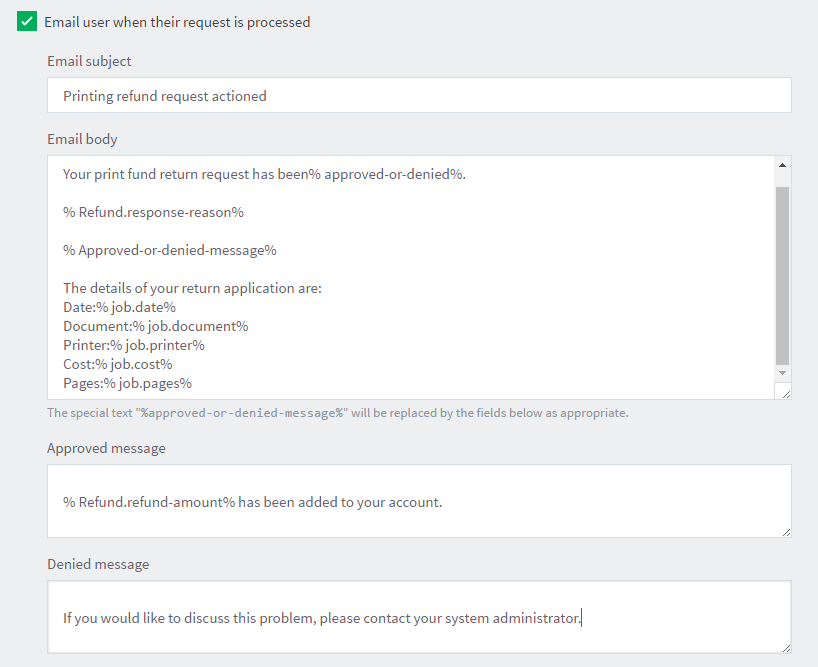
Select the Email user when their request is processed check box.
-
Complete the Email subject and Email body fields. You can use fields in the email subject and body. For more information about the available fields, see User notification fields.
-
Complete the Approved message and Denied message. These are used to replace the field
%approved-or-denied-message%in the email body. -
Define an SMTP server so that emails can be sent (see Configure email).
-
-
If you want to automatically approve refunds for all users in a group, select the Auto approve refund requests for users in this group check box; then select the group.
-
Click Apply.
User notification fields
Other than the %approved-or-denied-message% marker, you can use the following markers in any of the above four fields:
Fields available printer refund request user notifications
| Field | Description |
|---|---|
| %job.copies% | The number of copies in the print job. |
| %job.cost% | The original cost of the print job. |
| %job.date% | The date the original print job was sent. |
| %job.document% | The document name of the print job. |
| %job.pages% | The number of pages in the print job. |
| %job.paper-size% | The paper size of the print job. |
| %job.printer% | The printer the print job was sent to. |
| %refund.refund-amount% | The amount that was refunded. |
| %refund.request-amount% | The refund amount requested by the user. |
| %refund.request-date% | The date the user made the refund request. |
| %refund.request-reason% | The reason the user gave for the refund request. |
| %refund.request-username% | The username of the user making the refund request. |
| %refund.response-date% | The date the refund was actioned. |
| %refund.response-reason% | The reason the admin user gave for approving/denying the refund request. |
| %refund.response-username% | The username of the administrator who actioned the refund request. |
| %refund.status% | The status of the refund request as it is displayed in the Job Log. |
Managing refunds
The refund process is best described in the form of an example.
How users request refunds
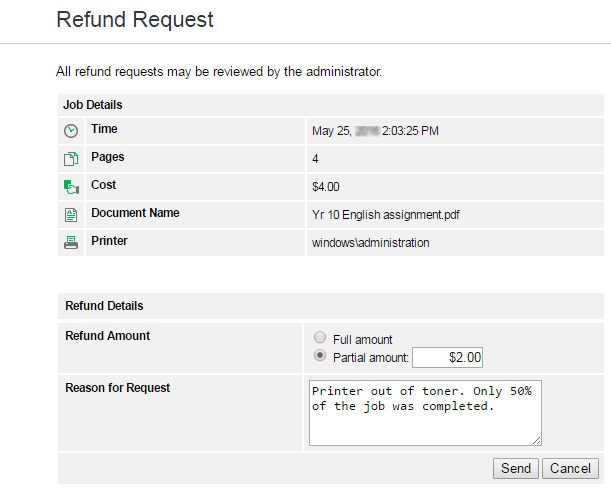
Debbie’s print job failed to fully print due to a printer jam, forcing her to reprint the remainder of the job on another printer. She has requested a refund of approx. 50% of her job cost for the first failed job. Debbie would place the request as follows:
-
Log in to the user web interface at
http://[server_name]:9191/userusing his network username and password. -
Locate the first, failed print job on the Recent Print Jobs page.
-
Click the [Request Refund] link.
![A [Request Refund] link on the Recent Print Jobs](https://cdn1.papercut.com/web/img/support/resources/manuals/ng-mf/user-web-recent-print-jobs-refunds.png)
-
Enter a reason.
-
Click Send.
The administrator approval process
Jenny is an IT administrator at John’s school. She has just received an email indicating that refund requests are pending review. To approve Debbie’s request Jenny would:
-
Select Printers > Refunds.
The User Refund Requests page is displayed. -
Locate Debbie’s request and review.
-
Click the Approve link.
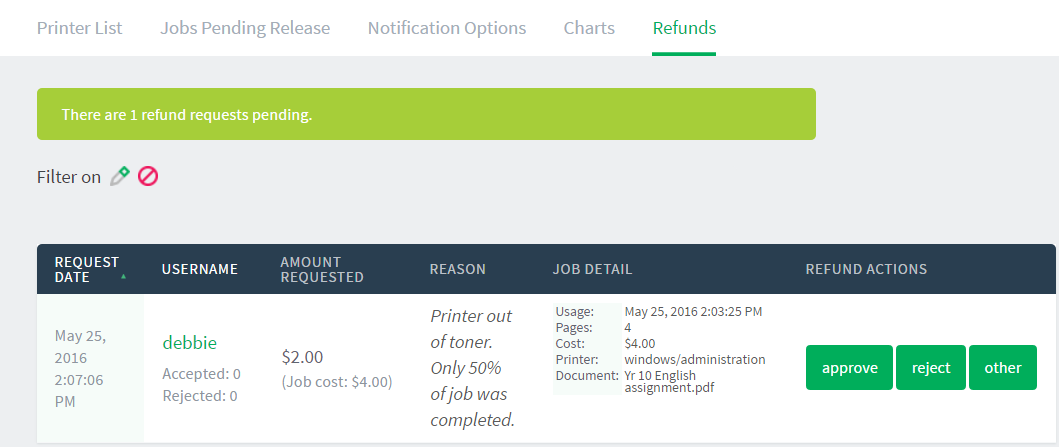
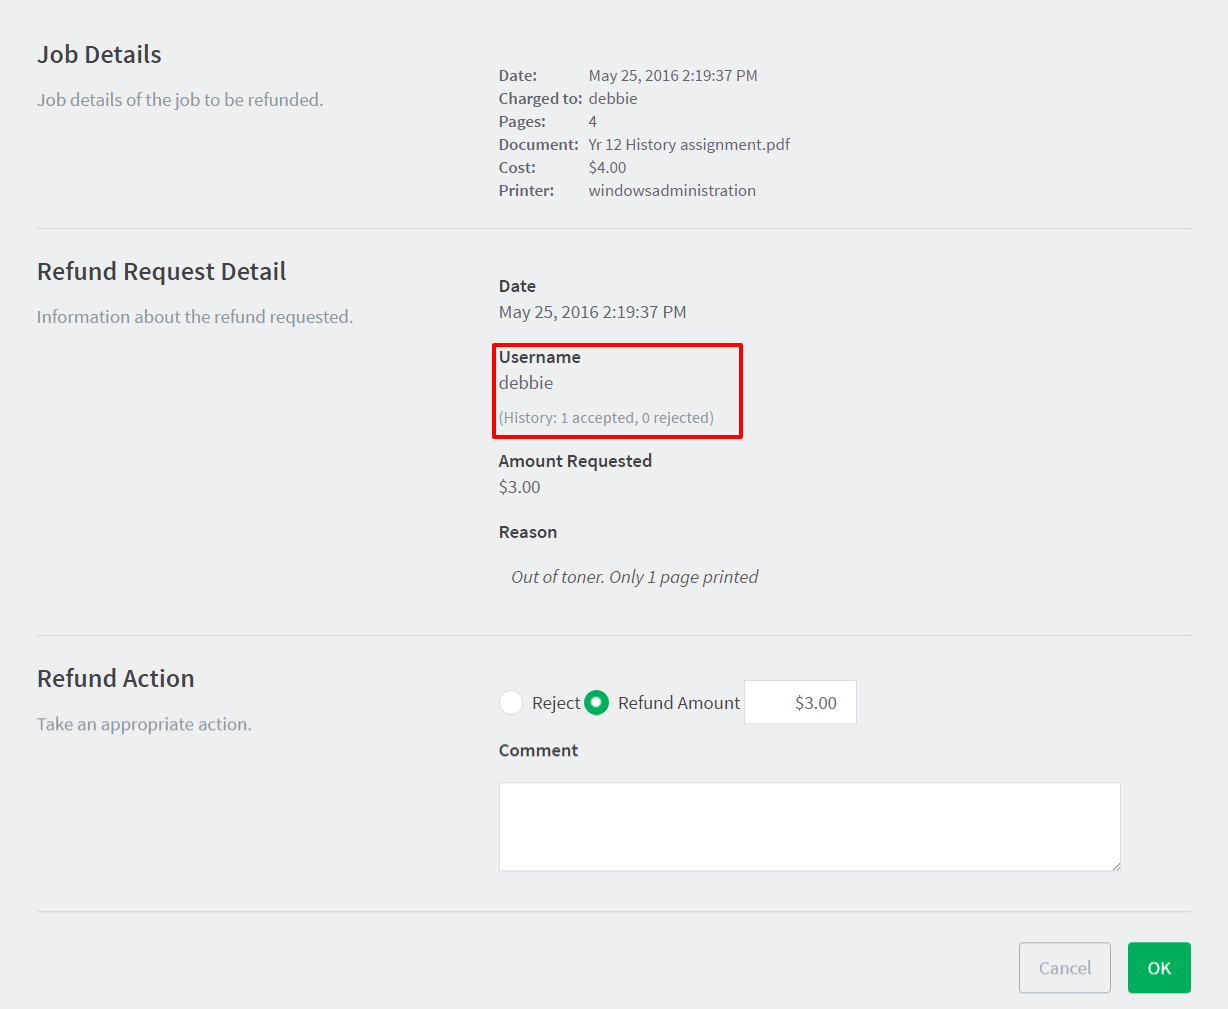
Jenny could have denied the refund request by clicking [reject] link. Clicking the [other] option would have allowed Jenny to review Debbie’s previous requests for refunds, edit the requested amount and write a comment.
Admin notifications
Administrators can receive regular emails about pending refund requests. To enable email notifications:
-
Click Options > Notifications.
The Notifications page is displayed. -
In the System Notifications area, select the Pending refund requests check box.
-
Click Apply.
For more information, see Pending refund request notifications.
Emails can be delivered hourly or daily. By default daily messages are delivered at 7 a.m. Configure the hour of the day via the config key notify.pending-refund-requests.daily-hour-of-day. For more information about changing config keys, see Using the Advanced Config Editor.
Comments