
Not all users have local admin rights that allow them to install PaperCut’s edge node, print client, and the “PaperCut Printer” on their device.
For those users, to deploy PaperCut Hive to their devices you can use Microsoft Intune, Microsoft Endpoint Configuration Manager (SCCM), or any other tool that you use to deploy software or manage your devices.
Many larger organizations use software such as Microsoft Intune, SCCM/Endpoint Manager, or Group Policy to control their end-user devices and deploy software to
them.
We already have separate instructions for some of these deployment tools, so if you use one of the tools listed below, just click the link (or the heading in the left menu) to get started:
![]() Deploy using Microsoft Intune (Windows)
Deploy using Microsoft Intune (Windows)
![]() Deploy using Microsoft Intune (macOS)
Deploy using Microsoft Intune (macOS)
![]() Deploy using Microsoft Endpoint Configuration Manager (SCCM)
Deploy using Microsoft Endpoint Configuration Manager (SCCM)
![]() Deploy using JumpCloud (Windows)
Deploy using JumpCloud (Windows)
![]() Deploy using JumpCloud (macOS)
Deploy using JumpCloud (macOS)
![]() Deploy using Group Policy (Windows)
Deploy using Group Policy (Windows)
![]() Deploy using ManageEngine Endpoint Central (Windows)
Deploy using ManageEngine Endpoint Central (Windows)
![]() Deploy using Google Admin Console (ChromeOS)
Deploy using Google Admin Console (ChromeOS)
Windows
What if your MDM (mobile device management) tool is not included in this list? What if you’re up for a bit of scripting? We’re so glad you asked!
The Windows client has two parts
First up, let’s talk about the two components that need to be deployed.
The edge node (client)
The edge node is responsible for handling print jobs throughout their life. It takes care of analyzing, replicating, and getting jobs to the printer, alongside a wide range of other tasks.
Installing the edge node requires elevated privileges to create the services and the PaperCut Printer print queue. The services are installed under: C:\Program Files\PaperCut Hive.
The edge node service runs in the machine context and starts at Windows OS startup. You must install the edge node first, before installing the print client.
The print client
The print client is responsible for capturing jobs sent to the PaperCut Printer and submitting them into your Edge Mesh, or specifically one particular edge node.
The print client is installed in the user context and resides in the C:\Users\<username>]\AppData\local\Programs\PaperCut Hive directory.
Install the edge node (client)
- Find the installer in the PaperCut Hive admin console at Edge Mesh > Add edge nodes > Manually deploy edge nodes.
- Click Download for Windows. After the file has downloaded, it needs to be hosted in a cloud storage location that can be accessed by your script or device management tool.
- Copy the command and either write a custom script or use your device management tool to run the command and install the edge node on users’ devices.
Note: that the command includes a system key to ensure all installations are linked back to your PaperCut Hive tenancy.
Install the print client — summary steps
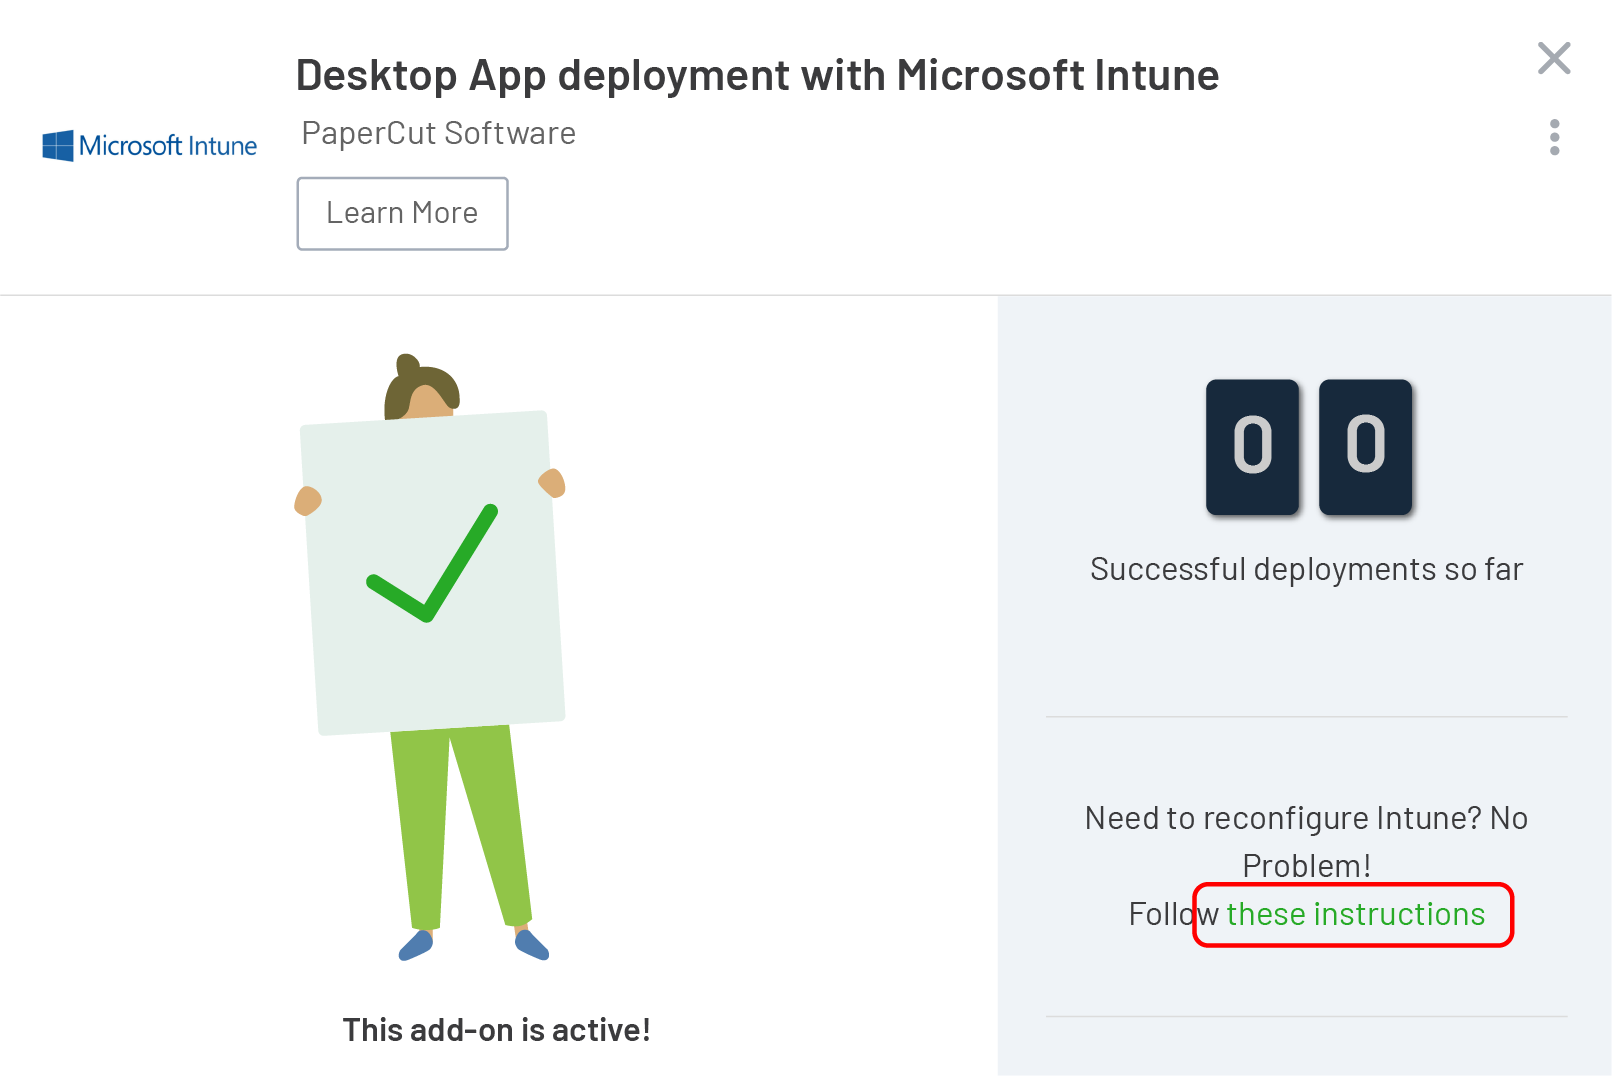
The installation command for the print client is part of the Intune add-on. It is unique to your organization. (Detailed steps are after this summary.)
- Go to Add-ons > Desktop App deployment with Microsoft Intune. The add-on’s side panel is displayed.
- Click Add > Follow these instructions > View set up process. The detailed setup process is displayed.
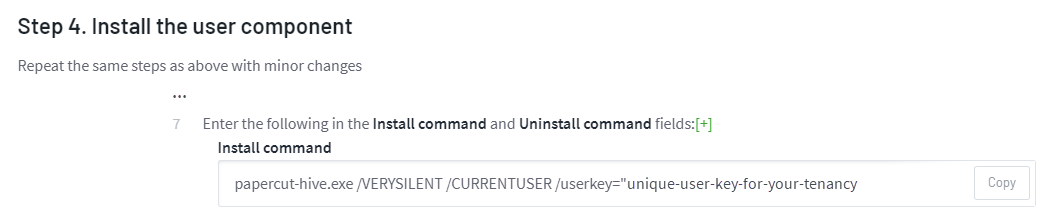
- Scroll down to Step 4. Install the user component, then go to step 7 and copy the install command. This command includes the unique user key for your tenancy.
- Copy the command and either write a custom script or use your device management tool to run the command and install the edge node on users’ devices.
Detailed steps to find the print client installation command in our Microsoft Intune add-on
From the PaperCut Hive and Pocket admin console, select Add-ons in the left menu.
Select the All Add-ons tab.
Locate the Desktop App deployment with Microsoft Intune card.
Click Learn More. Click Add to enable this add-on for your organization. The Review authorizations popup is displayed.

Select the I agree that: check box and click Agree.
Select these instructions to open the instructions and walk through the steps in your instance of Microsoft Intune.
Click View set up process.
Scroll down to Step 4. Install the user component, then go to step 7 and copy the install command. This command includes the unique user key.
Copy the command and either write a custom script or use your device management tool to run the command and install the edge node on users' devices.
macOS
Head over to bulk deployment instructions for macOS using Jamf.
ChromeOS
For managed ChromeOS devices, you pre-install the Google Chrome Extension on users’ computers ready for them to associate their identity token. The token is associated when the user clicks the Get Started link in their invitation email.
Note that users will not be able to submit print jobs until they have clicked Get Started.
Link for the Google App Store
Our PaperCut Pocket and PaperCut Hive extensions are not publicly listed in the Chrome store, so here are the links for you to copy and paste into the Google Admin console when installing for your users
PaperCut Pocket
App ID - ejbefnkdjpincjafmcpbbbgabheblnlc
https://chrome.google.com/webstore/detail/papercut-pocket-print-bet/ejbefnkdjpincjafmcpbbbgabheblnlc
PaperCut Hive
App ID - pdlopiakikhioinbeibaachakgdgllff
https://chrome.google.com/webstore/detail/papercut-hive-secure-prin/pdlopiakikhioinbeibaachakgdgllff
ChromeOS deployment instructions
For deployment instructions from the Google Admin Console, head over to PaperCut Hive and Pocket Deployment with Google Admin Console (ChromeOS).
Comments