
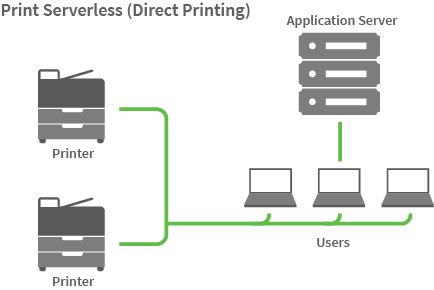
This topic describes how to use Print Deploy clone “direct print” queues. This is the term we use to describe a print queue on a user’s workstation that doesn’t use a print server. These steps will let users connect directly to printers using a proscribed driver, without the need for a print server.
One caveat is that this option does not support Print Archiving which is dependent on a print server. Another thing to keep in mind is that while it is possible to set up PaperCut’s Find-Me printing, this will look a little different than when a print server is used. For those steps, see Configuring Find-Me Printing without a print server (Optional) at the end of this page.
The high-level steps are:
- Set up the print queues on the reference computer
- Clone the print queue details into Print Deploy
- Connect print queues to a zone
Step 1: Set up the print queues on the reference computer
A reference computer is a Windows and/or Mac computer where you set up and test the print queues before deploying them to the users. It’s also where you set the default settings for print queues (for example, grayscale, 2-sided) and capabilities (for example, finishing options like stapling and hole punching). It should not be a print server.
Windows drivers often support multiple versions of Windows, for example, Windows 10 and Windows 8. PaperCut NG/MF automatically detects which versions of Windows the driver supports and displays them in its Admin web interface.
-
On the designated reference computer, install the network printers that you want to deploy to your users. In other words, pretend that you are setting up this computer for a user.
-
Configure the printer defaults for each queue.
- Windows: Printer Properties > Advanced > Printing Defaults
- Mac: via the CUPS Web Interface, available via:
http://localhost:631/orhttp://servername:631/
-
For advanced finishing options, configure the capabilities under:
- Printer Properties > General > Preferences
- Printer Properties > Advanced > Printing Defaults
- Some printer drivers may have settings available in the following tabs:
- Printer Properties > Device Settings (example: hp)
- Printer Properties > Configuration (example: fuji-xerox)
- Printer Properties > Optional Settings (example: epson)
-
Test that printing works on each print queue.
Step 2: Run the Cloner to import printers
- On the reference computer, log in to PaperCut NG/MF (which is installed and running elsewhere on the network).
- Select Enable Printing > Print Deploy. The Print Deploy page is displayed.
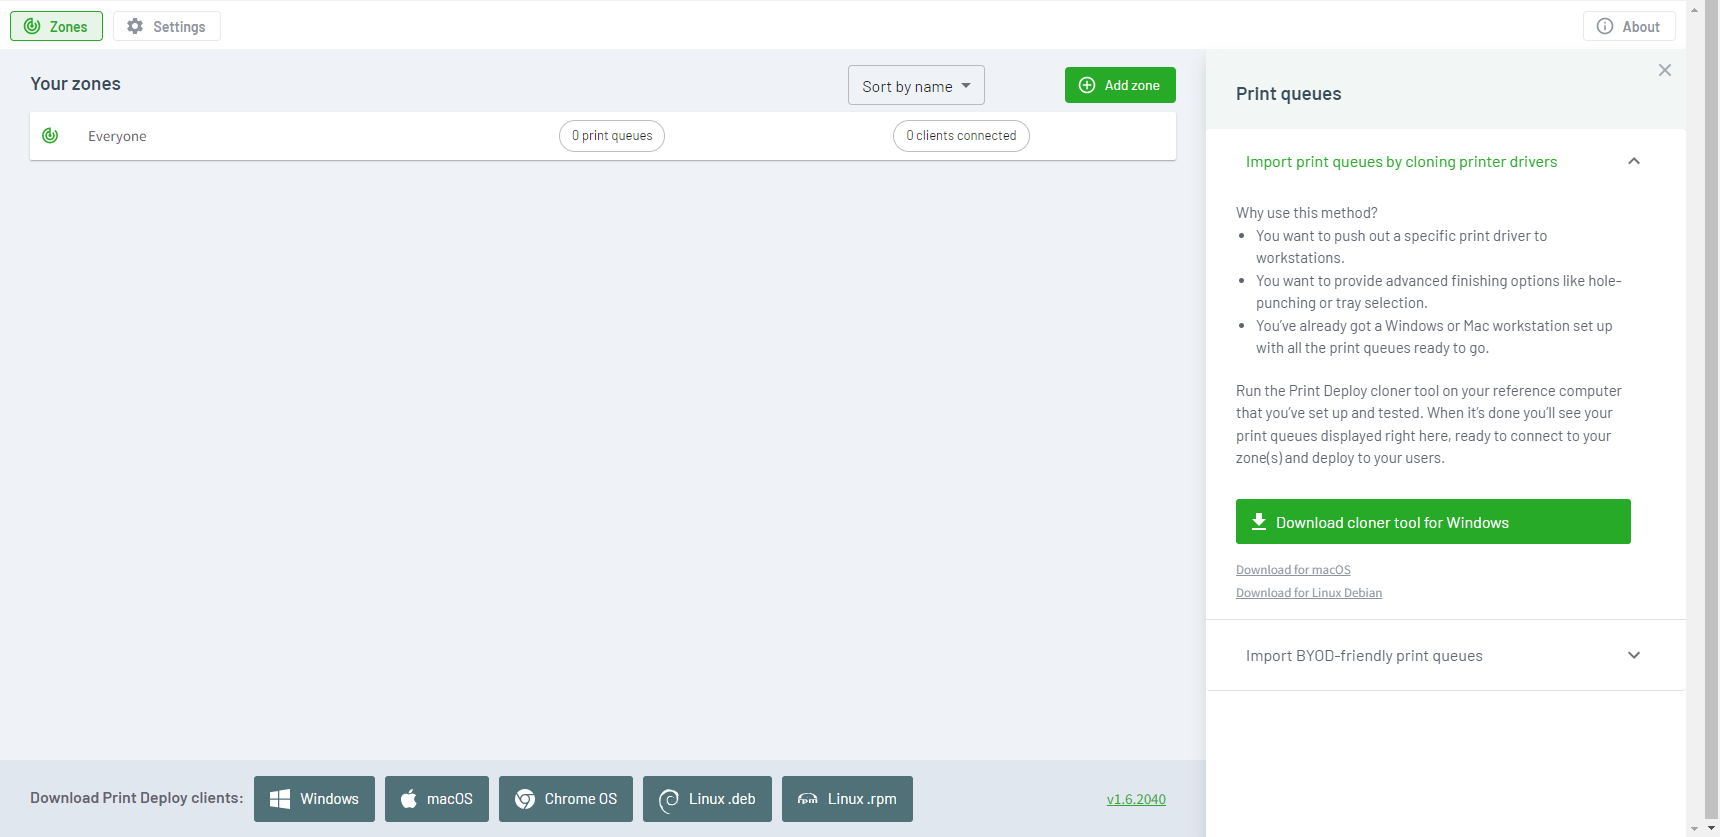
-
In the right panel, do one of the following:
- If this is the first time you’re using Print Deploy, click the Download cloner tool button for your operating system.
- If you already have print queues installed, click Add or update; then click the download button for your operating system
- The cloner tool (.exe, .dmg) is downloaded with the PaperCut NG/MF server address embedded into its filename.
-
On the Reference computer, run the cloner tool.
The cloner tool bundles all of the print queues, printer drivers, default settings (for example, grayscale, 2-sided) and capabilities (for example, finishing options like stapling and hole punching) and uploads the bundle automatically to the Application Server.
All of the print queues are displayed in the Print queues list at the right of the Print Deploy page.
Step 3: Set the queue type (macOS only)
For Windows print queues, Print Deploy automatically detects whether the queue type is Print via server or Print direct. However, Mac print queues default to Print via server, so if you have a print serverless (Direct Print) environment, you need to change the print queue type.
To change the print queue type:
- In the Admin web interface, click Enable Printing.
- In the Print queues list, click the three dots icon next to the print queue you want to update.
- In Type, select Print direct.
- Close the pop-up.
Configuring Find-Me Printing without a print server (Optional)
Find-Me printing enables users to print to a single print queue and securely release their print job at any printer.
When using Direct Print queues, you can deploy your Find-Me queue to all zones, so when users move between sites their Find-Me queue follow them around. That means that if they print a document at one site but don’t release it, they’ll still be able to release their print job when they arrive at a new site.
Before you start, we recommend that you create a test zone in the PaperCut Print Deploy page and limit it to connect to only one test computer in it.
- On your reference computer:
- Create a print queue called ‘Find-Me-Virtual’ (‘virtual’ is mandatory).
- Create the relevant print queues pointing to physical devices, for example ‘Room 201’, ‘Room 202, ‘Room 203’.
- Clone your reference computer.
- In the My zones drop-down list, select the appropriate zone in the Print Deploy page.
- Add the ‘Find-Me-Virtual’, ‘Room 201’, ‘Room 202’, ‘Room 203’ queues to the zone.
- Save and deploy.
- Confirm your test computer has received the appropriate queues. The test computer will ‘register’ the four deployed queues as direct print monitor queues. That is, jobs sent via these queues will be monitored and tracked locally.
- In the PaperCut Admin web interface left menu, click Printers; then select Find-Me-Virtual. It will be listed as a ‘Direct Print Queue’. The Printer Summary page is displayed. If you’re after more information about direct printing, take a look at Configuring Direct Printing.
- In the Job Redirection Settings section, select ‘Room 201’, ‘Room 202’, ‘Room 203’ as queues it can redirect to.
- In the Hold/Release Queue Settings section, select Enable hold/release queue.
- Click Apply. Here’s an example of a completed Printer List:
- Configure your release stations with your Find-Me-Virtual print queue as the source print queue, and the appropriate destination physical print queues where jobs will be redirected to. See Find-Me printing for more information.
- Test printing. Print to the Hold Release queue and release the job.
For more information, take a look at Configuring Direct Printing.
Comments