This topic describes how to import Mobility Print queues into Print Deploy quickly and simply with a generic print driver for basic finishing options.
This is great for environments that use Google Cloud Directory (Google Workspace) or Azure AD as a user directory, or if you manage users manually in PaperCut NG/MF, or even if you have a custom identity source.
PaperCut NG/MF does not rely on traditional Kerberos to authenticate computers that are not joined to a local domain. Instead, Mobility Print is used to authenticate users.
The high-level steps are:
Step 1: Prepare to import the queues
-
Ensure there is at least one working Mobility Print server connected to your PaperCut NG/MF server.
-
To configure the hostname or IP of the Mobility Print server where the Print Deploy client will be sending the print jobs to, set the Accessible IP on each Mobility Print server.
If this is not set, Print Deploy will use the IP address reported by the Mobility Print server.
Step 2: Run the import wizard
-
Log in to PaperCut MF.
-
Select Enable Printing > Print Deploy. The Print Deploy page is displayed.
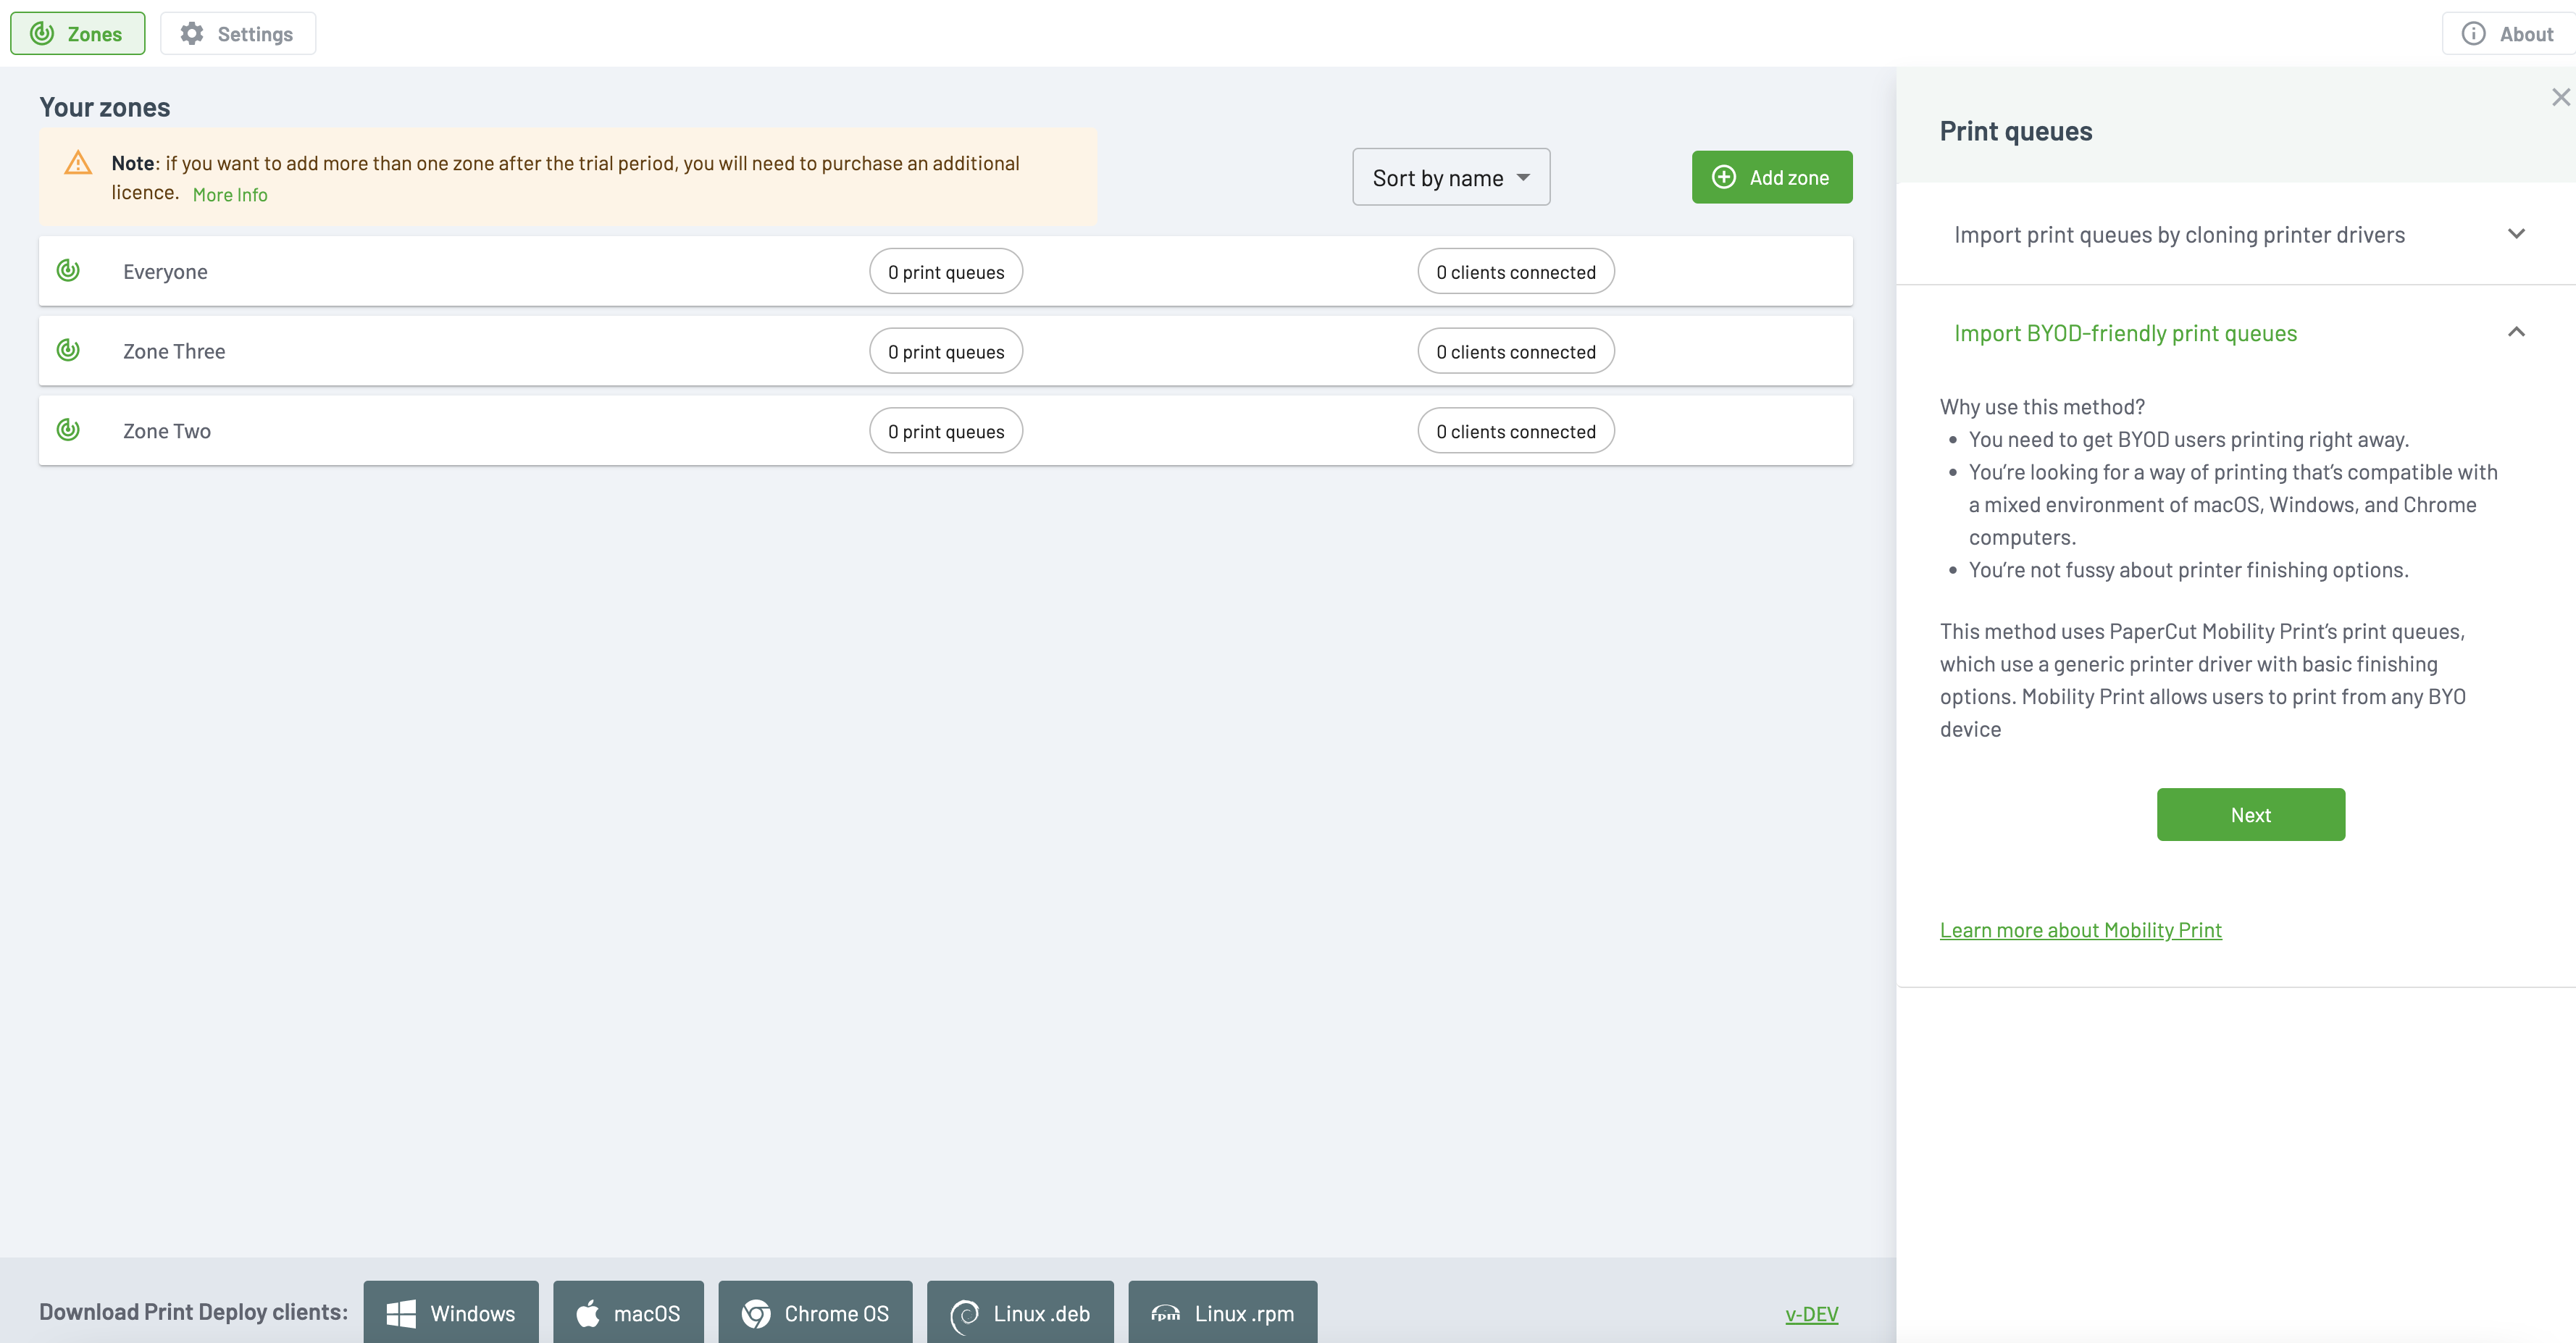
The Print Deploy import wizard interface.
-
In the right panel, do one of the following:
- If this is the first time you’re using Print Deploy, expand Import BYOD-friendly print queues, and then click on Next.
- If you have already installed print queues, click Add or update at the top of the print queue list (⊕), expand Import BYOD-friendly print queues, and then click on Next. The Before you begin panel is displayed reminding you of the preparation required to import Mobility Print queues.
-
Click Start Importing Mobility Print printers.
- The Mobility Print Import printers page will appear. It will list the Mobility Print servers you have connected to your PaperCut MF Application Server.
- Click on a server to view a list of Mobility Printers associated with it.
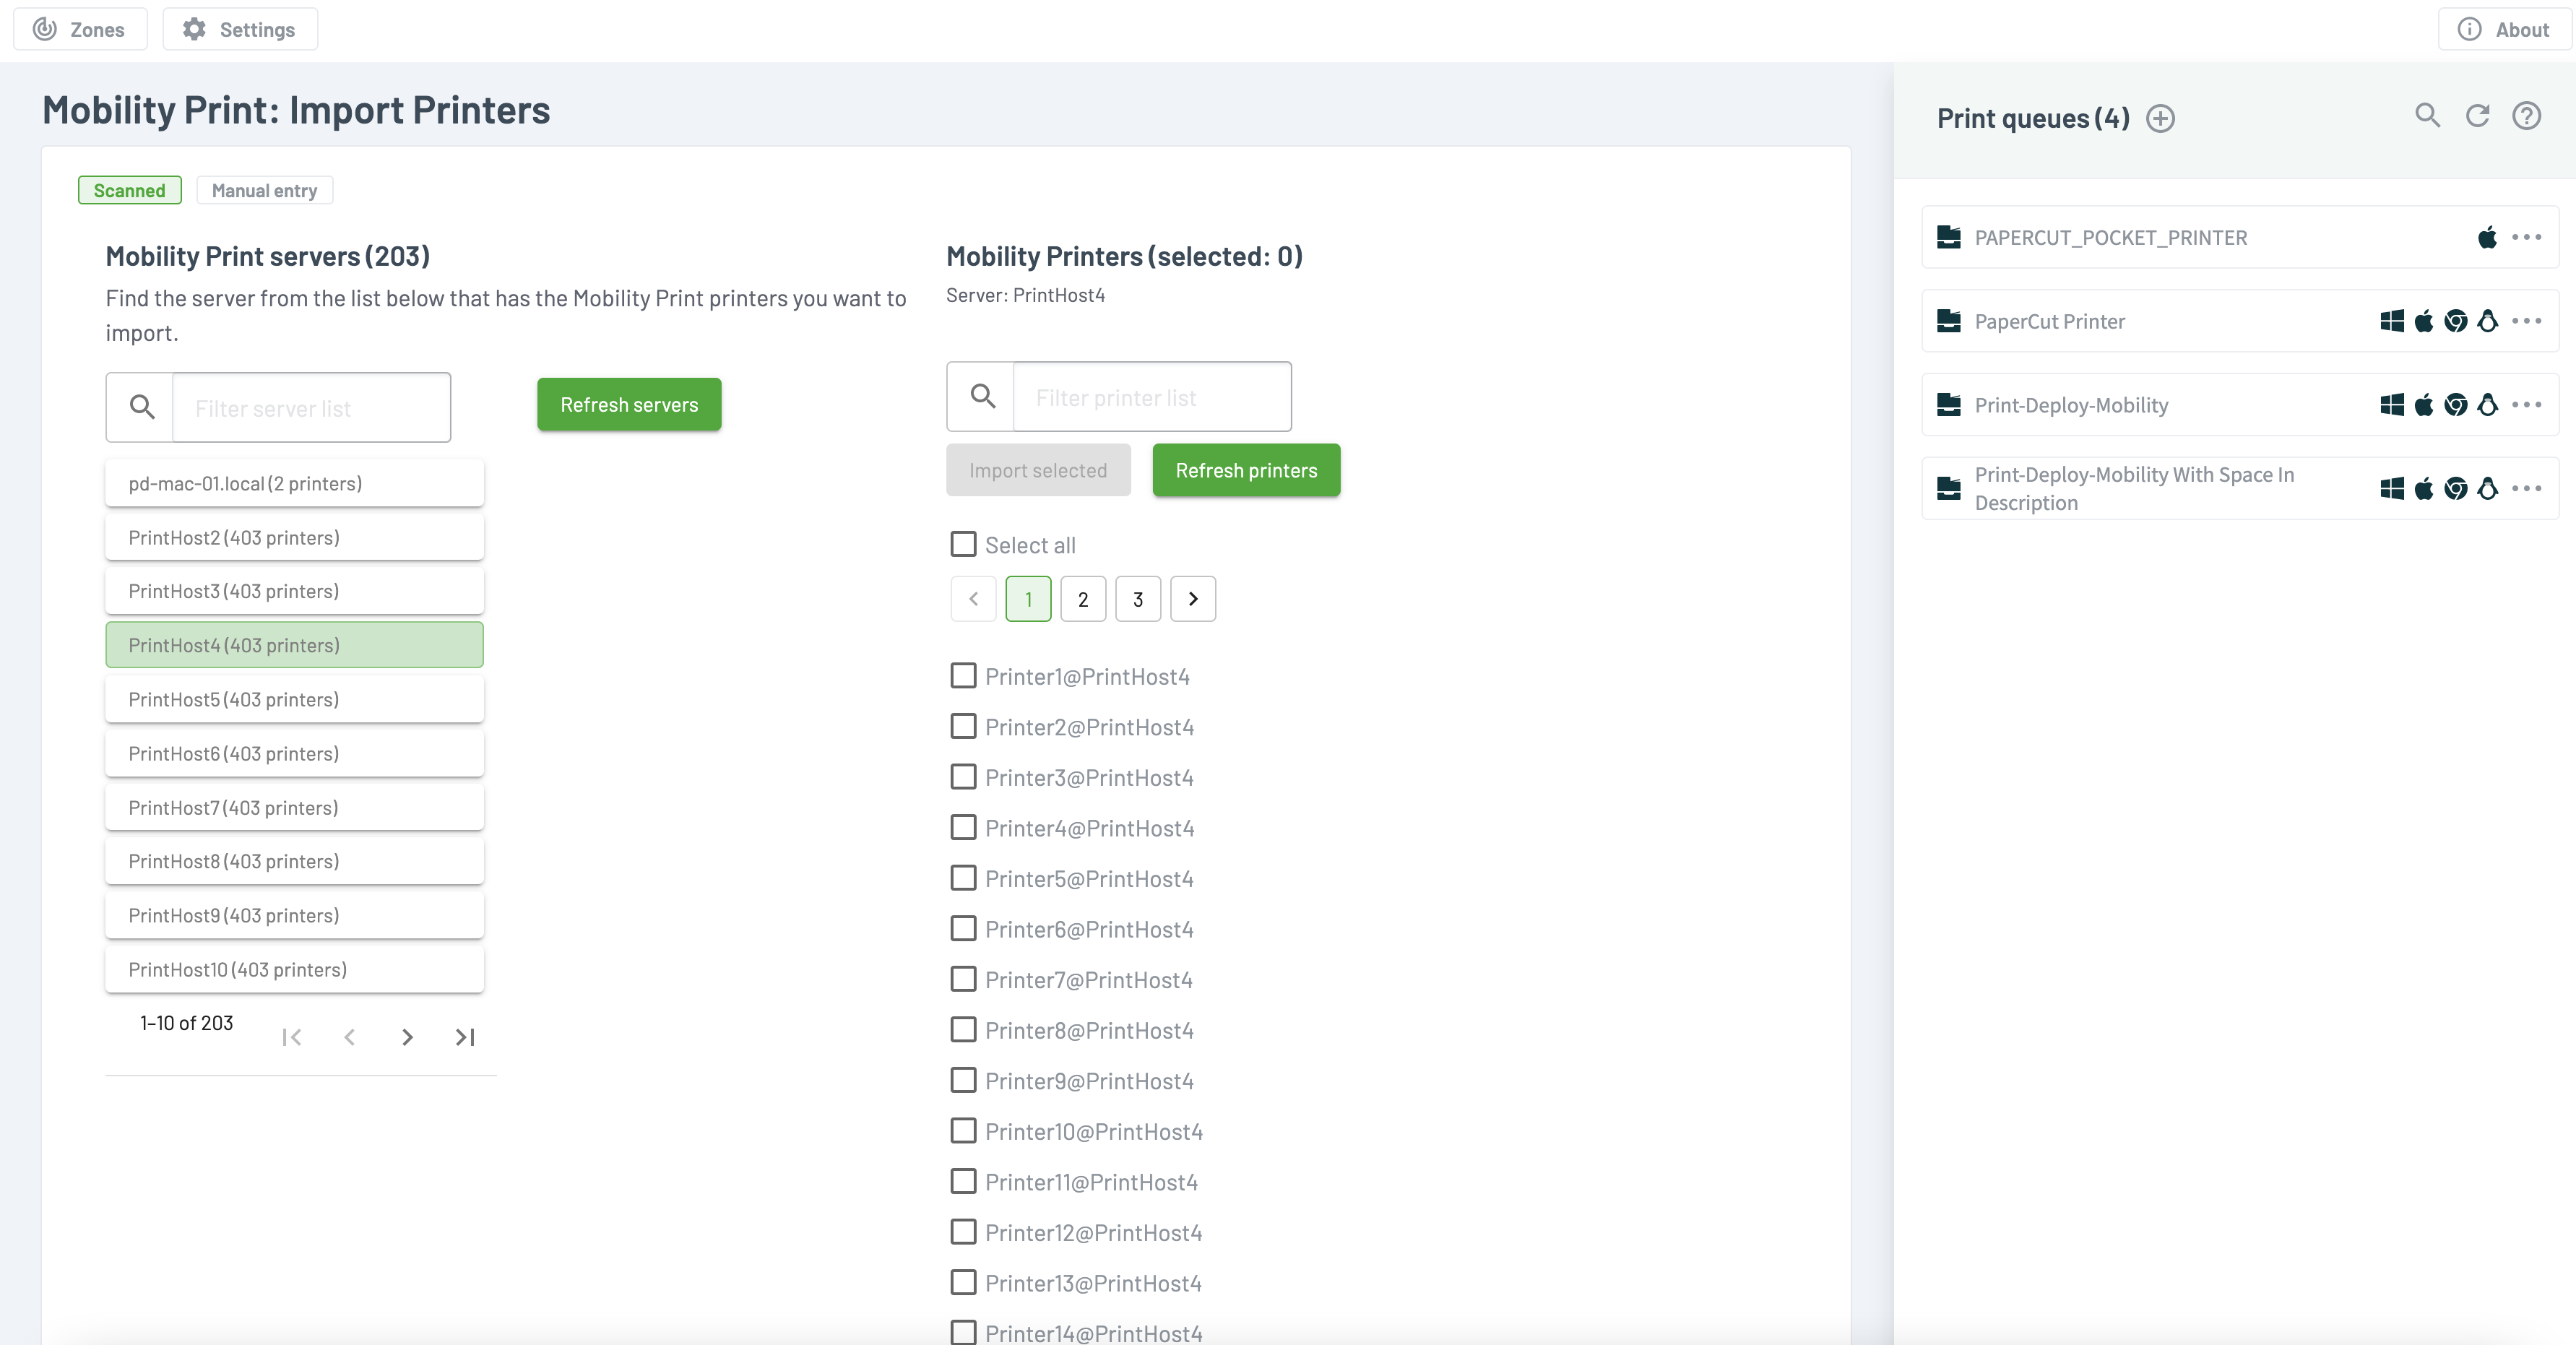
Print Deploy listing for PaperCut Mobility Print queues for a selected server.
-
Click on the Mobility Print Server you want to import printers from. (If you cannot see the server you need listed, see section 7 below)
- A list of Mobility Printers associated with that server will be displayed.
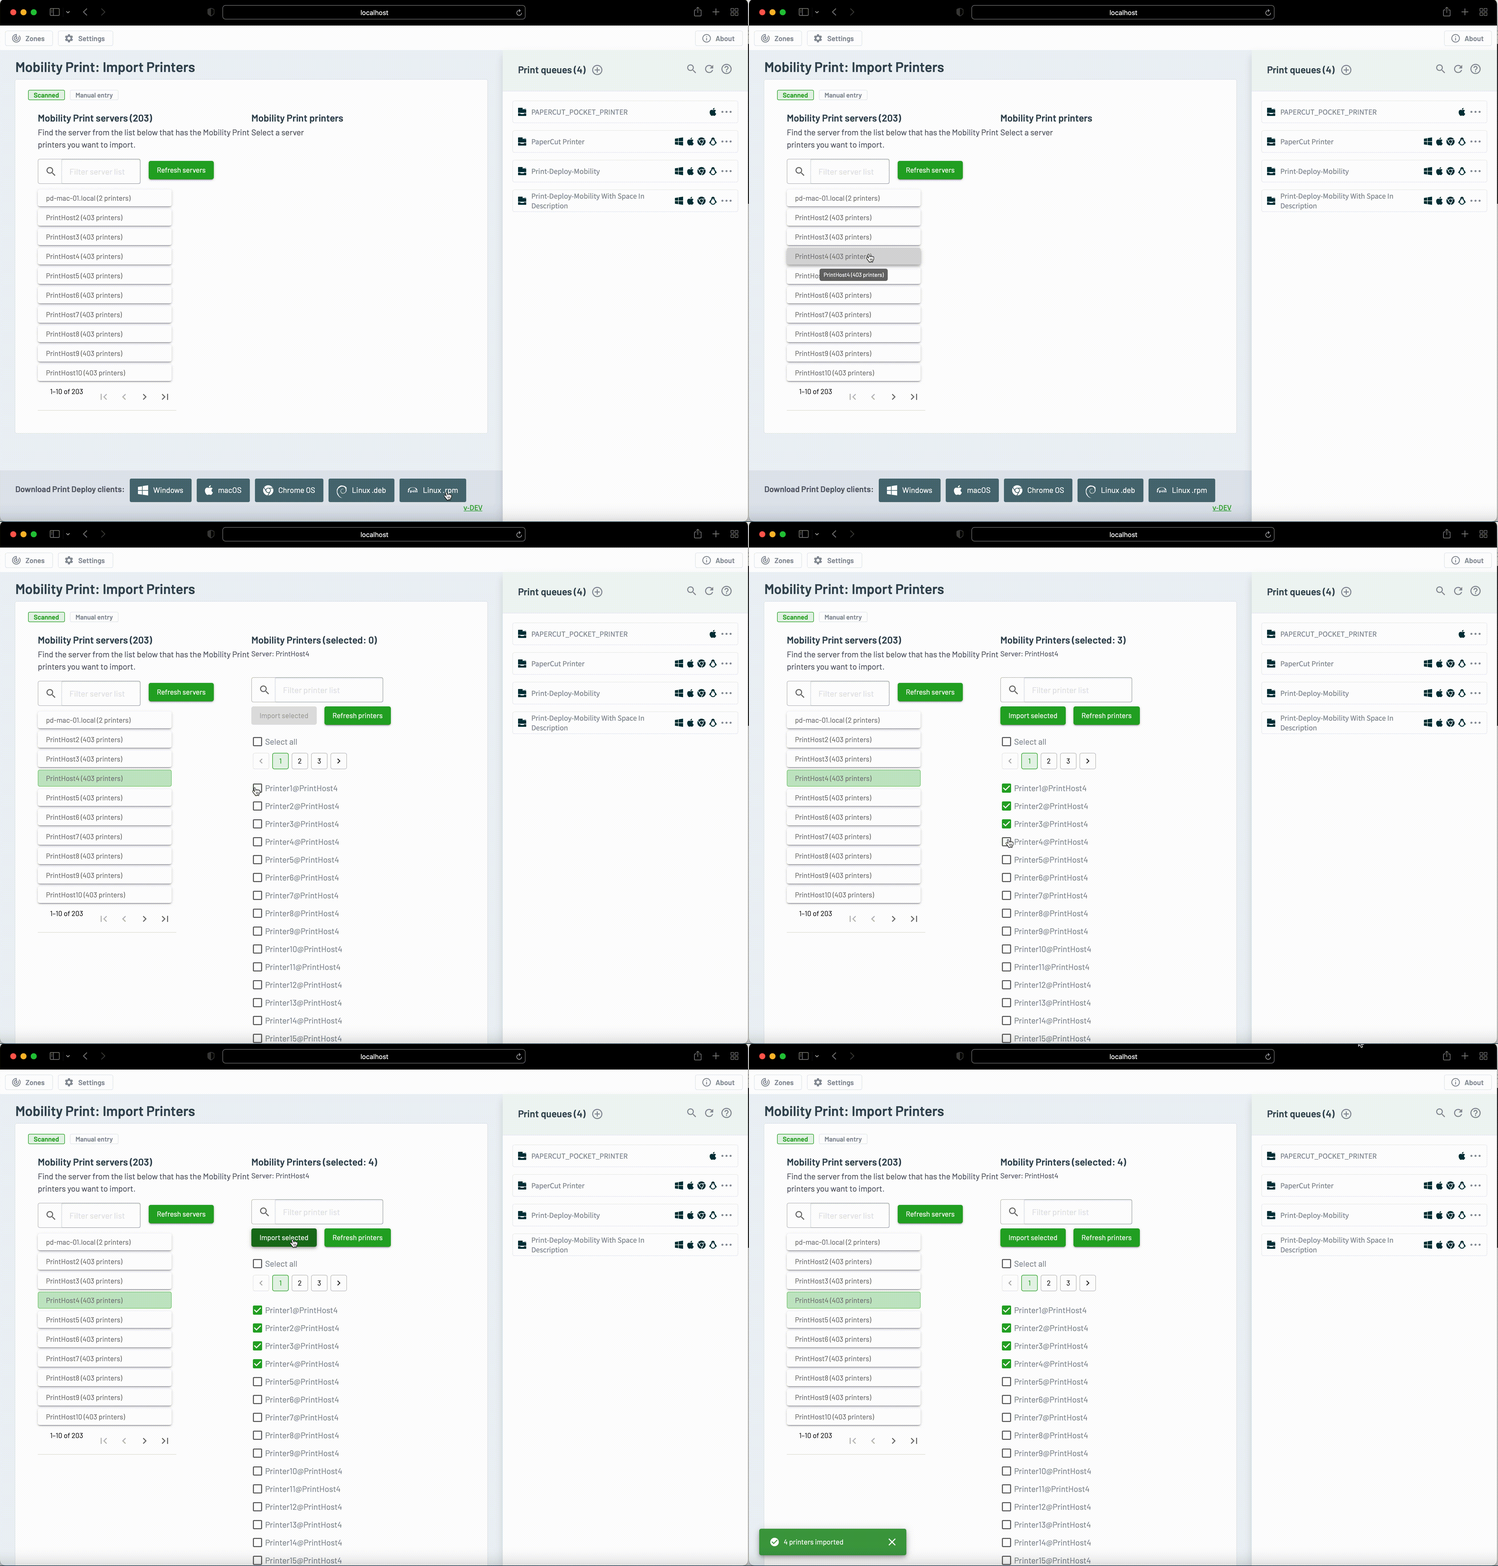
Our admin selecting which queues they want to import into Print Deploy.
- A list of Mobility Printers associated with that server will be displayed.
-
Once the import is complete, you can close the page.
-
If you cannot see the Mobility Server you need on the “Scanned” section of the Mobility Import page, click on “Manual entry” near the top of the page.
- The Manual Entry import view would appear.
- This feature allows you to enter a Mobility Print Server name and import printers from it.
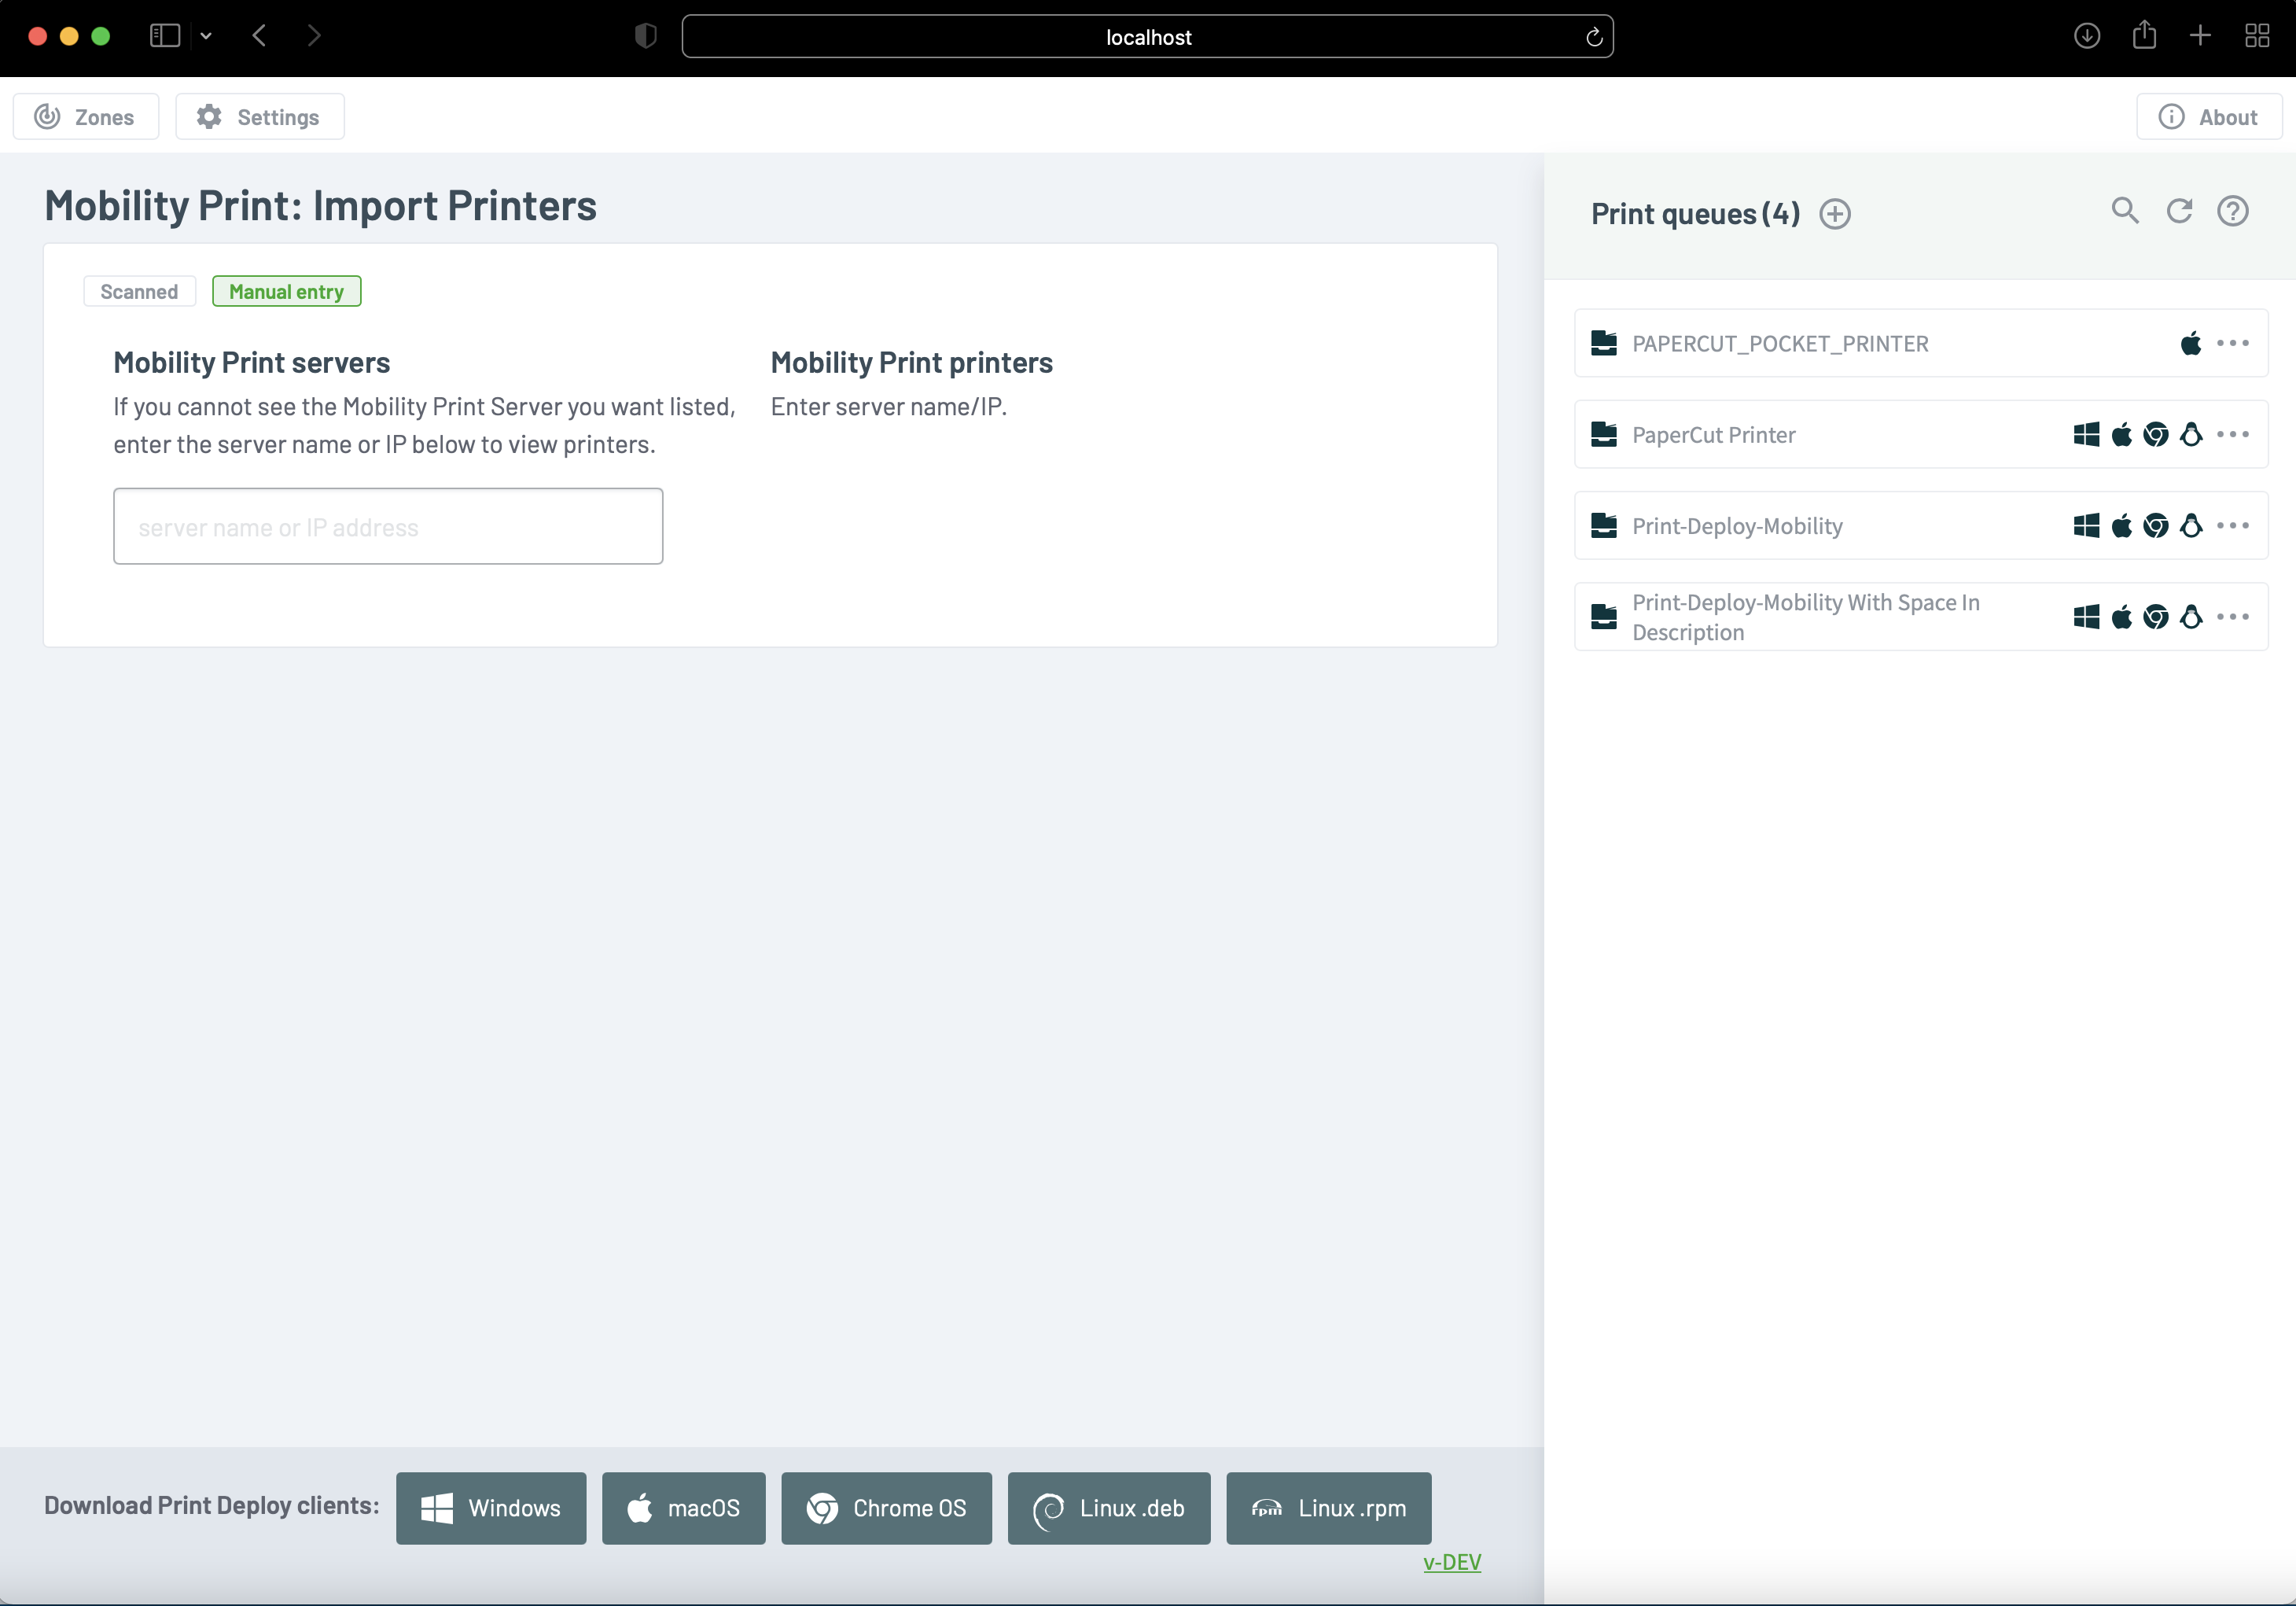
The Print Deploy manual printer import interface.
-
Enter the server name or IP address of the Mobility Server you need to import from in the text box. Ensure the server is up and is reachable.
- A list of Mobility Printers associated with it would appear.
- Select the printer(s) you need to import, and click the Import selected button.
- Once the import is complete, you can close the Mobility Import page.
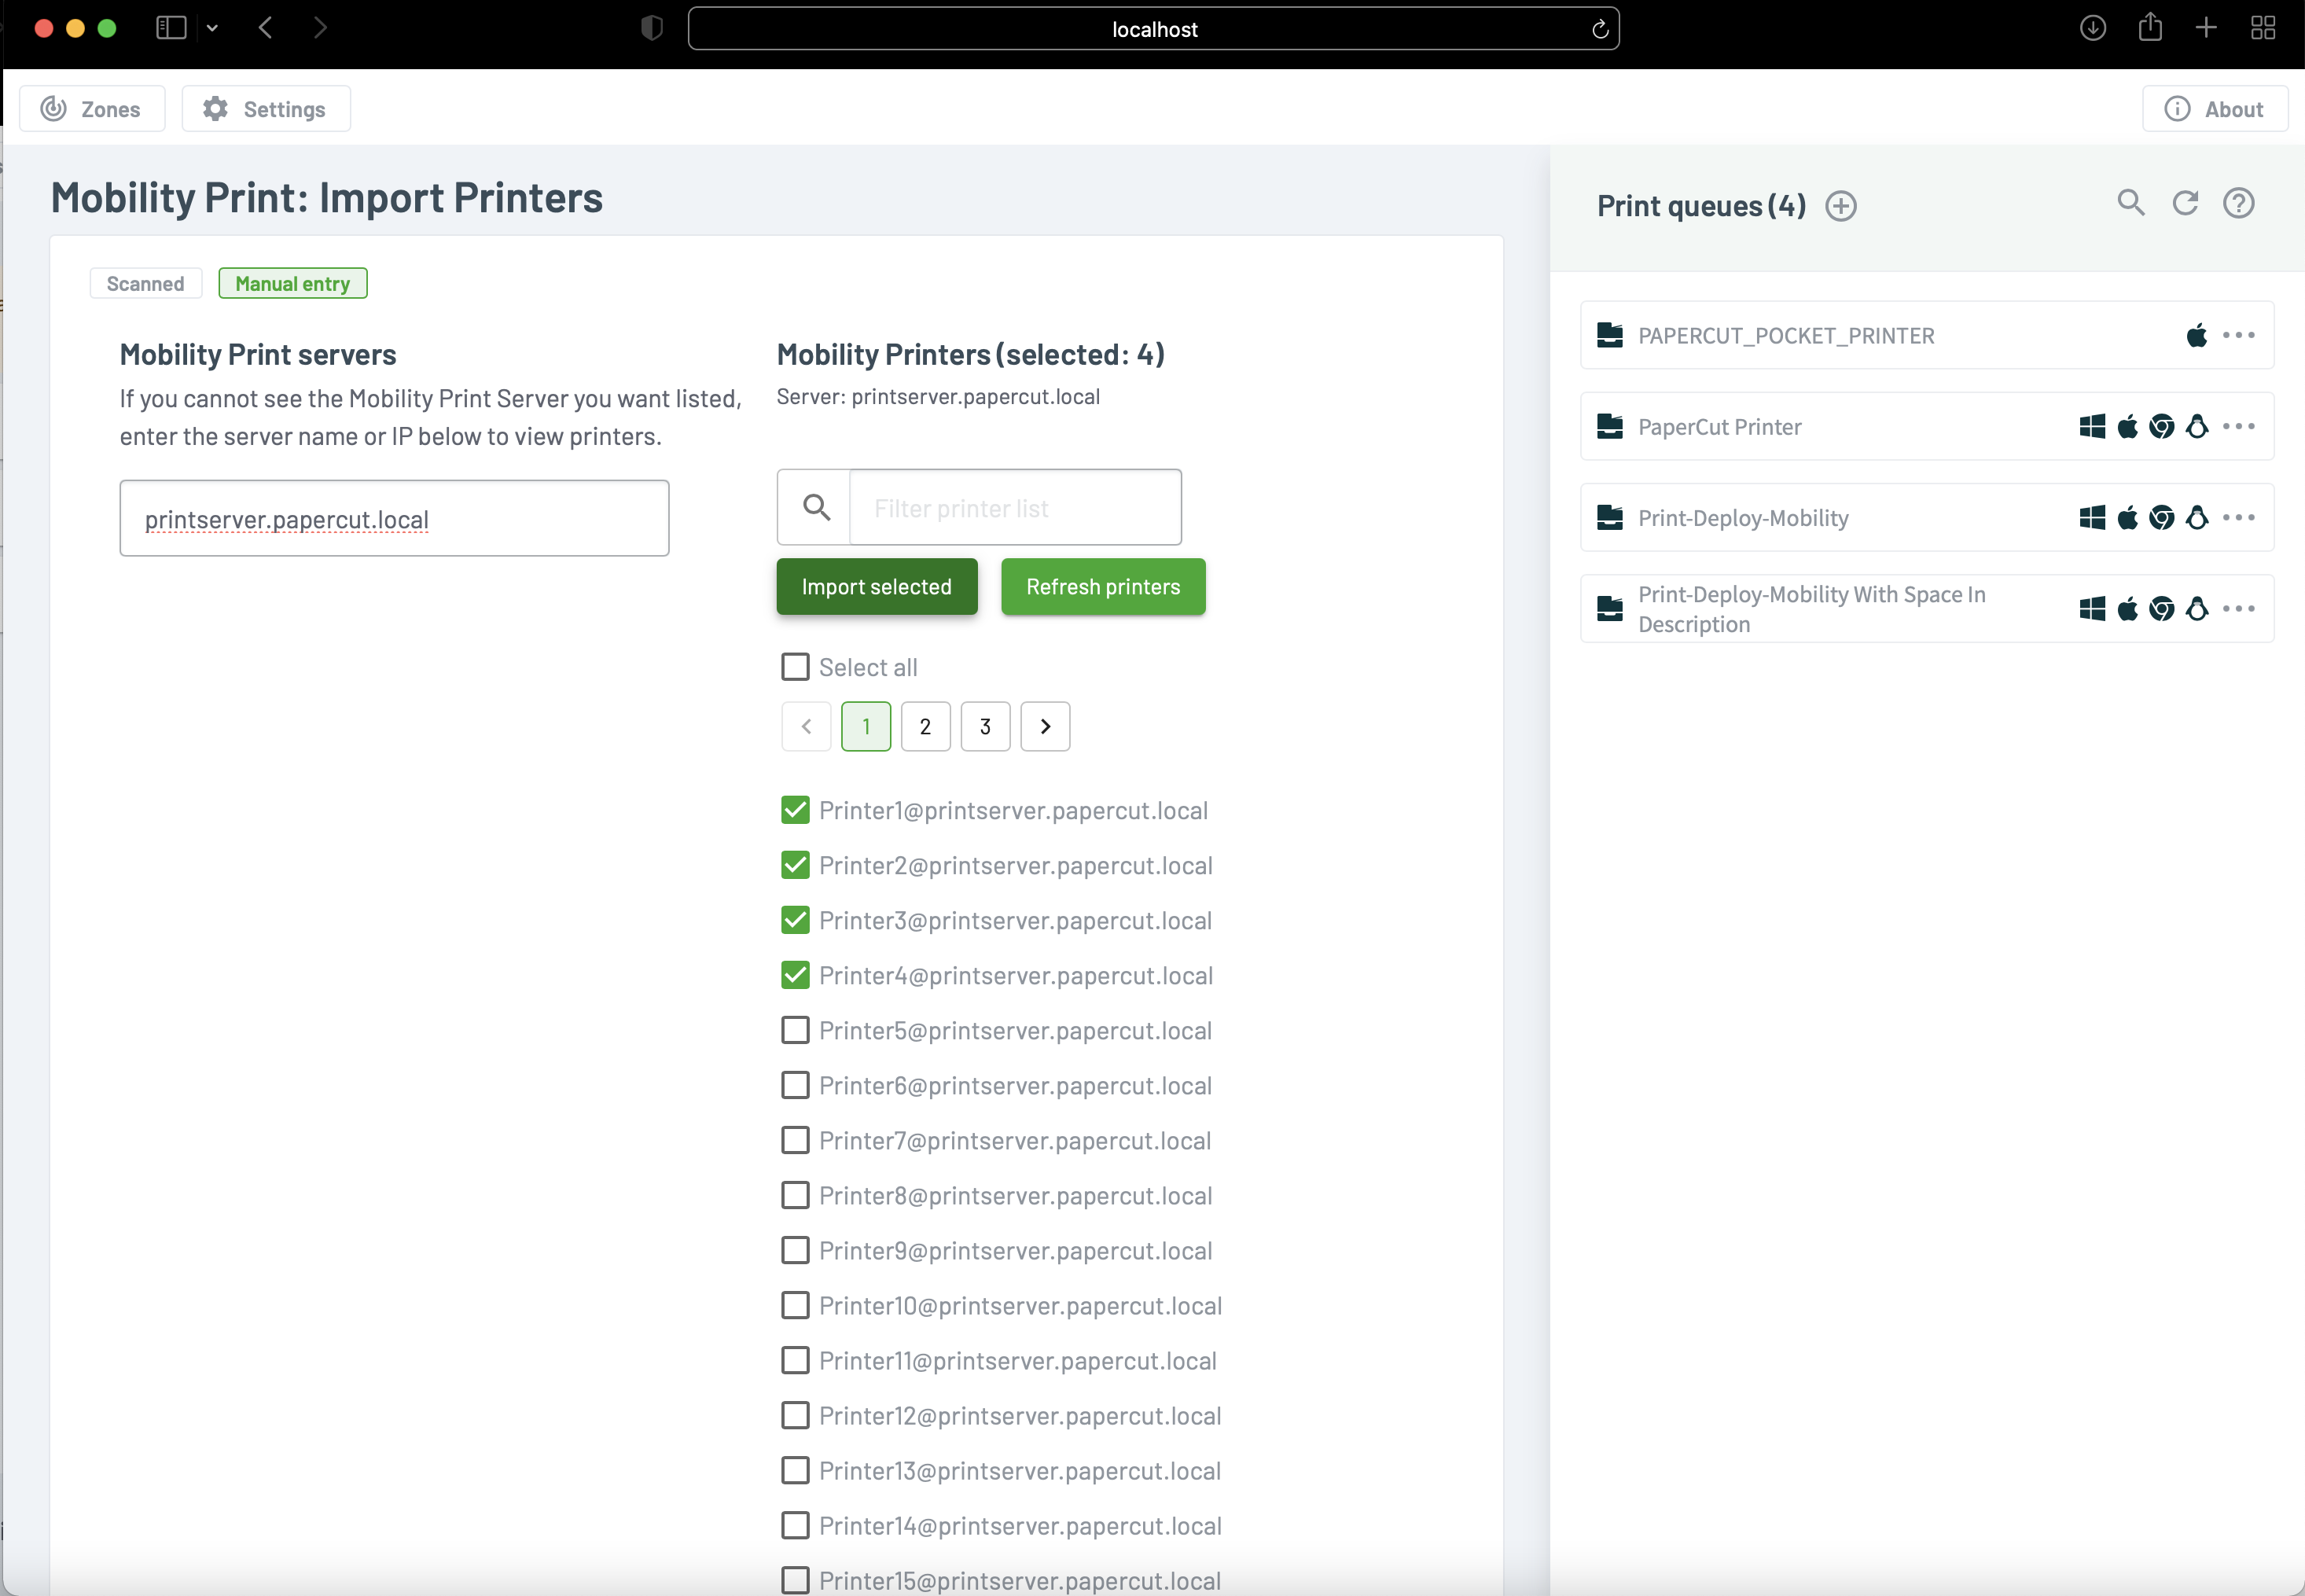
The Print Deploy manual printer import interface, with Mobility Server server name entered and printers listed and selected.
Step 3: Connect print queues to a zone
A zone is a location defined by an IPv4 address range, for example, an office, branch, or campus. It also include user groups to help define who can access the printers in that zone.
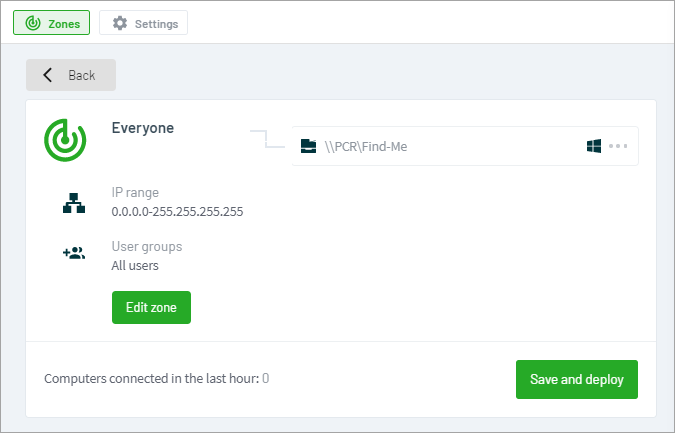
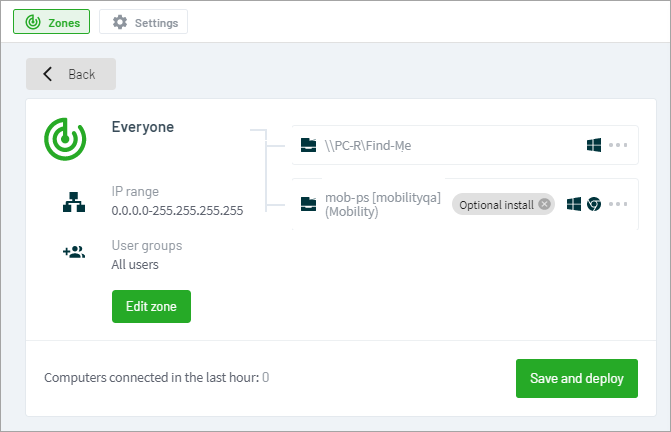
By default Print Deploy has one zone, called Everyone, that deploys print queues to all computers and all groups in the network. And of course you can add as many of your own zones as required.
-
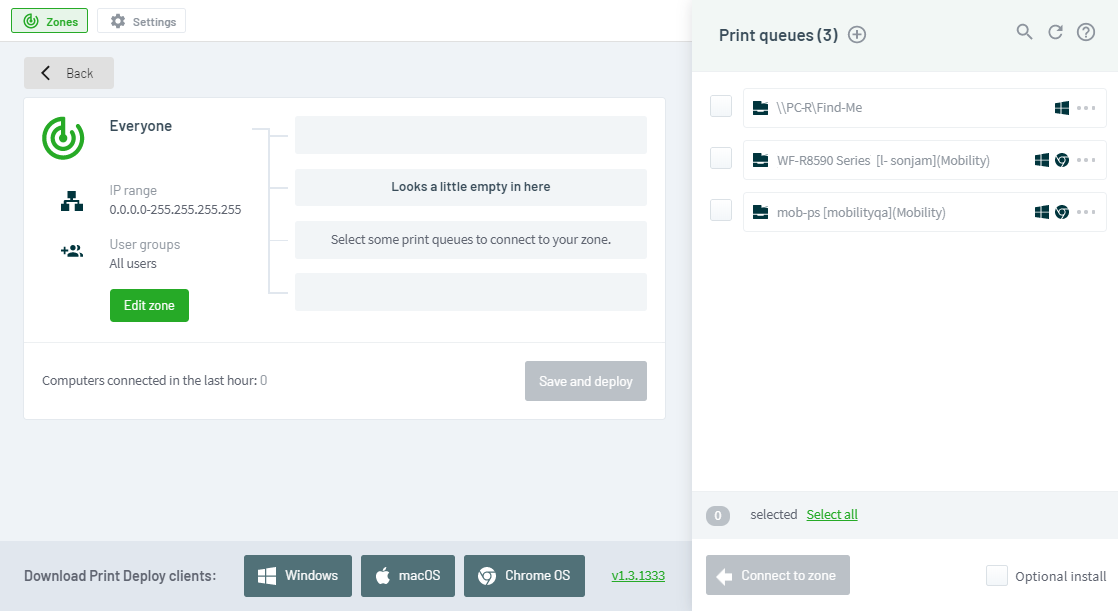
Click Zones, then in the Your zones list, select the zone you want to connect printers to.
If you need to add a new zone first, take a look at how to add zones and user groups to Print Deploy .
-
In the Print queues list, select which printers you want to be automatically installed on the users’ computers; then click Connect to zone. They are added to the list of print queues for that zone.
-
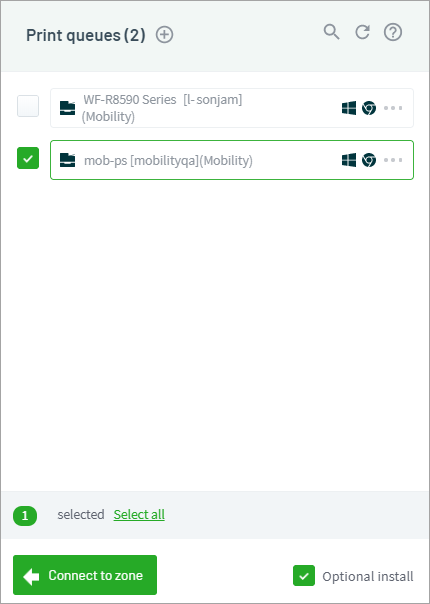
If required, add print queues to the zone that you want to make optional for users to install on their computer. They can install them via the Add printers tab in their Print Deploy client.
-
In the Print queues list, select which printers you want to make optional for users to install.
-
At the bottom of the list of printers, select the Optional install checkbox.
-
Click Connect to zone. They are added to the list of print queues for that zone.
-
By default, all computers that already have the Print Deploy client installed will automatically install the print queues within 15 minutes. This time is configurable though, so if you’d like to change it, go to Change the polling time for Print Deploy .
What’s next?
If the Print Deploy client has already been installed on some computers, click Save and deploy. The print queues will be automatically installed on the computers within 15 minutes. (This time is configurable ).
Otherwise, decide if you want to:
-
make any configuration changes to Print Deploy (optional)
-
make any security enhancements (optional)
-
jump straight to rolling out the Print Deploy client .


Comments