
Can Mobility Print users choose a tray?
THE PAGE APPLIES TO:
Last updated September 30, 2025
“Help! I’m a PaperCut Administrator, and my users need to use the bypass tray when printing through Mobility Print. Is this possible?″
There is a configuration to have all users print through a specific tray if you require it. This will be a helpful solution to provide when a group of users has a specific use case to print on a certain type of paper or a particular tray.
Windows
- Add a new print queue for this specific printer on your Windows system, use a unique queue name and matching manufacturer driver
- Ensure it appears in your PaperCut NG/MF instance
- Once the print queue is created:
-
Open Windows Print Management MMC snap-in console
Windows key+Rthen type printmanagement.msc and pressEnter -
Right-click the new queue; select “
Set Printing Defaults..” -
Set the default paper source to be the desired tray
-
Select OK when finished
-
- Now, whenever users send print jobs to this specific print queue, they should print out on the default tray that’s been selected here. Test this out by sending a print job from a Mobility Print client to confirm.
- If that doesn’t work, it might be necessary for the Mobility Print Service to be running as a Service Account in the case of some drivers.
For detailed information see Windows Printing Defaults and Printing Preferences .
macOS
-
Add a new print queue for this specific printer on your macOS system, use a unique queue name and matching manufacturer driver
- Ensure it appears in your PaperCut NG/MF instance
-
Go to your macOS CUPS administrator interface
- Open a web browser, go to
http://127.0.0.1:631- A screen may appear that states ‘
Web Interface is Disabled’ - Open a terminal window and use the command
cupsctl WebInterface=yes - Retry accessing the CUPS web interface,
http://127.0.0.1:631
- A screen may appear that states ‘
- Open a web browser, go to
-
Select
Printersat the top menu
-
Select the new print queue you just created from step 1

-
Use the drop-down box and select
set default options
-
Using the CUPS queue menu, search for
Paper Source(or similar)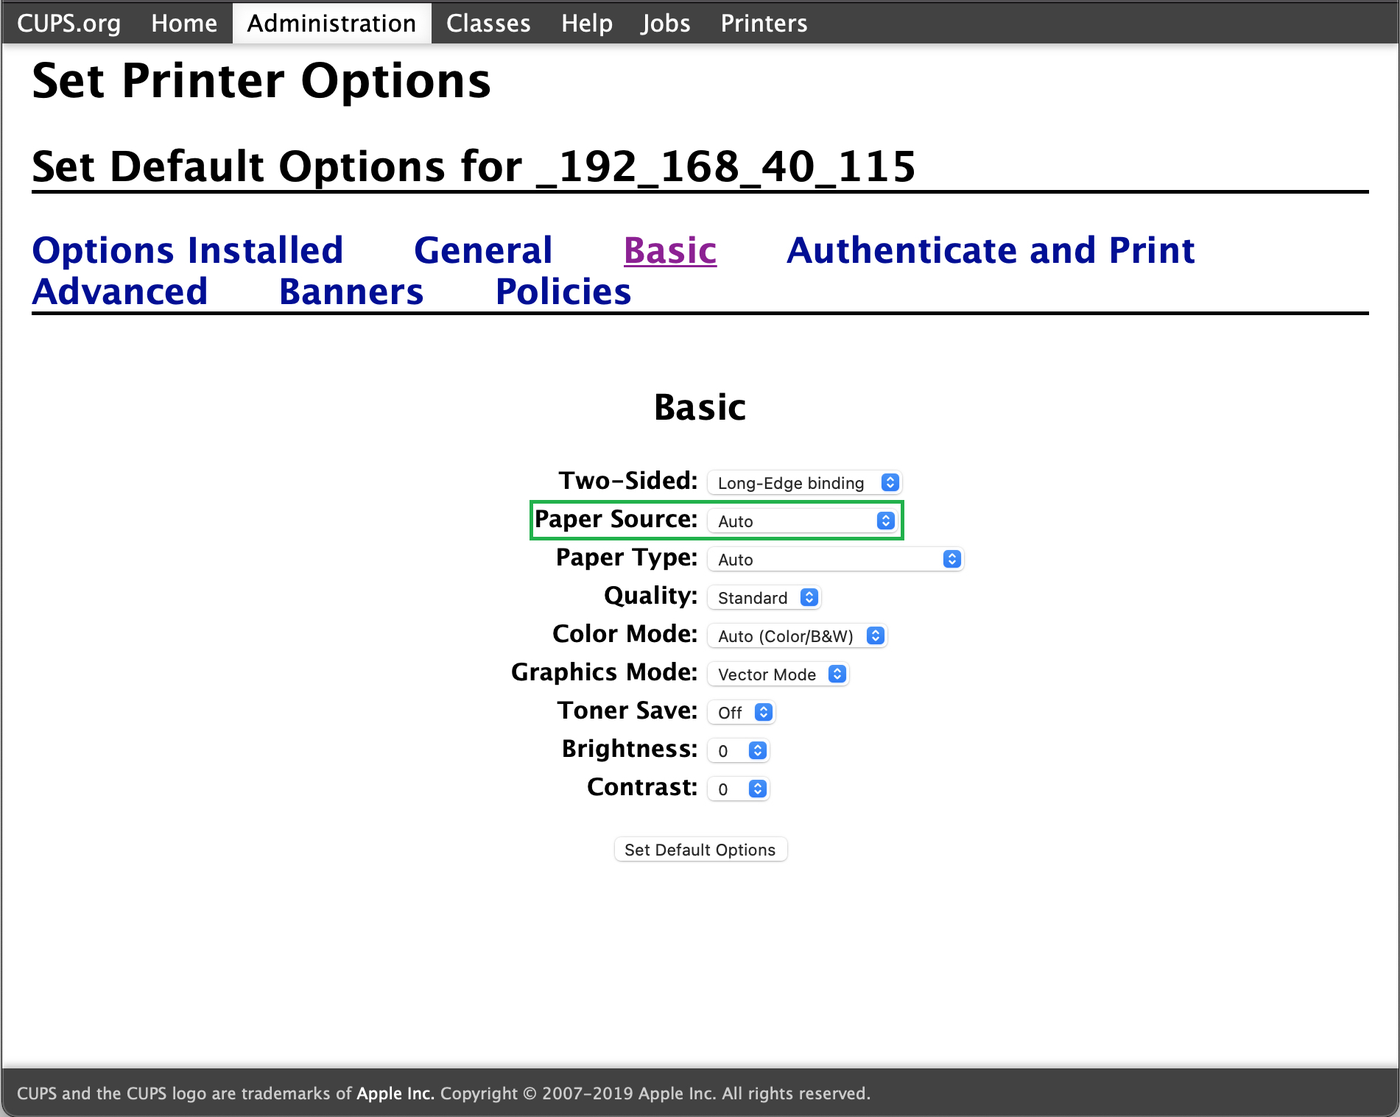
- Change paper source to your preferred tray (
bypass tray)
- Change paper source to your preferred tray (
-
Perform a test print from your macOS system direct to the queue first to confirm functionality
-
Create and publish a new Mobility Print Queue for this queue
-
Perform a test print from your Mobility Queue to confirm functionality
Now whenever users send print jobs to this specific print queue, they should print out on the default tray that’s been selected here. Test this out by sending a print job from a Mobility Print client to confirm.
An alternative solution would be to use PaperCut’s Print Deploy feature to push out print queues with specific print drivers to user’s workstations.
Still have questions?
Let us know! We love chatting about what’s going on under the hood. Feel free to leave a comment below or visit our Support Portal for further assistance.
Category: How-to Articles
Subcategory: Mobility Print
Comments