
Step 1: System requirements
Before proceeding with the installation, the sysadmin should take a few moments to verify system requirements. Is the operating system version supported and are patches up-to-date? (see PaperCut MF System Requirements).
Step 2: Print queue setup
For the purposes of this quick-install guide, we assume that you have your print queues set up on your macOS ‘server’, and that other devices print through those print queues. Administrators should ensure that the server based print queues are set up and working as expected before attempting to install PaperCut NG/MF.
While that setup is common, more and more organizations are printing directly from workstations to printers, or have more requirements about allowing BYOD machines (for example a user’s own phone or laptop) to print to their ‘server’ queues.
If that’s the case, then it’s worth checking out these more up-to-date methods of allowing your users to print from any platform, and for deploying your printers:
-
Print Deploy - our print queue deployment tool that gets the right printer drivers and print queues to the right person in the right location, automatically.
-
Mobility Print - delivers network print services for iOS, Windows, macOS, Android, and Chrome OS devices across mixed fleet environments.
-
Direct printing - one of the ‘original’ ways of setting up printing - if you’re wanting to set up monitoring and control of jobs going direct from the workstation to the printer.
Wondering whether to use Mobility Print, or Print Deploy, or both? Check out our guide Mobility Print & Print Deploy — what to use, when!.
Step 3: Download and install PaperCut NG/MF
PaperCut NG/MF is supplied as a standard disk image (.dmg) containing the installer. You can get the PaperCut NG installation files from our website (see PaperCut NG). For PaperCut MF, you’ll need to get the installation link through your PaperCut Partner.
- Log on to your macOS ‘server’ as an admin level account.
- Download and double-click Mac installer.
- Double-click the installer package named
PaperCut NG/MF Standard Installation.pkg. - Follow the directions on the screen.
The installation process takes between two and five minutes depending on the speed of the system. A system restart is not required but administrators are advised to perform installation on live production systems during periods of low activity - for example, not during backup operations or other administration activities.
The default install location is /Applications/PaperCut [NG/MF] for example if you’re using PaperCut NG, it will be /Applications/PaperCut NG.
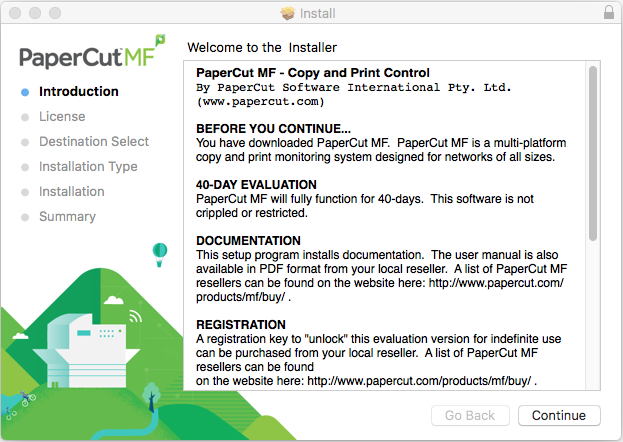
Step 4: Run the Configuration Wizard
After you install PaperCut NG/MF, a web browser is displayed with the PaperCut NG/MF Configuration Wizard Welcome screen.
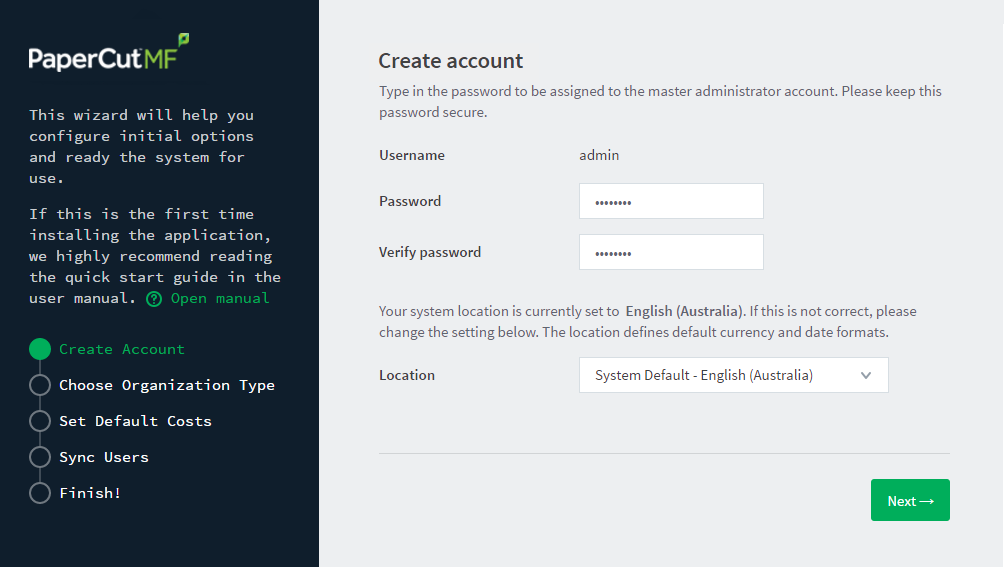
Administrative password
-
Complete the following fields:
-
Password—enter the password for the main in-built admin account. This password is independent of the operating system or domain passwords. The password must be at least six characters.
-
Verify password—re-enter the password.
-
Location—select the system’s physical location and language.
-
-
Click Next.
Organization type
The Organization type screen is displayed.

This selection determines which system defaults are used. For example, in a Professional (Client Billing) organization, where it is useful to charge-back printing to customers, an advanced client popup is provided with additional features useful for dealing with large numbers of client (shared) accounts. You can change these default settings chosen for an organization type after installation.
See Differences in PaperCut MF/NG installations for more information.
-
Select your organization type.
-
Click Next.
Default cost for printing
The Default costs for printing screen is displayed.
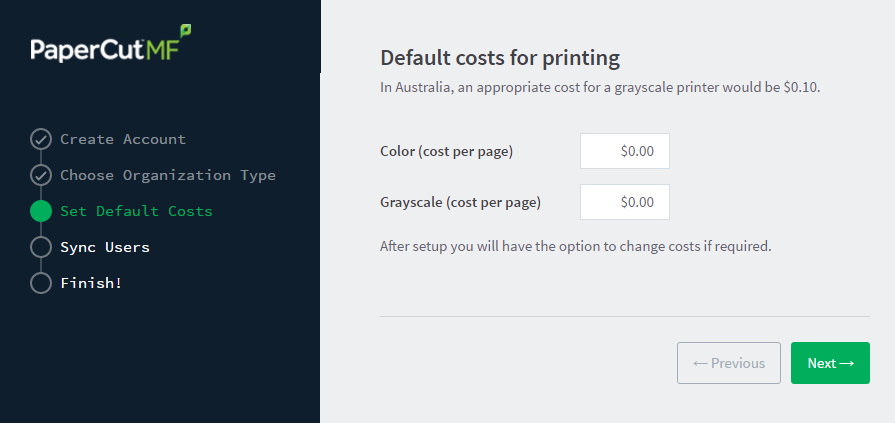
If required, you can change this setting after installation.
-
Complete the following fields:
-
Color (cost per page)—enter the default cost per page for color printing on all printers.
-
Grayscale (cost per page)—enter the default cost per page for grayscale printing on all printers.
-
-
Click Next.
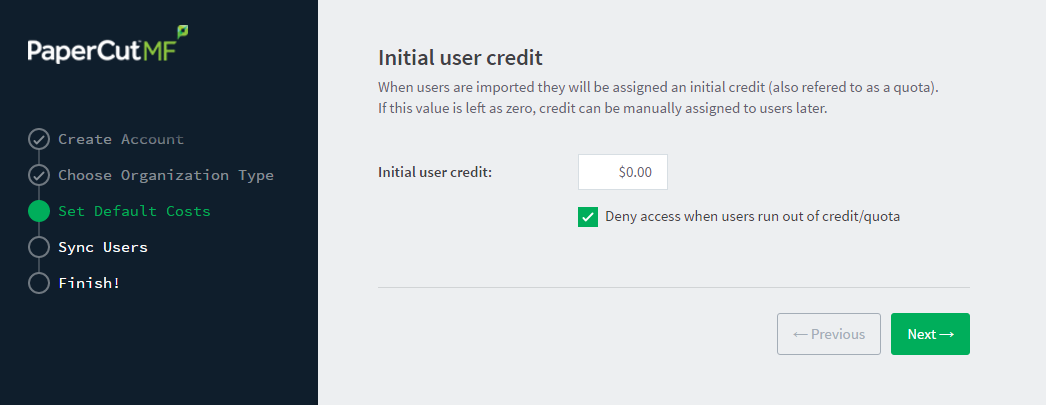
Initial user credit (Education organization type only)
If you selected Education as the organization type, the Initial user credit screen is displayed.
If you selected Small/Medium Enterprise (SME) or Corporate) or Professional (Client Billing) as the organization type, go to step 5.
-
Complete the following fields:
-
Initial user credit—enter the amount of credit each/quota each user will receive when the system is first enabled. You can change these settings after setup.
-
Deny access when users run out of credit/quota—select this check box to prevent users from printing when they run out of credit/quota.
-
-
Click Next.
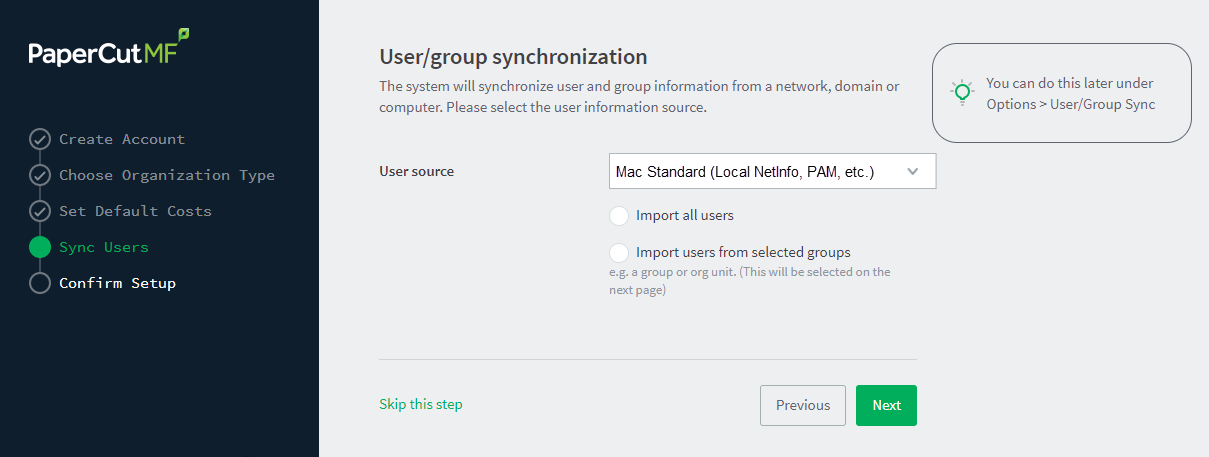
User/group synchonization
The User/group synchronization screen is displayed.
PaperCut NG/MF extracts user information out of the system or domain.
-
In User source, select the source of user account data:
-
Mac Standard (PAM, Local NetInfo, etc.)—if the user accounts are set up and defined on the local system. This option works with most Mac networks.
-
Samba—if the central user directory is a Windows Domain. The Samba option is available only if Samba is installed on the system. The Samba option is appropriate on medium to small networks currently operating in a Windows Domain environment.
-
Azure AD—for organizations using Microsoft Azure AD as a cloud based user directory service. For more information see Synchronize user and group details with standard Azure AD.
-
Azure AD Secure LDAP—for organizations using Microsoft Azure AD Secure LDAP as a cloud based user directory service. For more information see Synchronize user and group details with Azure AD Secure LDAP.
-
LDAP (Open Directory)—for large networks with existing Open Directory domains. This includes networks running Mac OS X Server with Open Directory, and Windows domains running Active Directory. PaperCut NG/MF does it’s best to auto discover LDAP settings, but some knowledge of LDAP and/or Open Directory is required. For more information see Synchronize user and group details with LDAP.
-
Google Cloud Directory—for organizations using Google Cloud Directory as a cloud based user directory service. For more information see Synchronize user and group details with Google Cloud Directory.
-
Custom—for organizations with other custom sync source requirements. For more information see Synchronize user and group details using custom programs.
-
-
Select one of the following options:
-
Import all users—import all domain user accounts.
-
Import users from selected groups—import a subset of users from a given group. This is useful when only a subset of users will use the printers.
-
-
Click Next.
Then see the following sections for more information on setting up your chosen sync source:
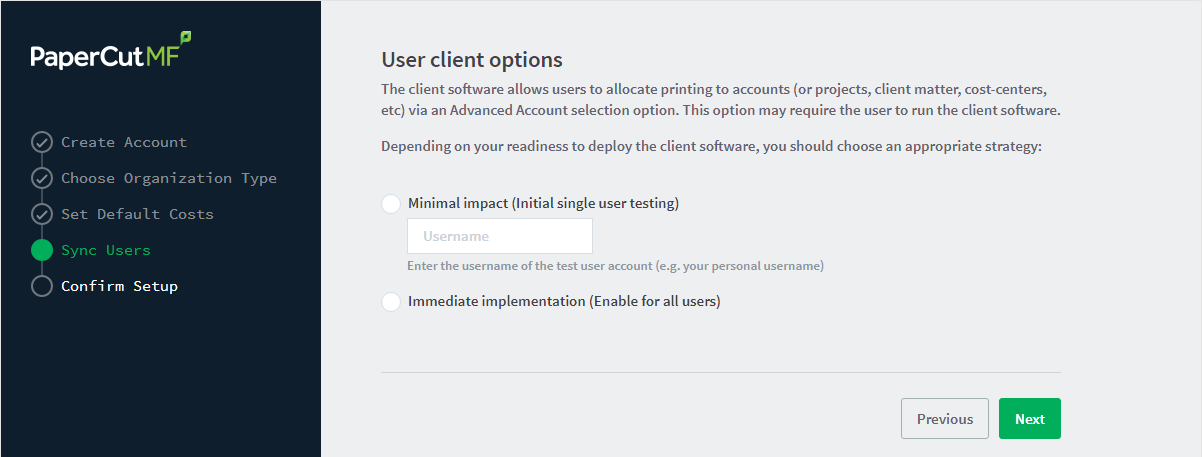
User Client options (Professional Client Billing organization type only)
If you selected Professional (Client Billing), as the organization type, the User client options screen is displayed.
If you selected Education or Small/Medium Enterprise (SME) or Corporate, go to Confirm Setup steps.
Every print job must be charged to an account via the process of Account Selection. This may or not require user interaction and is configured at the user level.
In environments where user interaction for Account Selection is required and the user has both options - User Client and printing device - running the User Client may be optional. Hence, deploying it immediately is also optional. If you choose not to deploy it now, you can still deploy it in the future. However, in environments where user interaction for Account Selection is required and can only be done via the User Client (and cannot be done at the printing device), running the User Client is mandatory. Hence, deploying it immediately is also mandatory. If not, the user is unable to carry out the configured user interaction for Account Selection, and the job remains paused in the print queue and does not appear on the printing device. The User Client can be deployed directly from a network share (which is automatically configured on Windows). There is also the option to install the software locally on each workstation, however, this is not usually recommended because it makes the process of updating the User Client more complicated. For more information about the Account Selection options with and without user interaction (via the User Client or printing device), see Shared accounts, User Client, and Allocating accounts to print jobs at the device.
-
Depending on the Account Selection configuration for users (whether or not user interaction is required and whether or not your environment caters for this on the User Client AND on the printing device), select an appropriate User Client deployment strategy:
-
Immediate implementation (Enable for all users)—the Account Selection option requiring user interaction is enabled only for all users. If you have configured your users with Account Selection that requires user interaction, and this can only be done on the User Client (and cannot be done on the printing device), then you must install the User Client on all user desktops immediately to prevent disruption of user printing services. If in doubt, select the minimal impact strategy. This ensures the impact is isolated to only the nominated test account.
-
Minimal impact (Initial single user testing)—the Account Selection option requiring user interaction is enabled only for a single user for testing purposes. You need to nominate the testing account; this can be an existing system/domain account used for testing purposes or your own user account. The username should be in the format used to log in to the domain/system (usually the short form). Depending on the environment, you can test the user interaction for Account Selection either on the User Client or on the printing device. The minimal impact strategy allows you to test Account Selection with user interaction using the nominated test system/domain user account, after which you can configure other users with similar Account Selection options.
-
-
Click Next.
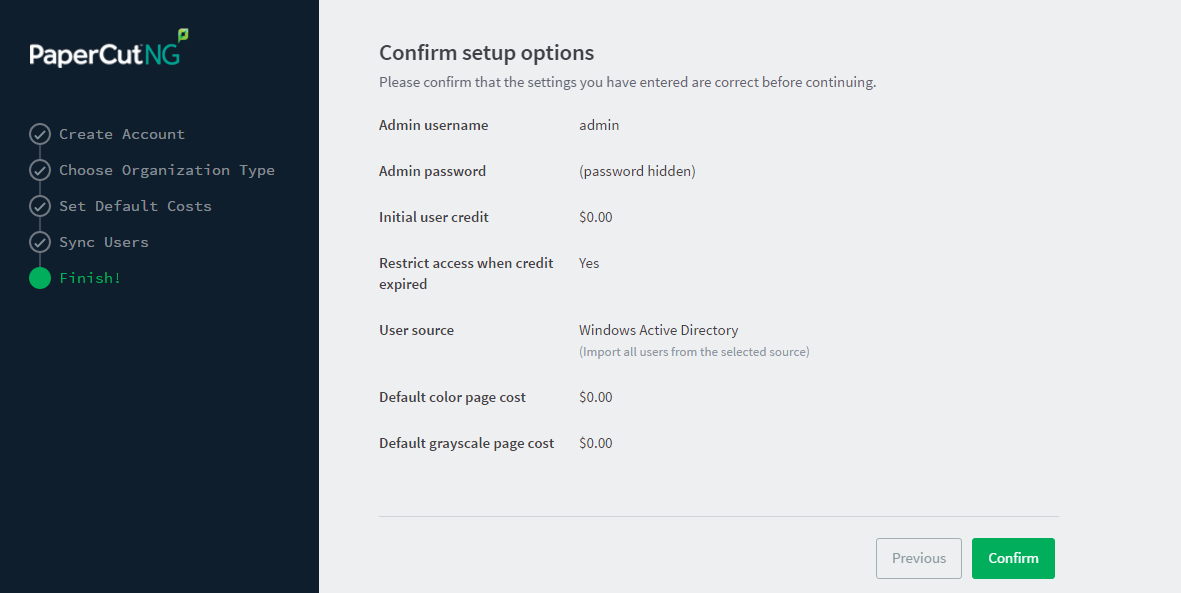
Confirm setup options
The Confirm setup options screen is displayed.
-
Check the settings you have entered. If you want to change anything, you can return to any of the configuration screens to alter the options.
-
Click Confirm.
The Initial user import screen is displayed. -
Click Close.
Setup complete
After completing the configuration wizard you are presented with a user synchronization status screen, showing the progress and results of the setup.
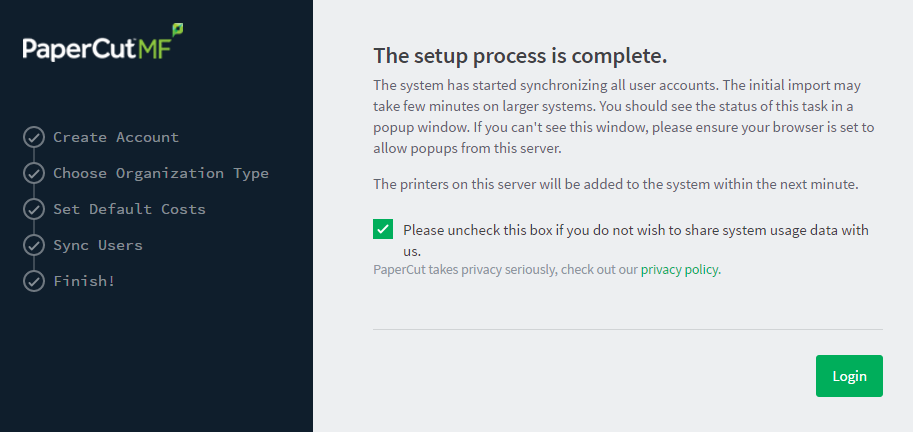
- Click Login to access the Admin web interface and begin familiarizing yourself with the options and features available. Take some time to explore, and refer back to the relevant sections of this manual as required.
Step 5: Check the printer configuration
When you install PaperCut NG/MF, your networked printers are automatically added to the system. Any new printers added to your network are also automatically added to PaperCut NG/MF. You can, however, change the configuration so that new printers are not automatically added. You will need to do this if you have printers you do not want monitored by PaperCut NG/MF. For more information, see Add and remove/delete/ignore printers.
The monitored printers are listed on the Printer List page. If the printers are not displayed, try printing a document. The first job triggers registration.
Step 6: Sharing the User Client software
The PaperCut NG/MF client software is located in the directory /Applications/PaperCut MF/client or /Applications/PaperCut NG/client. You can share this directory over the network so workstations can access/install the client application. Sharing with Protocols AFP for Mac clients, and SMB for Windows clients is recommended.
Users can have the client software start automatically using the macOS “Open at Login” feature.
See Install the User Client on macOS for more information on deploying the macOS user client.
Step 7: Deployment for a Professional (Client Billing) installation
Every print job must be charged to an account via the process of Account Selection. This may or may not require user interaction and is configured at the user level. When Account Selection requires user interaction, then depending on your environment, the user can do so either on the User Client or at the MFD/copier.
The options are:
-
User selects the account on their computer: the user runs the user client software on their computer, and when they print a document, the client pops up asking them for the account information.
-
User selects the account on the MFD/copier: the user prints the document from their computer or device, and when they walk up to the MFD to release their print job, they select the shared account on the MFD.
See the page on Account Selection for more detail on these two options.
If you choose the user client software option, see Install the User Client on macOS for more information on installing the macOS user client.
Step 8: Testing
Following a fresh installation, it is highly recommended to test core features of the system. For further details, see Testing the installation.
What next?
Take some time to explore the features of PaperCut NG/MF before continuing reading at Implementation by example or view the interface Tour.
Comments