
There are multiple areas in PaperCut where Google SSO can be configured, including Mobility Print, Print Deploy, and when logging into the PaperCut admin and user web interfaces.

Google SSO for Admin and User web interfaces
Google Workspace users can always log in to the PaperCut NG/MF Admin or User web interfaces by typing their Google credentials in the Username and Password fields.
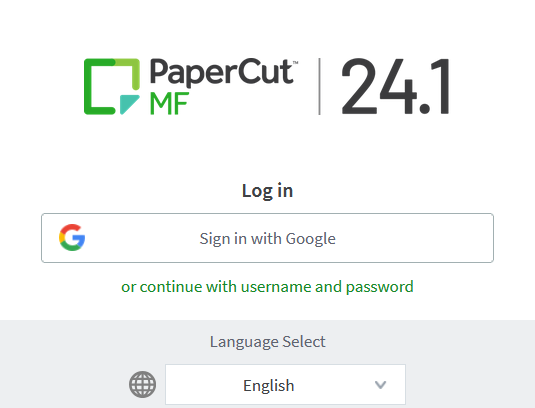
If Google SSO has been configured as below, users and admins will be greeted with a familiar Sign in with Google button, and a link below to continue with username and password instead.
Create the client secret JSON file in Google Workspace
-
Ensure your PaperCut NG/MF system environment is ready before you start to set up users to log in to PaperCut NG/MF using their Google credentials.
-
Ensure your organization owns a top-level, fully qualified domain name (FQDN), for example:
-
We highly recommend you use a secure browser connection, so ensure that you have one. Refer to Forcing use of HTTPS/SSL only. Ensure:
- User and admin access to the system is restricted to only via SSL
- HSTS is turned on
-
Log in to the Google Cloud Console. The Google Cloud Welcome screen is displayed.
-
In the title bar, next to the Google APIs heading, click the button showing a project name.

The Select a resource pop-up is displayed.
-
Do one of the following:
- If a project is already set up for synchronization with PaperCut NG/MF, click the project’s name to switch to the desired project. Go to the next step.
- If a project is not set up yet, create a new project:
- At the top right of the pop-up, click NEW PROJECT. The New Project screen is displayed.
- In the Project name field, type a name that identifies the project you’ll use for PaperCut NG/MF, for example, PaperCut NG/MF Authorize. Click Create.
- In the title bar, next to the Google APIs heading, click the project name dropdown. The “Select a resource” pop-up is displayed.
- Click the new project’s name to switch to the desired project. Click on the Google Cloud logo in the top right to return to the Welcome page.
-
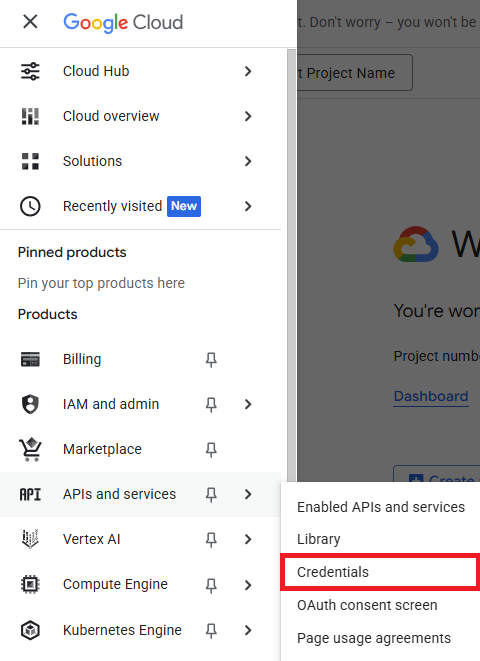
Click the Navigation menu (≡) in the top right and navigate to APIs and services > Credentials, or simply search for “Credentials” in the main search bar.
-
Click Create credentials in the top bar, and select the OAuth client ID option from the dropdown menu.

If you haven’t already created an OAuth Consent Screen, you’ll be prompted to create one. Click the Configure consent screen button to be redirected to the Google Auth OAuth platform to set that up. Click Get started to proceed.- Set an App name to help you remember what this was created for. We’ll use “PaperCut OAuth Consent” for our example. Add a “User support email” to display to your users for questions regarding OAuth consent. Click Next.
- Set the Audience Type to Internal. Click Next.
- Set a contact Email address to receive updates from Google about your project. Click Next.
- Read and agree to the Google API services user data policy by clicking the checkbox. Click Continue.
- Click Create.
- Click on the Clients tab on the left-hand side to resume creating your OAuth client ID.
-
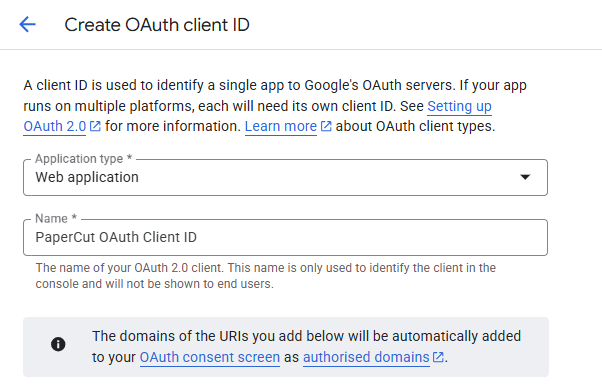
Use the dropdown to set the Application type to Web application. Set a friendly name to help remember the purpose of the OAuth client ID we’ll create. For our example, we’ll use “PaperCut OAuth Client ID”.
-
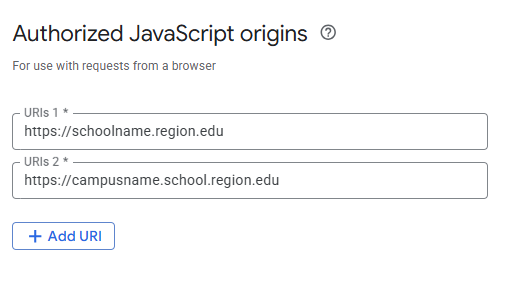
In the Authorized JavaScript origins field, click Add URI, then enter the URI(s) your users and admins use to access the PaperCut web interface from the internet. Using our example domains above, that would look like:
-
In the Authorized redirect URIs field, click Add URI and type the full URI(s) of your PaperCut NG/MF Application Server. This URI must exactly match the address that the end-user is accessing in the browser, including the server hostname, domain, and port. Please note that these URIs are case sensitive. Please always use lowercase for these URIs. If we suppose our example environment uses the aforementioned domains and is configured with the default PaperCut ports and HSTS enabled, that might look like:

-
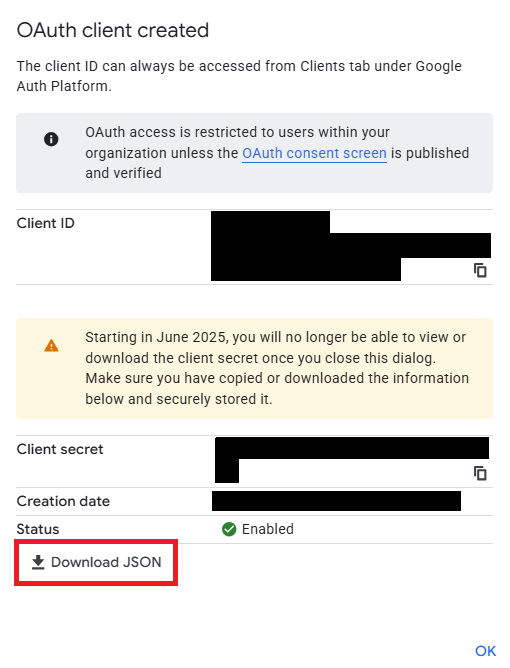
Click Create. The OAuth client pop-up displays your client information.
-
Click the Download JSON button as we’ll need this JSON file later to connect our PaperCut instance to the OAuth client we’ve just created. Click Ok to dismiss the pop-up window.
-
In the PaperCut Admin web interface, select Options > User/Group Sync; then scroll to the Single Sign on with Google section.
-
Select the Enable the “Sign in with Google” button on the Admin and User web interfaces checkbox.
-
Click Choose file, then select the JSON file you downloaded.
-
Click Upload client secret. The file is uploaded.
-
Test with real users to confirm the Sign in with Google button is visible on the PaperCut NG/MF login screen and works as expected.
Google SSO for Mobility Print (Chromebooks)
For Mobility Print on Chromebook devices, by default the Sign in with Google button will be enabled so users don’t have to re-enter their credentials to log in. This is for environments where user accounts have Gmail email addresses or Gmail accounts. If it’s not on, and you need it to be, you can find more information on how to turn it on right here in our manual.
In the case of an environment where there are user accounts that do NOT have Gmail email addresses or Gmail accounts, you might want to consider turning off Single sign on. If you don’t, these users might click the Sign in with Google button and not be logged in because their account won’t be registered in PaperCut NG/MF.
To turn off Google SSO for Chromebooks:
- Select Enable Printing > Mobile/BYOD.
- In the Mobility print section, uncheck the option ‘Allow users to sign-in with their Google account’.
- Click Apply.

Google SSO for Print Deploy
- Select Enable Printing > Print Deploy.
- Click Settings.
- Under Authentication methods, ensure that the Google checkbox is selected.
- Set the User Identity method to PROMPT.
- Click Save.
Comments