
The User Client program (sometimes called pc-client.exe or PCClient.app) displays a small window highlighting the current logged in user’s current account balance. This window contains two links and has other elements such as logos and background colors. You can tailor the visual design of these pages to make them fit into the look and feel of your internet or intranet site.
For example:
- Changing or updating the link in the balance window. Some suggestions include linking to your organization’s website or intranet site, or linking to a page containing your organization’s network usage policy.
- Changing the background color of the window and the logo, to suit your organization’s branding.
- Changing other elements of the user client windows.
Change the link on the User Client
-
Click the Options tab. The General page is displayed.
-
In the Client software area, select the Change link on client software check box.
-
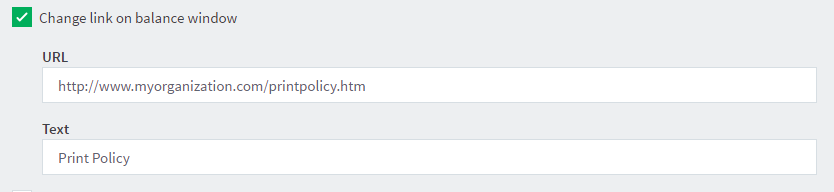
Enter a Destination URL pointing to your new destination. The link should be a complete URL including the
http://component. e.g.http://www.myorganization.com/printpolicy.htm. -
Under Link text enter the text to be displayed. e.g.
Print Policy. -
Click Apply.
The next time the User Client is started on one of the workstations, the new link is displayed.

Change the branding of the User Client
-
Click the Options tab. The General page is displayed.
-
Scroll to the Client software > Balance window section.
-
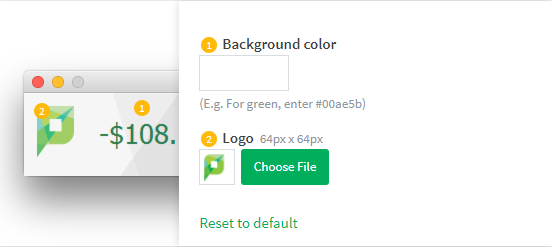
To change the background color, in Background color, enter the hexadecimal value
#RRGGBBof the required color. e.g. for green, enter#00ae5b. -
To change the logo, click Choose File next to Logo; then locate the logo image file. The image must be in PNG format and for best results should be sized 64px x 64px.
-
Click Apply.
The next time the User Client is started on one of the workstations, the new branding is displayed.

Change other elements of the balance window
There are other configuration keys that allow an administrator to customize the User Client for their organization. The table below outlines all of the client customization config keys available. You can update the value of these config keys using the Advanced Config Editor
User Client customization config keys
| Config name | Description |
|---|---|
| client.config.show-link | Indicates whether the link at the top of the User Client is displayed. To display, set the value to Y. To hide, set the value to N. |
| client.config.show-details-link | Indicates whether the "Details" link that points to the user web interface is displayed. To display the link set the value to Y, to hide set the value to N. |
| client.config.show-document-cost | Determines whether to show the document cost to the user in print popup notifications. To show the cost set the value to Y, to hide set the value to N. |
| client.config.default-advanced-tab | The default tab to display when a user is configured with advanced account selection. Values: DEFAULT (All Accounts), ALL (All Accounts), PREFERRED (Preferred List), RECENT (Recent Selections) |
Change the user client to use a dialog box for messages instead of balloon tips
For Windows operating systems only:
The message (e.g. low quota, print job pending release, etc.) displays in the client as Windows task tray balloon items. We agree this is a little small at times, however this is “the way Windows works” and we don’t have much control over this.
Instead, you can force the client to use popup dialog boxes, which can be a little more “in your face”. This can be done on an individual system when the client tool is installed locally, or for all systems by modifying the version of the client available on the network share.
To force standard dialogs, you can use the user client option called disable-balloon-tips. This option can also be set by adding a disable-balloon-tips=Y line (or uncommenting the existing line) to the client config.properties file located at [app-path]/client/win/.
An alternate option (advanced) is to enable this with the pc-client.exe start command-line option —disable-balloon-tips (e.g. place in your startup script or Group Policy start command).
Restart the client tool(s) and send a test notification. The notification should now appear in a standard dialog instead of a balloon tip.
Change text items in the Print Job Notification window
It’s also possible to change the text in the Print Job Notification window of the user client software. The main reason for changing the text is the need to use organization-specific terminology (e.g. shared account may be referred to as a cost center, department, project or matter).
A set of options is defined in the config.properties.tmpl file located in the client directory
For example on the server:
- Windows:
[app-path]\client\win\config.properties - Linux:
[app-path]\client\linux\config.properties - Mac:
[app-path]\client\mac\PCClient.app\Contents\Resources\config.properties
or on locally installed clients:
[client-install-path]\config.properties
To enable these options, copy them to your config.properties file and remove the # from the start of the relevant lines. You can then change the text as needed.
For example, changing the line from:
#account-from-list-text=Charge to shared account
to:
account-from-list-text=Charge to a cost center
will make the Print Job Notification window look like this after the client is restarted:

The full list is below, but check your local config.properties file for what is available in your specific version of PaperCut NG/MF:
# The following options define the text to display in client windows.  These
# can be useful if you wish to customize the text to suit your environment.
#
#account-from-list-allocate-text=Allocate to shared account
#account-from-list-text=Charge to shared account
#account-pin-text=PIN / Code
#account-with-pin-allocate-text=Allocate to shared account using PIN / Code
#account-with-pin-text=Charge to shared account using PIN / Code
#auth-description-text=Your login credentials are required for printer access.
#auth-login-text=Login
#auth-password-text=Password:
#auth-username-text=Username:
#auth-pin-text=PIN:
#auth-id-number-text=ID Number:
#identity-description-text=Your login credentials are required for printer access.
#identity-detailed-text=Please log in using your network username and password to confirm your identity.
#identity-login-text=Login
#identity-password-text=Password:
#identity-username-text=Username:
#no-accounts-text=No shared accounts available
#other-user-account-text=Perform print as user
#personal-account-text=Charge to my personal account
#select-account-text=Select the shared account to charge ...
#user-balance-for-text=Balance for {0}
#user-close-warning-text=The application cannot be closed, because it is required to perform printing on this network.
#user-details-text=Details ...
Comments