You’re probably here to solve one of these PrintNightmare problems:
- You need a free alternative to Point and Print
- You want to enable Point and Print without admin rights
- You want to get rid of your print server
Let’s jump straight into it and step you through your options. If you’re not interested in hosting anything yourself, jump straight to option 4 .
What is PrintNightmare?
“PrintNightmare” is a bug in the Windows spooler service that under some circumstances can result in an attacker being able to remotely run code on a Microsoft Windows system as the local SYSTEM user.
You should read the advisory from Microsoft (updated with security patch information on July 6, 2021).
It’s important to note that the attacker needs to be authenticated against the remote system for the attack to be possible.
more on PrintnightmareOPTION 1: Use a free alternative to Point and Print
The easiest way to get users printing again after PrintNightmare via your Windows print server is to install PaperCut Mobility Print on it.
Mobility Print will make the printers on your server available to Android, iOS, Mac, Windows, and Chromebook users.
Steps include:
- Download and install PaperCut Mobility Print on your print server for FREE
- Choose the printers you want to share
- Send an invite link to your users. Mobility Print will automatically detect their operating system and give your users a few steps to get printing working on their device.
Mobility Print is ideal for environments where users have admin rights on their devices. If that doesn’t work for you, go onto Option 2 below.
OPTION 2: Enable Point and Print without admin rights
For this PrintNightmare fix, we’ll combine Mobility Print with Print Deploy , which is available in PaperCut NG and PaperCut MF .
Print Deploy allows you to push printers, drivers, and default settings to users based on who they are and where they are. Users don’t need admin rights for Point and Print.
With Print Deploy you can also choose to make some printers available as optional printers. Optional printers will allow users to choose which printers they want to install through a simple self-help interface.
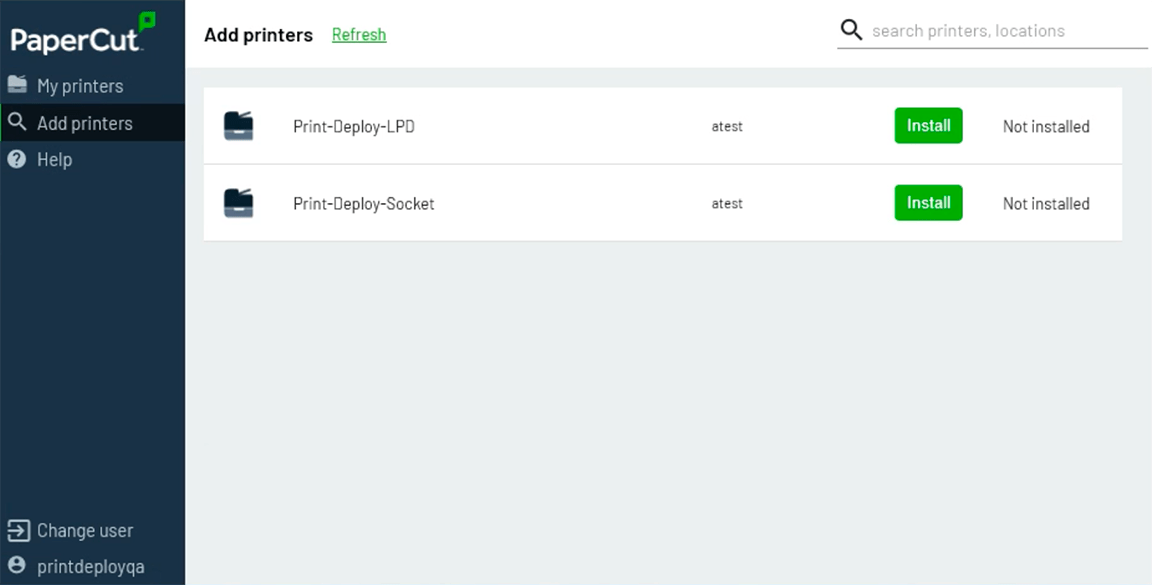
Adding printers with PaperCut Print Deploy
Follow these steps:
- Download and install PaperCut NG on your print server. PaperCut NG has a free 40-day trial. Read about PaperCut NG and how it will help you manage printing and also how much PaperCut NG will cost.
- Follow the steps in Option 1 to install Mobility Print on the same print server
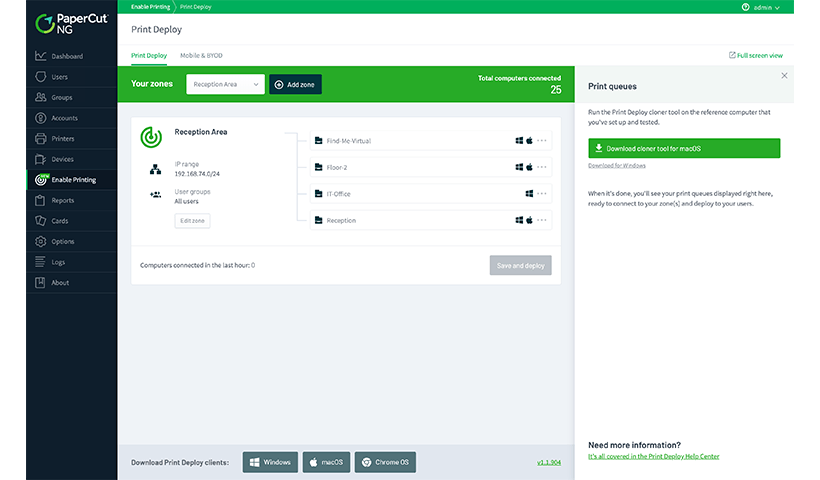
- In the PaperCut NG admin interface, scroll to ‘Enable Printing’ -> Print Deploy.
- In the ‘Add Printers’ section, choose ‘Import BYOD-friendly print queues’. This will import printers directly via the Mobility Print server software running on this machine.
- Select the printers you want to share, and click on ‘Connect to zone’. This will make the printers available in the ‘Everyone zone’.
- Select the operating system you want to deploy to at the bottom of the screen. You will be provided with a client and also steps on how to push the client to users via your favorite MDM tool like Intune or Jamf.
When the client runs on user devices, it will check in with the server from time to time to get the latest printers and drivers. - Optionally, if you need to deploy manufacturer drivers that include finishing options like stapling and hole punching, or you want to set default printer options, you can install these drivers and set the options on a reference computer and clone the printers.

Note: if you want to configure multiple zones in Print Deploy, you’ll have to purchase an additional Print Enablement pack.
OPTION 3: Replace your Microsoft Print Server (part I) and host PaperCut NG/MF in the cloud
With Print Deploy introduced in Option 2, you are not restricted to a print server. Print Deploy can push direct or print-server-less printers to users too, including drivers and default settings.
To get rid of your print server with Print Deploy, follow these steps:
-
Download and install PaperCut NG on your print server. This can also be a VM hosted in a cloud service like Microsoft Azure, Amazon Web Services (AWS), or Google Cloud Platform.
-
Install all the printers you want to share with users on a reference computer. On this computer you’ll check that you are happy with the drivers and you can successfully print.
-
From the reference computers, open the PaperCut NG admin web interface, scroll to ‘Enable Printing’ -> Print Deploy.
-
In the ‘Add printers’ section, choose ‘Import print queues’ by cloning printer drivers. This will download a small cloner tool.
-
Run the cloner tool to push all the printers and drivers on this computer to the server.
-
Select the printers you want to share, and click on ‘Connect to zone’. This will make the printers available in the ‘Everyone zone’.
-
Select the operating system you want to deploy at the bottom of the screen. You will be provided with a client and also steps on how to push the client to users via your favorite MDM tool like Intune or Jamf.
When the client runs on user devices, it will check in with the server from time to time to get the latest printers and drivers.
OPTION 4 : Replace your Microsoft Print Server (part II) and move to cloud print management
Perhaps it’s time to say farewell to your print servers once and for all. PaperCut Pocket , with its serverless printing, removes the PrintNightmare problem once and for all.
With PaperCut Pocket, devices in your workplace act as nodes within an edge mesh architecture , replacing the need for a physical print server.
What this means is that users can print from their Android, iOS, Chromebook, Mac, Windows device from anywhere, shut their device down, and still walk up to any printer to securely release their print job.
The print job is encrypted and replicated within the mesh, so there’s no need for a print server at all.
To get up and running with PaperCut Pocket:
- Start your free PaperCut Pocket trial .
- The trial will take you through a couple of steps to first get printing to work on your own device.
- You can invite others to PaperCut Pocket, which will send an email to them with a few steps to get up and running with printing.
If you like how that sounds, you can step up your game with PaperCut Hive and get added copy and scan tracking and control, Secure Print Release , and more.