Staff and students often need to print from their Chromebooks while working from home or around campus. Managing these requests can be a headache for IT teams without the right tools.
PaperCut Mobility Print is our free solution designed to simplify BYOD printing inK-12 schools.
In this guide, we’ll walk through the steps to enable secure, remote printing for your entire school, and teach you how to publish printers to end-users and ensure print jobs stay secure over the internet.
By using these tools, you can provide a seamless experience that feels exactly like printing from a local network.
What makes Mobility Print right for schools?
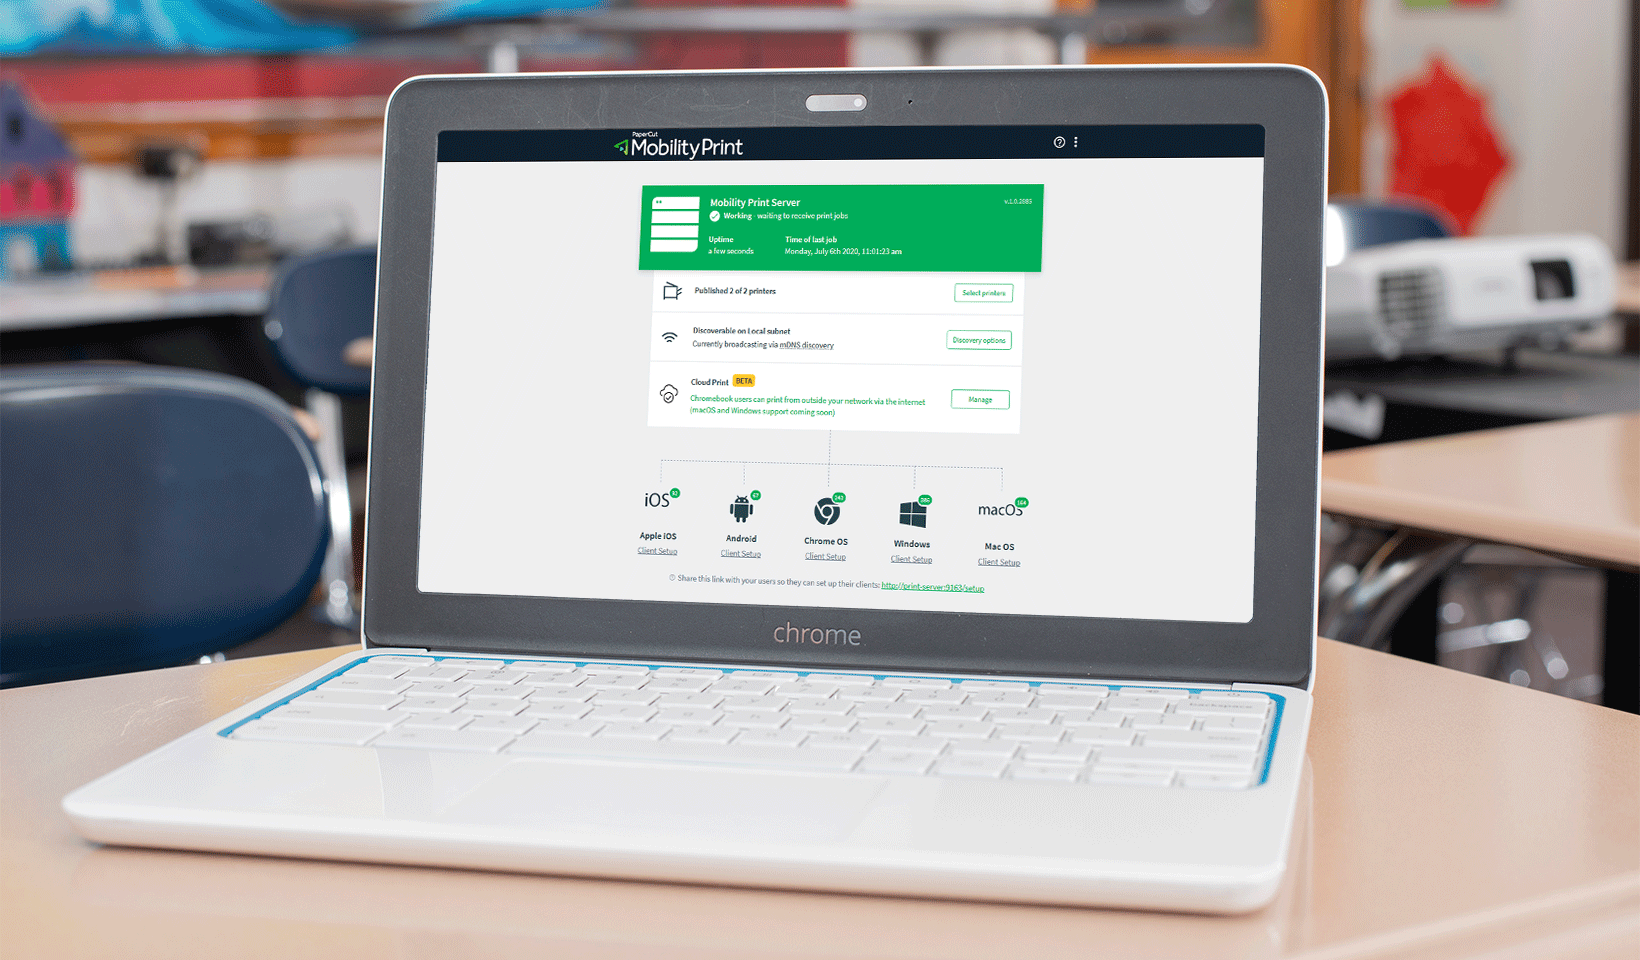
Mobility Print allows system administrators to auto-install printer drivers across an entire fleet of Chromebooks. It handles printer discovery and job delivery locally when possible, switching to the cloud only when users are remote.
Secure and native printing experiences
Security is a top priority when students send documents over the internet.
Mobility Print uses encrypted peer-to-peer connections to keep metadata and print jobs safe. Because it works natively, users simply hit “Print” in their device interface without needing extra apps.
Step-by-step Chromebook printing setup
With PaperCut Mobility Print, give your students and staff the freedom to print no matter where they are. It solves student and staff Chromebook printing, allowing them to print over the internet from any location.
An added bonus? You don’t have to pay a cent to use Mobility Print; it’s free! No matter how small or large your school is, or how much student and staff printing you do.
With PaperCut Mobility Print, printing is:
- Secure: Print jobs and metadata are sent via an encrypted peer-to-peer connection.
- Lightning-fast: Print jobs stay local when possible, and only sent via the internet when users are not connected to the local network.
- Native: Just like local printing, hit CTRL+P or ‘Print’ right in the device’s interface to enable simple, functional printing from any application.
How do you do it? Let’s walk you through, step-by-step, how to set up PaperCut Mobility Print.
Step one: Download PaperCut Mobility Print
Step two: Set up PaperCut Mobility Print
Step three: Set up and deploy Cloud Print
Find more information on how it works in our manual.
Where to get more info
Visit the Mobility Print Help Center for more information or alternatively follow the How to Migrate from Google Cloud Print to Mobility Print if you are planning on replacing Google Cloud Print.
Using PaperCut Mobility Print with PaperCut MF
While Mobility Print works great alone, pairing it with PaperCut MF offers even more control. With MF, you can implement Find-Me printing to prevent documents from sitting uncollected on the tray. Users simply walk up to any printer and release their job using a badge, user information, mobile phone, or PIN.
PaperCut MF tips for remote printing
- Just in case you haven’t yet, set up Find-Me printing.
- Increase the default period for how long jobs are held before being deleted. This will allow users to print from home, and then arrive several days later to pick up their print jobs.
- Stop print jobs from being released when the printer is in error. This will prompt users to walk to a different printer to release their jobs if the one they are standing at has a fault. This will avoid users having to reprint their document.
This is especially handy if you followed tip two because users will likely have closed the document they printed the previous day. Need some help?
Still need assistance setting up PaperCut Mobility Print?
No sweat – if you get stuck, feel free to reach out to your PaperCut reseller, or our support team.
Want to make sure you’re on top of all things PaperCut?
We love helping schools, teachers, sysadmins, and everyone else simplify their printing! That’s why we send out a monthly email with all the best information and updates.

Subscribe to our newsletter
We'll keep you in the loop with the most up-to-date news, tips, and more, all in a handy dandy monthly newsletter.
This site is protected by reCAPTCHA and the Google Privacy Policy and Terms of Service apply.