
We get it, printer ports are a bit of a nightmare. Not only do you have to navigate the world of hardware (SCSI, USB, ethernet cables and so on) but there are a bunch of software ports and wireless options out there, including TCP/IP printing, parallel LPT1, and now IPP.
So what is IPP printing, and do you really need it?
In a nutshell: if you’re printing over a network, then yeah, you probably need an IPP printer. But there’s a lot to unpack here – let’s run through the basics of IPP, what it is, and why it’s usually a good idea.
What is IPP printing? How does it work?
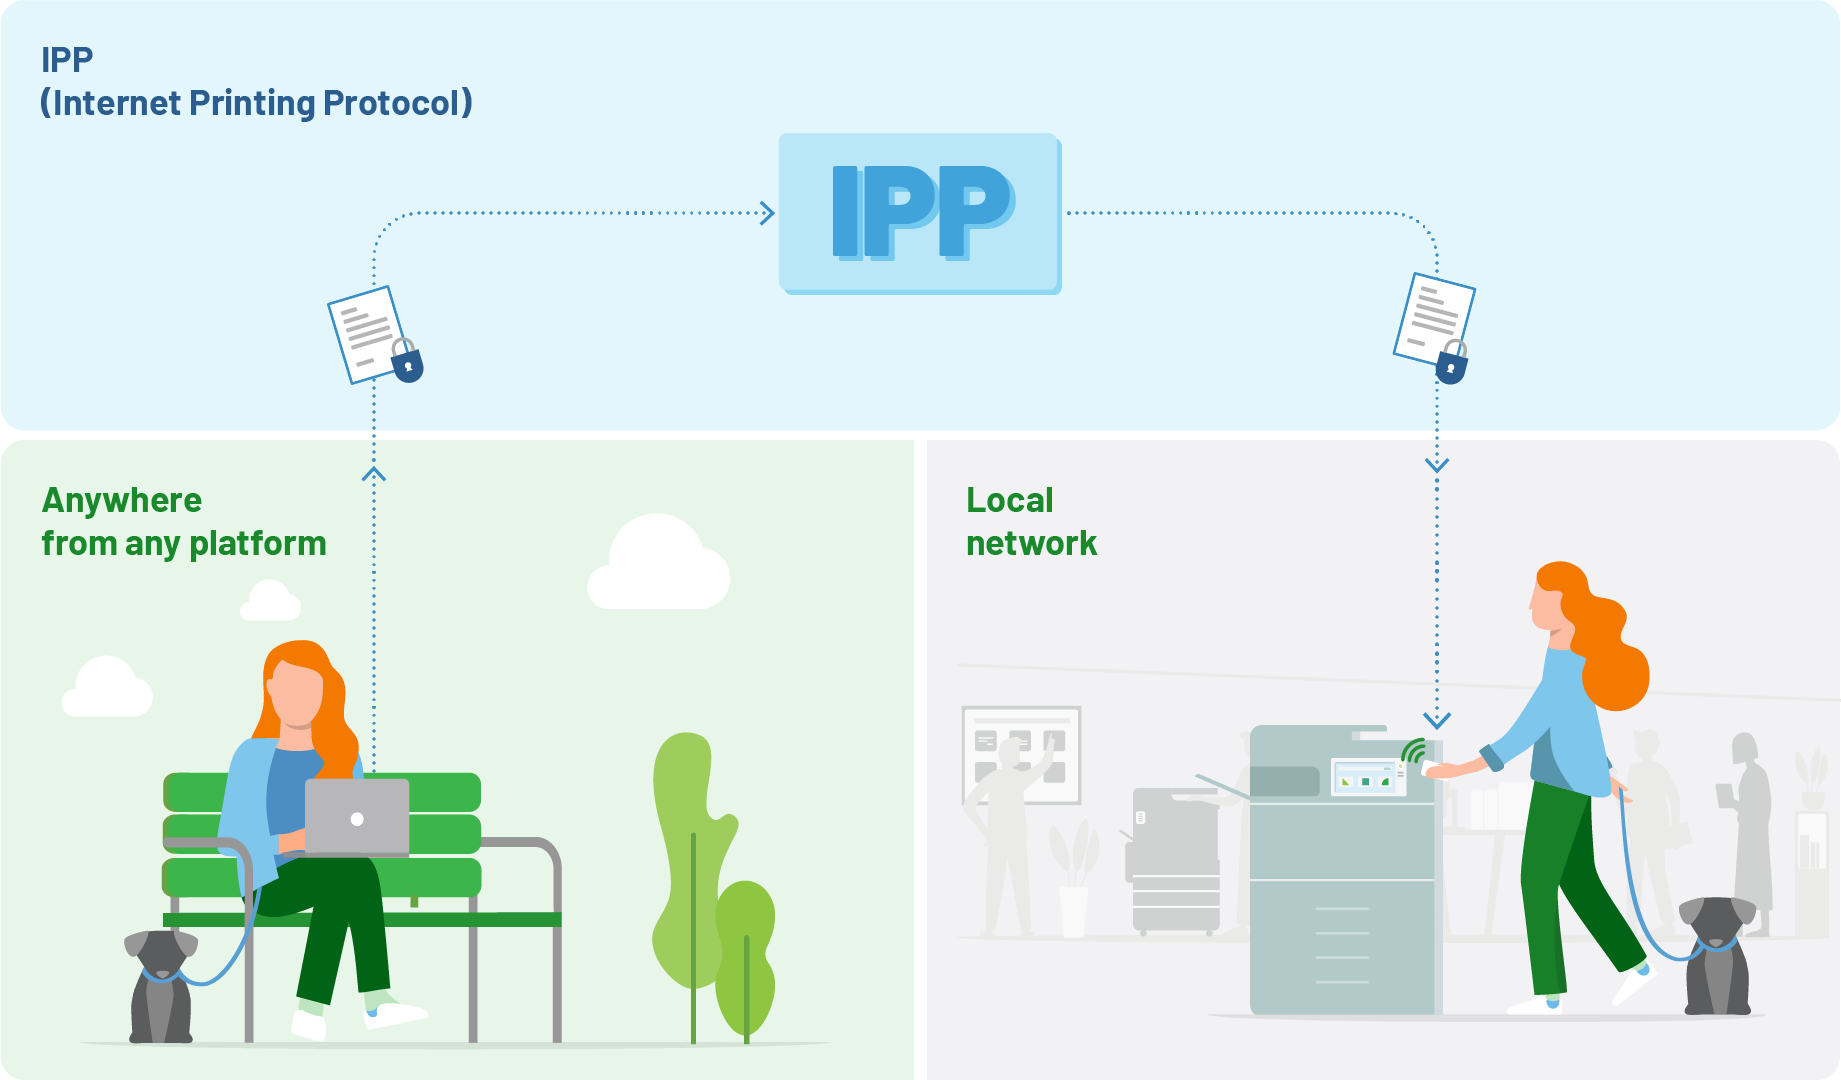
IPP is an acronym, like everything else in the print world – it stands for Internet Printing Protocol. It’s basically a protocol for printing documents over a network (usually the internet).
If you’re printing documents through a corporate server, or a home network, you can use an IPP printer port. IPP is pretty common these days, with the rise of wireless network printing. It basically killed off old, legacy printing protocols like LPR, LPD, and PORT 9100.
Because IPP operates over the HTTP and HTTPS protocols, it’s platform independent, and can even be used for cross-platform printing. Pretty nifty, right?
Some benefits of IPP printing
Remote printing
IPP lets you print through the internet, rather than a cable. That means you can send print jobs to any printer on the network, even when working remotely.
Platform agnostic
IPP is specifically designed to work across different operating systems and platforms, so anyone can use it.
Simple setup
Two words we love to hear. IPP printing is usually pretty straightforward to set up, as long as the printer is configured for IPP
Remote printing
Working from home? No worries, you can print remotely using the printer URL. This makes IPP great for travelers and work-from-home employees.
Secure printing
You can secure your IPP port using HTTPS, which encrypts your print data during transmission. It’s a good way to protect sensitive documents.
Print across networks
IPP can even be set up to print between different networks, making it a great choice for large organizations.

Should you use IPP for your network printing?
In a word: probably.
There are a lot of benefits to IPP printing and IPP ports, especially for large, complex organizations who need to juggle hundreds of users across multiple networks, locations and printers.
IPP cuts through the confusion, allowing any employee to print through the internet, wherever they happen to be.
Internet Printing Protocol also lets you, or at least your PC, ‘talk’ with the printer. You can quickly see what its capabilities are, its default configurations, the status of the print queue, and any hardware issues (like paper jams or low ink).
Just like a regular software interface.
How to set up IPP printing
There are three parts to setting up IPP on your network. You need to configure the printer itself, the print server (if applicable) and your computer. The good news is, IPP makes this process pretty easy.
1. Configure your printer
- Connect the printer to the network using an ethernet cable or Wi-Fi, and make sure it’s on.
- Jump into the printer’s web interface using its IP address in a web browser (you can find this in your printer’s control panel).
- Lastly, enable IPP printing – there’s usually a check box or button for this.
- Make sure to jot down your printer’s IP address: you’ll need this to connect your computer.
2. Set up the print server
Some networks will have a dedicated print server. If this is the case, you’ll need to install the printer driver onto the server first.
Access the driver’s admin console, add a new printer and select the option to add a network printer using IPP. You may be prompted to provide the printer’s IP address here.
3. Connect your computer
This process will differ slightly between Windows, macOS, and Linux, but essentially you need to go into the control panel or system preferences, add your printer, and then choose IPP as the designated protocol.
Congratulations! You now have an IPP printer.
Remember, most printer models will have their own manuals that walk you through this process, so that’s always a good place to start. Printer manufacturers usually have IPP setup guides on their websites, too.
How to print using IPP
Once you’ve set up an IPP printer, printing a document is no different than any other port. Simply open the document you want to print, go to ‘Print’, and select the IPP-enabled printer you want to use.
Easy, right?
Want to simplify how you print?
PaperCut is here to help!
If you’re after print tips to help you make printing seamless for end-users, our blog is full of nifty and useful information.
If you want to dive even deeper into the possibilities of print management software, our Knowledge base is full of clever information and insights from our team of very very clever experts, designed to help IT administrators and sysadmins take on every issue.
Not sure what product is right for your business? We can help you choose the right one: chat to us today!

