VMware Workspace ONE (formally AirWatch) Unified Endpoint Management (UEM) can be used to deploy the Print Deploy Client to Windows computers.
Grab a coffee and let’s get started.
Before you start
You need to be a Workspace ONE UEM administrator (or have relevant permissions), and should have already:
- Configured the Windows computers to be managed by Workspace ONE UEM.
- Existing, and appropriate groups created in Workspace ONE UEM.
You’re also a PaperCut NG/MF administrator (or have relevant permissions), and should have already:
- Made sure that the PaperCut NG/MF Application Server is accessible via TCP 9191, 9192, 9173, 9174 from the targeted client machines—preferably by a FQDN (Fully Qualified Domain Name) rather than an IP address.
- Set up your PaperCut Print Deploy Reference computer
- Deployed and manually tested at least one print queue.
Steps
To deploy the Print Deploy client using Workspace ONE UEM:
- (Optional) Customize the user login popup
- Upload the Print Deploy Client and configure APP
- Configure Assignment and Distribution for APP
Step 1: (Optional) Customize the user login popup
Depending on the method you’ve chosen to determine the user’s identity , users might be presented with a one-off user login popup for authentication. For details on how to customize the branding and text on the popup, go to Customize the Print Deploy user login popup branding and text .
Step 2: Upload the Print Deploy Client and configure APP
-
On your Windows computer, log in to your PaperCut NG/MF Admin Interface.
-
Click Enable Printing.
-
Click Download for Windows.
-
Make a note of the filename. Later, you will add this installer to Workspace ONE UEM .
-
Save the
.msito your Downloads folder. -
Login in to your VMware Workspace ONE UEM Admin Console.
-
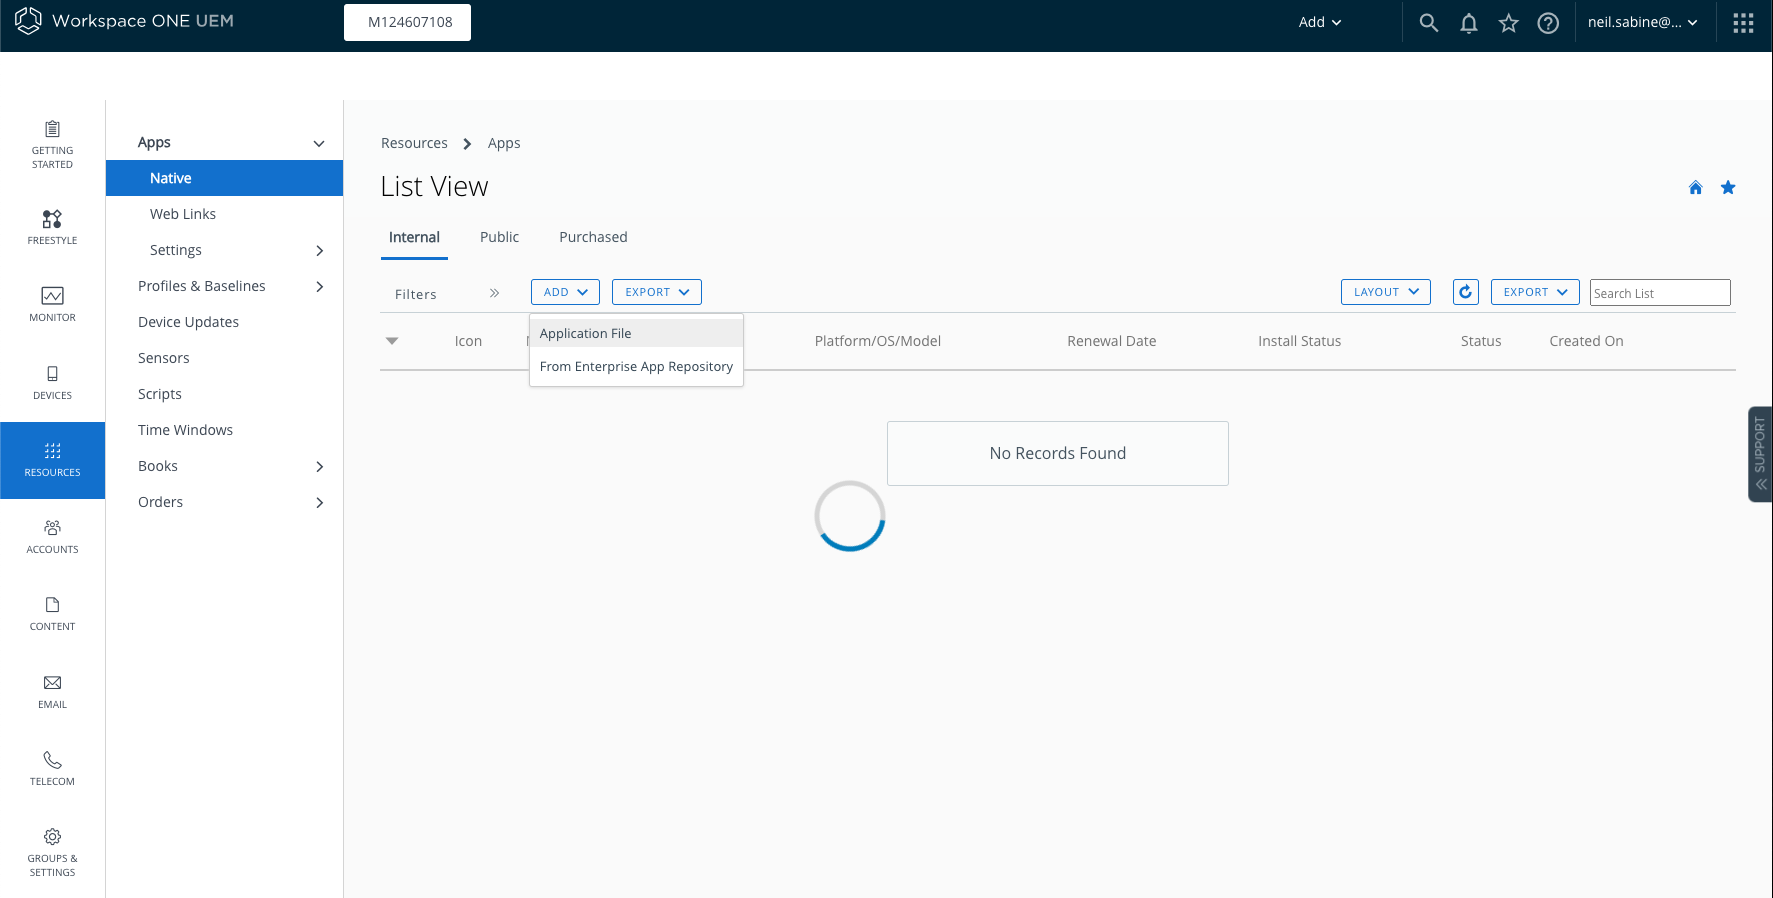
Click on RESOURCES > Applications > Native > Add > Application File.
-
On the popup set Type to
Local File. -
Click the ‘Choose file’ button to select the Print Deploy client installer from your Downloads folder.
-
Click the Save button you upload the Print Deploy Client installer.
-
On the next screen adjust the Organization Group ID (if required), leaving Is this a dependancy app? set to N0 and click Continue.
-
On the Details tab you can adjust the Name e.g. PaperCut Print Deploy Client you can leave all other settings as default.
-
Click on the Deployment Options tab.
-
Edit the Install Command to include ‘/quiet’ on th end of the existing command
e.g.
msiexec /i "pc-print-deploy-client[pc-printdeploy.domain.com].msi"would become
msiexec /i "pc-print-deploy-client[pc-printdeploy.domain.com].msi" /quiet -
Click the Images tab.
-
As with anyother App you deploy with WOrkspace ONE you have the ability to upload a Mobile Image, Tablet Image and Icon for the App. As Print Deploy is a featue of PaperCut NG / MF it does not have it’s own logo, so you can be creactive here.
-
Finally click the Terms of Use and make any adjustments required for your organisation, before clicking the Save and Assign button.
Step 3: Configure Assignment and Distribution for APP
-
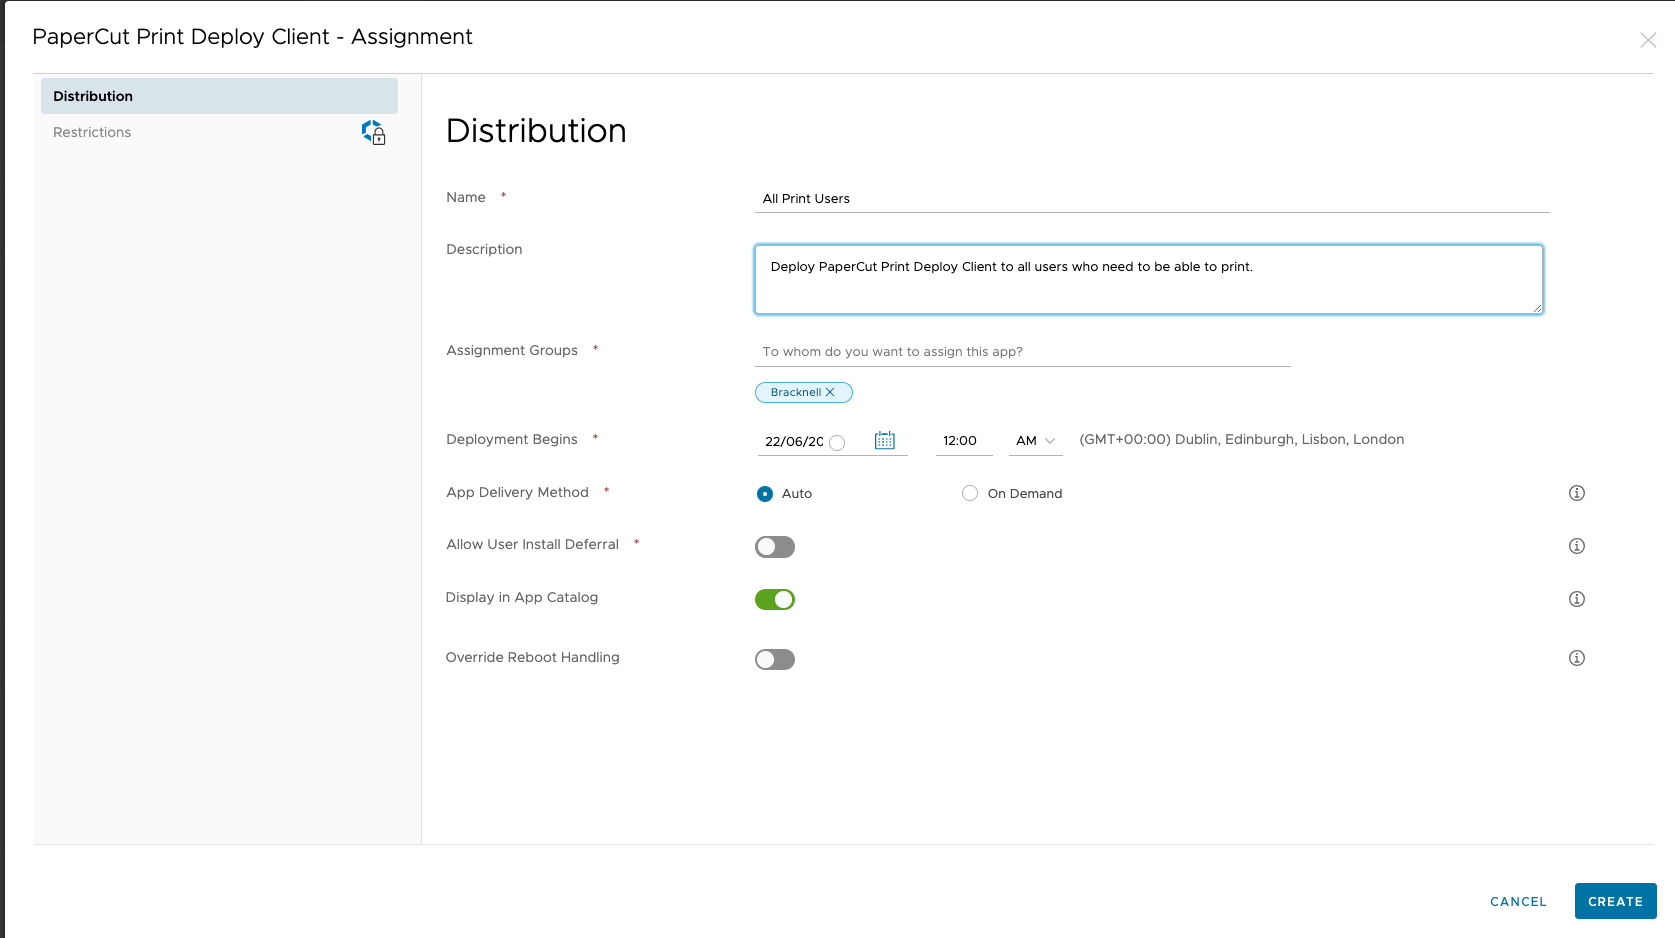
You should now be lookihg at the Distribution settigs for your APP. Enter a Name, Description.
-
Next select the Assignment Groups which contain computers where you wish to install the Print Deploy Client.
-
You can then configure the date and time when Deployment Begins and the App will start to get installed on end user computers in the Assignment Groups selected.
-
Ensure that App Delivery Method is set to Auto.
-
You can then select as to whether or not you want to have the PaperCut Print Deploy APP displayed in the App Catalog.
-
Finally click the Create button to save the and create the Distribution.
-
On the Assignment screen you should see the Distributon you just created ono the Assignments tab. You have the ability to create additional Assigments using the Add Assignment button should you need to.
-
Click the Exclusions tab to add any Assignment Groups you may which to exclude.
-
Click the Save button to Save the assignments.
-
Finally on the Preview Assigned Devices screen click on the Publish button to publish the APP and start deployment of the Print Deploy Client.
Your Print Deploy Client will now be deployed to the appropriate computers, starting from the date and time you configured in the Assignment.
Did that work?
You’ll know your deployment is up and running if you can log in to the client successfully, and you’re not receiving errors displayed in the client (including invalid username/password for a known good username and password).
“No Printers Found” can be indicative of either a failed connection to the Print Deploy server or a Zone misconfiguration (the user doesn’t belong to a zone). Double-check that your Print Deploy username matches the user from PaperCut!
Reach out to PaperCut support if you need assistance.
Comments