There are three options for Office/Microsoft 365:
- Configure an SMTP service over OAuth2 - We recommend this option.
- Configure an SMTP Relay. While it still works, it is not very straightforward.
- Use the Outlook.com pre-configure/basic auth option - We don’t recommend this option because Microsoft is deprecating it .
Set up an app or a client for PaperCut MF on Azure Active Directory
Here on Azure portal , each organization has some tenants, and you can register applications within the tenants.
The registration for an application here is more like a registration of intent, telling Microsoft services that I have an external application that would like to interact with the resources held on Azure or other Microsoft services.
This is all managed by Azure Active Directory. You can read more documentations about how Microsoft manages identity and access on their website. Here we will focus on how to set up a client to interact with Microsoft resources on behalf of an application, which is, in this case, PaperCut MF.
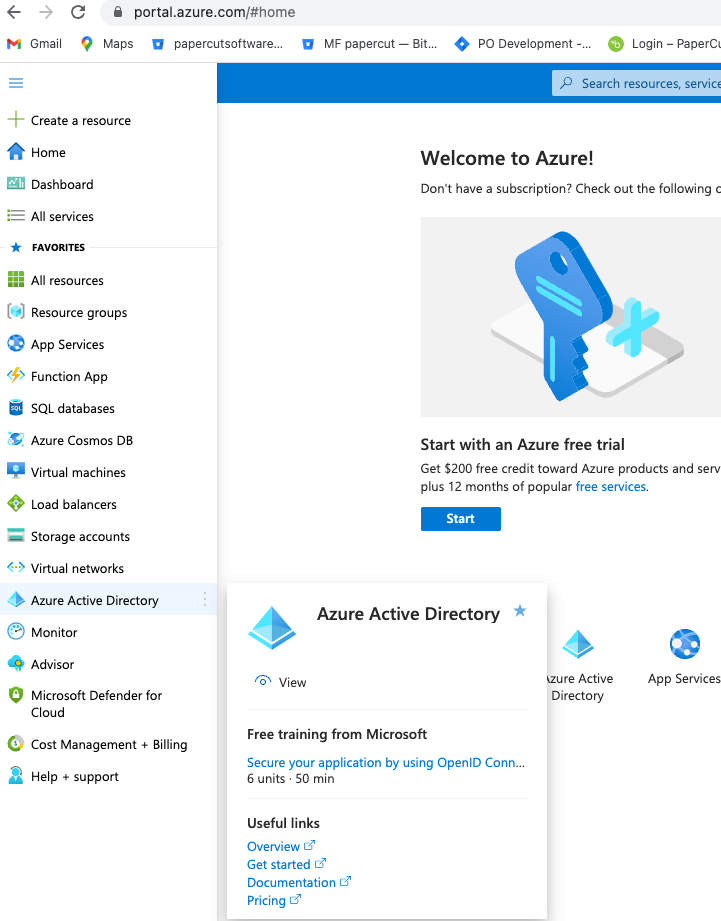
- Start by entering the Azure Active Directory (AAD) by clicking on the menu item;
- Inside AAD, choose App registrations. Here you should see the registered apps (or rather, their clients) for the whole organization. But, under the sub-tab of Owned applications, the UI will only display apps registered by you. It’s a lot faster to go through the registered apps here. If there aren’t any listed, it just means you haven’t registered any yet. That’s what we are doing right now;
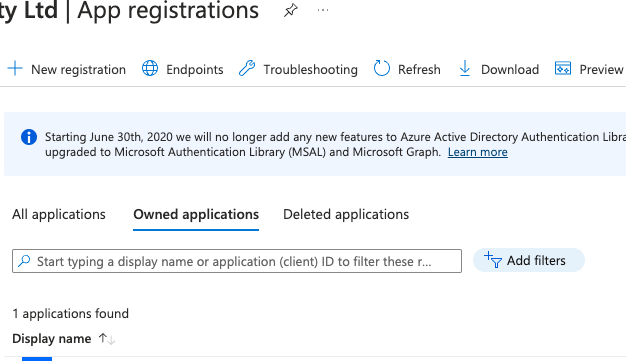
- Click on + New registration button shown at the top of the page;
- While filling in the Redirect URIs, make sure you know how your MF server is set up. By default, you can enter http://localhost:9191/azure-oauth2-callback and https://localhost:9192/azure-oauth2-callback as callback URIs for the purpose of setting up SMTP server;
- After filling in the details of the app registration form, click Register at the bottom of the page. You can change the name of the client later.
- You should see the screen like this:
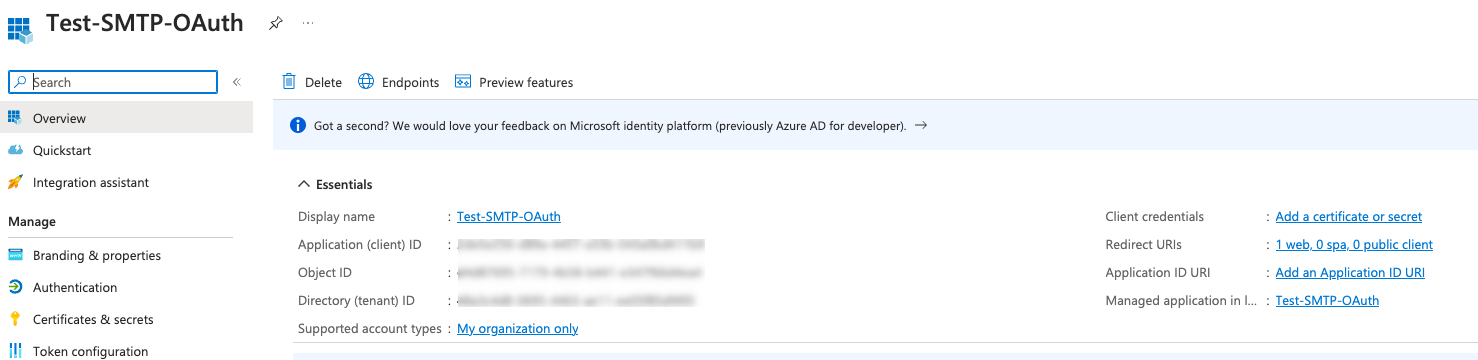 Notice that there are 0 public clients here in the “Redirect URIs” section.
 - If you have selected the correct platform, “Web”, in step 4 while registering the app, you can expect to see this in the “Authentication” section:
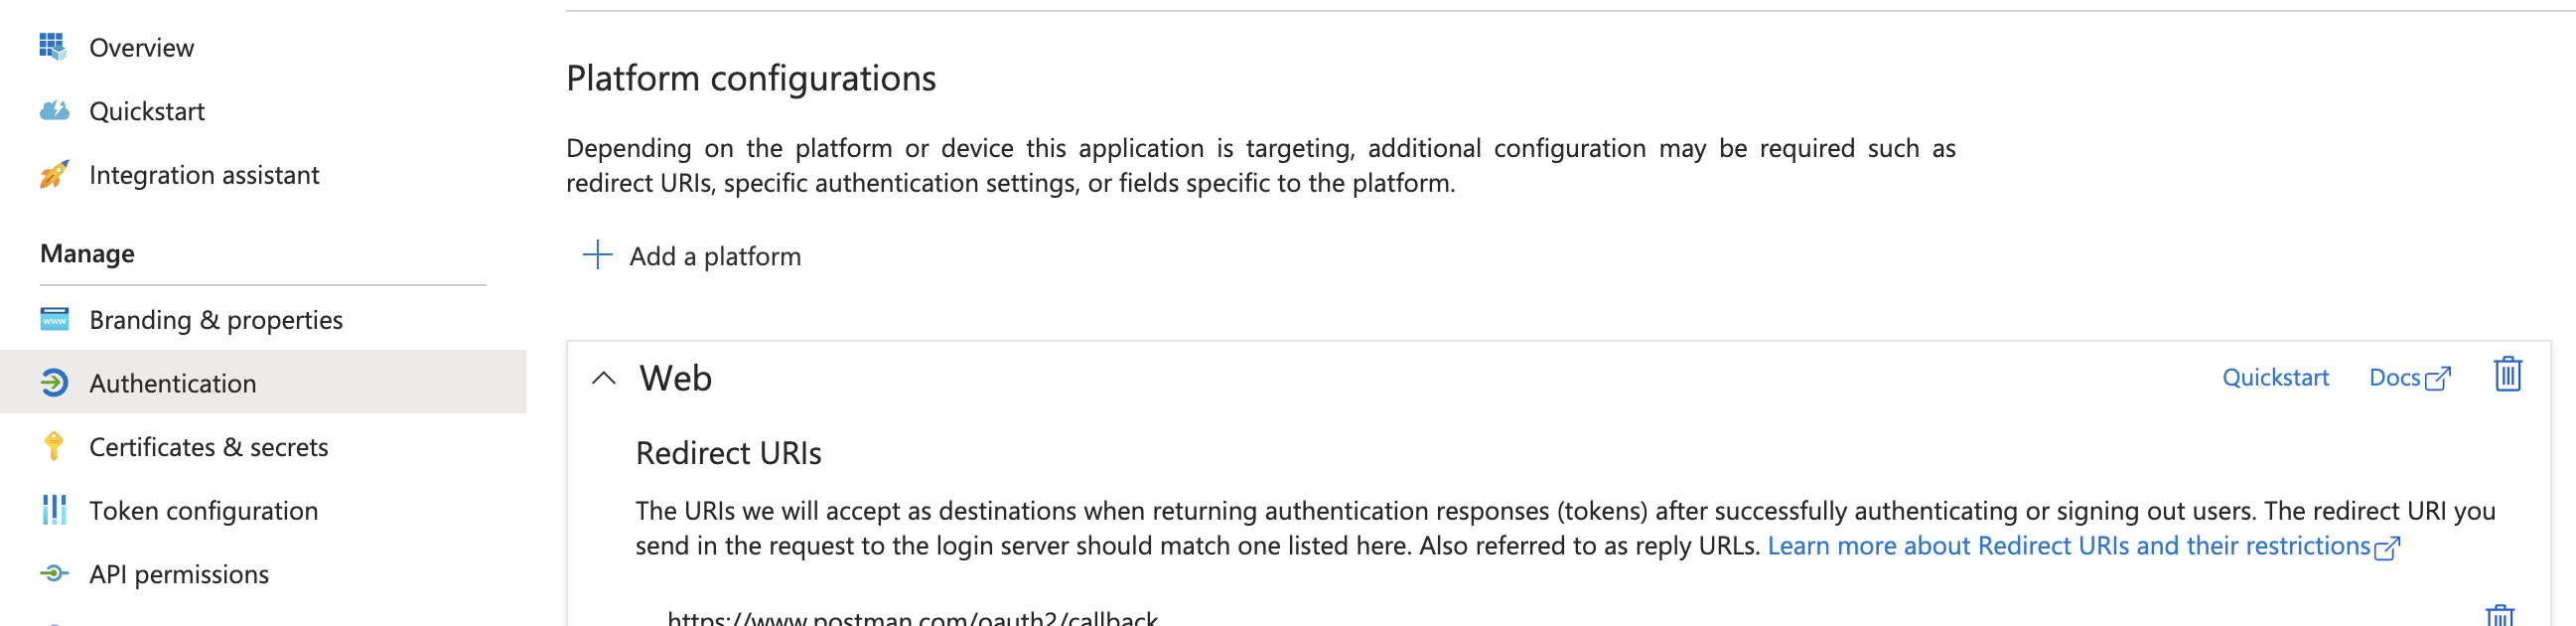 For the purpose of using PaperCut NG/MF, you only need the “Web” platform added here. Make sure there are no other types added. Redirect URLs should be displayed here in a list under the “Web” platform.
 - Copy 2
- values and save them somewhere handy: Directory (tenant) ID and Application (client) ID, the Object ID is not required;
- Now we have to create a client secret. With Microsoft Azure, one client can have more than one client secrets. They all last for a while but are required to be updated at regular intervals. Now click on the link that says Add a certificate or secret on the right side;
- You should see a page like this. Click on + New client secret to start.
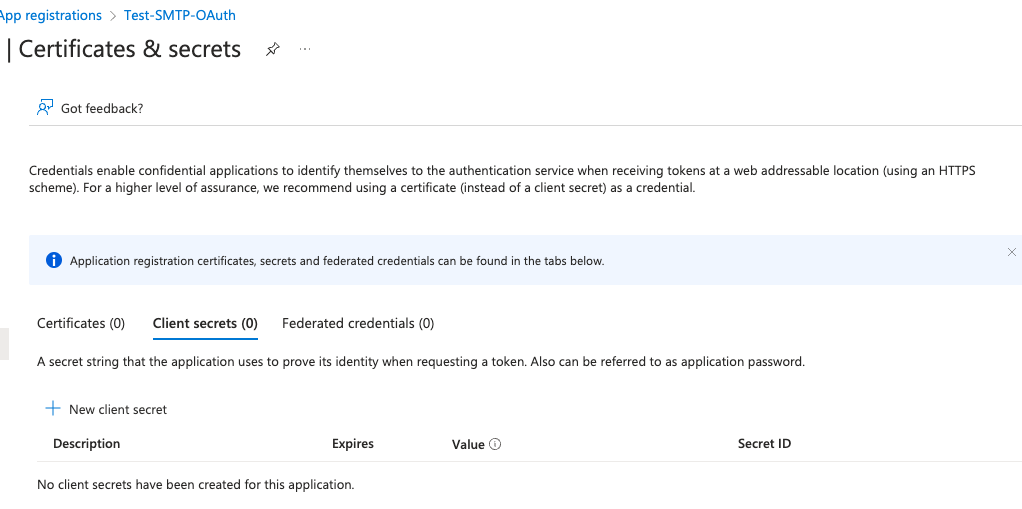
- Enter a description for the client secret and choose how long you want the client secret to be valid for. The longest validity is 2 years. Or you may choose to give it a custom expiry date. Click on Add;
- Be careful and copy the Value of the client secret now and save it somewhere safe;
- Now we have 3 pieces of information about this client, namely: its Tenant ID, its Application ID and its Client Secret.
This concludes the basic setup of the Azure Active Directory Client.
Add API permissions to the client we just set up
We have just created an entity that will act as the intermediary between the Microsoft APIs and PaperCut MF. Now we need to add which APIs it is allowed to access.
- Click on API permissions in the left menu, you should see that this client has by default, 1 permission, which is to do User.Read, under Microsoft Graph category;
- For SMTP purposes, please add some permissions to access Office 365 Exchange Online. Click on + Add a permission first;
- Head over under APIs my organization uses sub-tab, and start typing Office 365 Exchange Online. Choose it;
- You will be presented a choice to choose between Delegated permissions or Application permissions. Select Delegated permissions;
- Go to the Mail category, and tick the Mail.Send box. If you also want to leave some more options open, such as using Send As somewhere down the track, also tick the Mail.Read.All, Mail.Send.All and Mail.Send.Shared boxes. But minimally, you need Mail.Send. Remember, this is a designated email address just for notifications, and it should not belong to any individual;

- Be sure to grant them admin consent so the status column of these permissions have green ticks;
- Just because the UPN of a user underneath your Azure organisation looks like an email address, it doesn’t mean it is. It is more of a user@organization type of entry. To confirm that the email is indeed operational, you need to head to Microsoft admin dashboard to have a check;
- Click on Users > Active Users from the left menu panel;
- Search for the user you would like to use as the default SMTP sender, such as notif@yourorg.com ;
- It should exist here if you had created this user under the Azure portal, click into this user entity;
- Be sure that it has an active license to use Exchange Online.
 As this means the active user is using email services at the address that is the same at the UPN. Otherwise, the UPN is just a UPN. If you are just granting this user a license, it may take a few minutes for Exchange to set up the email service for the user;
 - Then in the same pop-open menu, click on Mail tab. Here you need to edit the Email apps. You must give consent to apps to access Authenticated SMTP by ticking the box;

This concludes the permission setup from both Azure and the Microsoft admin console. When the email address is up and running, it can be used to send emails from PaperCut MF.
Setup SMTP service on PaperCut MF
With the client and its permissions all set up, the last step is to use the client inside PaperCut MF to set up the SMTP service.
- Go to Options > Notifications page;
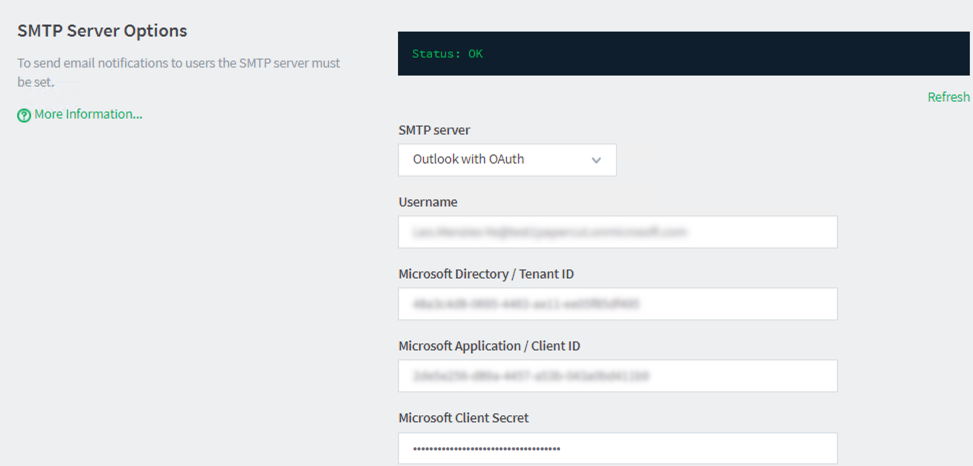
- In the SMTP Server Options section, use the dropdown menu and select an Outlook with OAuth option that applies to you. Most users around the globe use the global option, which is Outlook with OAuth. If your subscription is on the US national cloud please choose the Outlook with OAuth (US Gov) option.
- Fill in the SMTP server details such as details Username, Microsoft Directory/ Tenant ID, and Microsoft Application/ Client ID.
- In the Microsoft Client Secret input box, enter the Client Secret Value (not the Secret ID).
- Click on the Apply button at the bottom of the page to save this information, and the page will reload;
- You will now see instructions in the status area and also an Authorize button below the client details. Click Authorize;
- You will be asked to log in to a Microsoft account. If the email account you intend to use for notifications also has the admin privilege for your Azure AD organization, you may opt to give consent on behalf of your organization when prompted. Otherwise, just click Continue without trying to give consent on behalf of the organization. It shouldn’t affect the service on the account level;
- Be sure to log in to the account that you are using as the Username here! You are giving consent to PaperCut MF to send emails on behalf of that particular user by filling in the Username before. Now the authentication must be for the same user;
- Once the page is redirected back to the Options > Notifications page, the status area should say Status: OK.
Now you may go on and scroll down to the bottom of the page to test and send a message by email to a user.
Issues related to sending emails as another user and configuring the “From Address”
Sometimes it is necessary or at least preferred to send an email from the notification system as another user.
For example, if the public outgoing SMTP account is, say “ notifications@yourorg.com ”, you may want it to appear as it was from another account.
One such scenario could be that you are sending off a scan job from a scanner, but to another person inside the organization instead of yourself. You may want the email to appear to be from you, instead of the public “ notifications@yourorg.com ”.
If you are moving your SMTP services from an old email address plus “app password” type of set up for Google, your experience so far is seeing an email being sent from the public account, e.g. “ notifications@yourorg.com ” with the user’s name next to it, e.g. John Doe.
If you are moving your SMTP services from Outlook/Microsoft’s older settings, you would have been using forwarding to achieve this.
Regardless which services you have been using so far, the new experience will be:
- The sender will remain the public SMTP sender account, i.e. you will see in the email’s details in the recipient’s inbox as coming from “ notifications@yourorg.com ”;
- Next to the sender address, you will see the user’s name, i.e. John Doe, which makes the sender part looks like “John Doe - notifications@yourorg.com ”, or however your mail service renders that part;
- When you click on “reply”, the reply-to address will be the actual user who did the scanning, not the public sender address, it will be something like “ j.doe@yourorg.com ” you would be replying to.
This approach takes a few factors into consideration:
- People need to be able to quickly reply to a system delivered scan job email when required;
- With SMTP over OAuth, sending as other users require stringent permissions set up in the background, which can be very time-consuming for the admin, with very little extra benefit. Microsoft explicitly expects you to set up such permissions one at a time if you want to send out an email as “ j.doe@yourorg.com ” by “ notifications@yourorg.com ”. If every user wants to have this, the admin will have to set it up for all users within the organization;
- Consistency with previous user experiences. As mentioned above, right now sending scan jobs over Gmail SMTP accounts uses public account with the actual user’s name. On Outlook, current experience doesn’t apply because forwarding is used;
- Easy to recognize who initiated the scan job.
Comments