- Overview
- Step 1 - Get the PaperCut NG or MF System Health Monitoring details
- Step 2 - Access the Zabbix Server Admin web interface
- Step 3 - Create a PaperCut NG or MF host group on the Zabbix Server Admin web interface
- Step 4 - Create a PaperCut NG or MF host on the Zabbix Server Admin web interface
- Step 5 - Import the Zabbix template for your PaperCut NG or MF host
- Step 6 - Configure PaperCut NG or MF host macros
- Step 7 - Install the Zabbix agent on the PaperCut NG or MF Application Server
- Step 8 - Verify PaperCut NG or MF System Health is monitored by Zabbix
Monitoring PaperCut NG or MF System Health using Zabbix
THE PAGE APPLIES TO:
Contents
- Overview
- Step 1 - Get the PaperCut NG or MF System Health Monitoring details
- Step 2 - Access the Zabbix Server Admin web interface
- Step 3 - Create a PaperCut NG or MF host group on the Zabbix Server Admin web interface
- Step 4 - Create a PaperCut NG or MF host on the Zabbix Server Admin web interface
- Step 5 - Import the Zabbix template for your PaperCut NG or MF host
- Step 6 - Configure PaperCut NG or MF host macros
- Step 7 - Install the Zabbix agent on the PaperCut NG or MF Application Server
- Step 8 - Verify PaperCut NG or MF System Health is monitored by Zabbix
Several organizations use PaperCut NG and PaperCut MF as their print management solution to track and control their printing, copying, scanning and faxing. Both products provide a System Health interface to provide information about the state of the print environment and infrastructure, including servers, printers, and multi-function devices.
The third-party tool Zabbix ( http://www.zabbix.com ) can be used to help maximize and realize the benefits of this real-time system health monitoring. This guide provides more information about how to use Zabbix 3.2 (please note: these instructions were written and tested with v3.2 of Zabbix; newer versions may not work with this old template that was created in 2018 by Zabbix’s creators open-future.be) to monitor your PaperCut NG or MF Application Server, for both Windows and Linux.
To use Zabbix, you need the following:
• Python 2.x or 3.x – Python 2.x or 3.x must be installed on your PaperCut NG or MF Application Server.
For more information on Python for Windows, see Download Python for Windows and How to Install Python on Windows.
• Zabbix Server – The Zabbix Server must already be installed and set up. For more information, see How To Install and Configure Zabbix to Securely Monitor Remote Servers on CentOS 7.
• Zabbix agent – The Zabbix agent must be configured using the following steps:

Step 1 - Get the PaperCut NG or MF System Health Monitoring details
1. Log in to the PaperCut NG or MF Admin web interface: http://
2. Navigate to Options > Advanced
3. In the System Health Monitoring section’s Authorization - GET query parameter field take note of the following:
a. The PaperCut NG or MF Application Server authorization key:

b. The PaperCut NG or MF Application Server IP address:

c. The PaperCut NG or MF Application Server URL:

Step 2 - Access the Zabbix Server Admin web interface
To access the Zabbix Server Admin web interface:
1. Log in to the PaperCut NG or MF Admin web interface: http://

2. Enter the Zabbix Server Administrator credentials
3. Click Sign in.
Step 3 - Create a PaperCut NG or MF host group on the Zabbix Server Admin web interface
To create a PaperCut NG or MF host group on the Zabbix Server Admin web interface:
1. Access the Zabbix Server Admin web interface.
2. Navigate to Configuration > Host Groups and click Create host group:

3. Enter the relevant Group name and click Add:

4. Verify that the PaperCut NG or MF host group you just created is on the Configuration > Host groups page:

Step 4 - Create a PaperCut NG or MF host on the Zabbix Server Admin web interface
To create a PaperCut NG or MF host on the Zabbix Server Admin web interface:
1. Access the Zabbix Server Admin web interface.
2. Navigate to Configuration > Hosts and click Create host:

3. Change the default settings of only the following fields and click Add:
Host name – Name of your PaperCut NG or MF Application Server (exclude the FQDN).
Visible name – Easily identifiable name of your PaperCut NG or MF host on the Zabbix Server.
Groups – Select the PaperCut NG or MF host group (you just created) from the Other groups list and click the < button, to add it into the In Groups list.
Agent interfaces IP address – Enter the IP address of your PaperCut NG or MF Application Server noted from the Authorization - GET query parameter of the PaperCut NG or MF Admin web interface. For example, 10.250.64.127:9191
Agent interfaces Port – Enter the port used to communicate with your PaperCut NG or MF Application Server (9191).

4. Verify that the PaperCut NG or MF host you just created is on the Configuration > Hosts page:

Step 5 - Import the Zabbix template for your PaperCut NG or MF host
To import the Zabbix template for your PaperCut NG or MF host:
1. Navigate to:
https://github.com/Open-Future-Belgium/zabbix-papercut/blob/master/zabbix
_template/zabbix_papercut_template.xml
2. Right click the Raw button and select Save link as…:

3. Save the file in to your local directory:

4. Access the Zabbix Server Admin web interface.
5. Navigate to Configuration > Templates and click Import:

6. On the Import file field, click Choose File:

7. Locate and select the zabbix_papercut_template.xml file saved in your local directory and click Open:

8. Verify that the Import file field displays the zabbix_papercut_template.xml file:

9. Do not change the default settings of the Rules fields:

10. Click Import:

11. Verify that the Zabbix template for your PaperCut NG or MF host that you just imported is on the Configuration > Templates page as Template_PaperCut.
Note: To search for and locate the template, specify Template_PaperCut as the search filter on the Name field and click Apply.

12. Click the Zabbix template for your PaperCut NG or MF host that you just imported, Template_PaperCut.
13. Change the default settings of only the following field and click Update:
Hosts / templates – Select the PaperCut NG or MF host group (you just created) from the Other | group drop down and click the < button, to add it into the In list.

14. Verify that the Zabbix template for your PaperCut NG or MF host that you just imported (Template_PaperCut) on the Configuration > Templates page is Linked to the PaperCut NG or MF Server:

Step 6 - Configure PaperCut NG or MF host macros
To configure macros for your PaperCut NG or MF host:
1. Access the Zabbix Server Admin web interface.
2. Navigate to Configuration > Hosts and click the PaperCut NG or MF host (you just created):

3. Navigate to Macros > Inherited and host macros:

4. Click Change and change the Effective value of the following Macros:
{$AUTHORIZATION} – Enter the authorization key of your PaperCut NG or MF Application Server noted from the Authorization - GET query parameter of the PaperCut NG or MF Admin web interface. For example, Authorization=tPEidXZQv4znKF8hUtpYYAEInIdtZKCe
{$PAPERCUTIP} – Enter the IP address of your PaperCut NG or MF Application Server noted from the Authorization - GET query parameter of the PaperCut NG or MF Admin web interface. For example, 10.250.64.127:9191

5. Click Update.
6. Navigate to Configuration > Hosts and click the PaperCut NG or MF host (you just created).
7. Navigate to Macros > Host macros.
8. Verify that the Effective value of the {$AUTHORIZATION} and {$PAPERCUTIP} macro are the same as those you just updated on the Macros > Inherited and host macros page.
Step 7 - Install the Zabbix agent on the PaperCut NG or MF Application Server
On Windows:
To install the Zabbix agent on the PaperCut NG or MF Application Server on Windows:
1. On your Windows PaperCut NG or MF Application Server, in the following path, create a Zabbix folder: C:\zabbix

2. Navigate to:
https://www.zabbix.com/download
3. From the Zabbix Sources section, select the latest and click Download:

4. Save the downloaded file in to the Zabbix folder that you just created:

5. Navigate to
https://github.com/Open-Future-Belgium/zabbix-papercut
6. Click Clone or download > Download Zip:

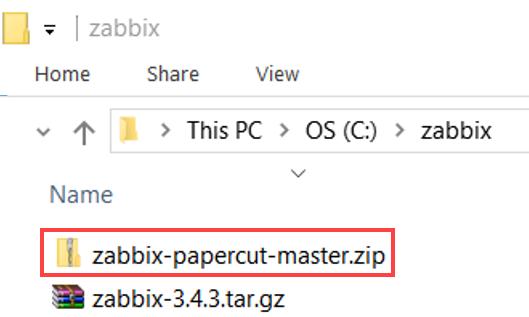
7. Save the downloaded file zabbix-papercut-master.zip in to the Zabbix folder that you just created:
8. From the downloaded zip folder zabbix-papercut-master.zip, navigate to the Windows sub-folder: C:\zabbix\zabbix-papercut-master.zip\zabbix-papercut-master\windows:

9. From the Windows folder, copy the relevant python file that corresponds to the Python version installed on your PaperCut NG or MF Application Server:
• If you have Python version 2.x, then copy the PcZabbixAgentPy2.py file
• If you have Python version 3.x, then copy the PcZabbixAgentPy3.py file

10. Paste the copied python file in the Zabbix folder that you just created:
• If you have Python version 2.x, then use C:\zabbix\PcZabbixAgentPy2.py
• If you have Python version 3.x, then use C:\zabbix\PcZabbixAgentPy3.py

11. Navigate to the Windows Start menu.
12. Right-click the Command Prompt.
13. Select Run as administrator.
14. Run the following command (based on the Python version installed on your PaperCut NG or MF Application Server):
• If you have Python version 2.x, then use:
cd c:\zabbix\
python PcZabbixAgentPy2.py
• If you have Python version 3.x, then use:
cd c:\zabbix\
python PcZabbixAgentPy3.py

15. Enter the following responses to the script’s wizard:
| Enter PaperCut NG or MF System Health Monitoring URL: | Enter the URL of your PaperCut NG or MF Application Server noted from the Authorization - GET query parameter of the PaperCut NG or MF Admin web interface. A list of other endpoints that can be used can be found here. For example,http://localhost:9191/api/health/application-server/status?disk-threshold-mb=1&Authorization=FqwMbv0nARBPqaJOx5bmX6I1XpTvIsIk |
| Enter Zabbix Server IP address [127.0.0.1]: | Enter the IP address of your Zabbix Server. If nothing is entered, then 127.0.0.1 is used. |
| Enter Zabbix active Server IP address []: | Enter the same IP address as entered for Enter Zabbix Server IP address. If nothing is entered, then the same IP address as entered for Enter Zabbix Server IP address is used. |
16. Verify that the Zabbix agent is installed successfully:

On Linux:
To install the Zabbix agent on the PaperCut NG or MF Application Server on Linux:
1. On your Linux PaperCut NG or MF Application Server, navigate to the Linux Shell Command Terminal.
2. Run the following commands:
a. Create the Zabbix repository rpm -Uvh http://repo.zabbix.com/zabbix/3.4/rhel/7/x86_64/zabbix-release-3.4-1.el7.centos.noarch.rpm
b. Install the Zabbix agent yum install zabbix-agent -y
c. Start the Zabbix agent systemctl start zabbix-agent.service
3. Verify that the Zabbix agent is installed and started successfully:
* Confirm the Zabbix agent has started systemctl status zabbix-agent.service

4. Run the following command:
* Set up the Zabbix agent to start by default at startup systemctl enable zabbix-agent.service
5. Verify that the Zabbix agent starts by default after the PaperCut NG or MF Application Server is started:

6. Navigate to
https://github.com/Open-Future-Belgium/zabbix-papercut
7. Click Clone or download > Download Zip:

8. Save the downloaded zip folder zabbix-papercut-master.zip in the /tmp directory of your Linux PaperCut NG or MF Application Server.
9. On your Linux PaperCut NG or MF Application Server, navigate to the Linux Shell Command Terminal.
10. Run the following command (based on the Python version installed on your PaperCut NG or MF Application Server):
If you have Python version 2.x, then use:
cd /tmp
ls zabbix-papercut-master*
unzip zabbix-papercut-master.zip
ls zabbix-papercut-master*
cp zabbix-papercut-master/zabbix-papercut-master/papercut.conf /etc/zabbix/
cp zabbix-papercut-master/zabbix-papercut-master/linux/py2/*.py /etc/zabbix/
cp zabbix-papercut-master/zabbix-papercutmaster/zabbix_agentd.d/userparameter_papercut.conf/etc/zabbix/zabbix_agentd.d/
If you have Python version 3.x, then use:
cd /tmp
ls zabbix-papercut-master*
unzip zabbix-papercut-master.zip
ls zabbix-papercut-master*
cp zabbix-papercut-master/zabbix-papercut-master/papercut.conf /etc/zabbix/
cp zabbix-papercut-master/zabbix-papercut-master/linux/py3/*.py /etc/zabbix/
cp zabbix-papercut-master/zabbix-papercutmaster/zabbix_agentd.d/userparameter_papercut.conf/etc/zabbix/zabbix_agentd.d/

11. Locate the following file: /etc/zabbix/papercut.conf
12. Edit the file as follows:
| papercut_ip= | Enter the IP address of your PaperCut NG or MF Application Server noted from the Authorization - GET query parameter of the PaperCut NG or MF Admin web interface. For example, 10.250.64.127:9191 |
| papercut_auth= | Enter the authorization key of your PaperCut NG or MF Application Server noted from the Authorization - GET query parameter of the PaperCut NG or MF Admin web interface. For example, |

13. Locate the following file: /etc/zabbix/zabbix-agentd.conf
14. Edit the file as follows (change the default values in the file):
| Server=127.0.0.1 | Enter the IP address of your Zabbix Server. If nothing is entered, then 127.0.0.1 is used. |
| ServerActive=127.0.0.1 | Enter the same IP address as entered for Server . If nothing is entered, then the same IP address as entered for Server is used. |
| Hostname= | Enter the hostname of your PaperCut NG or MF Application Server. |
15. Add the following parameter (to enable support for UnsafeUser parameters, the “/” in printer names) in the last line of the file: UnsafeUserparameters=1

16. Run the following command
* Restart the Zabbix agent on the PaperCut NG or MF Application Server systemctl restart zabbix-agent.service
Step 8 - Verify PaperCut NG or MF System Health is monitored by Zabbix
To verify that your PaperCut NG or MF System Health can be monitored by Zabbix:
1. Access the Zabbix Server Admin web interface.
2. Navigate to Monitoring > Latest data:

3. On the Hosts field, click Select:

4. From the Group drop down, select the PaperCut NG or MF host group:

5. From the Hosts section, check the PaperCut Server option and click Select:

6. Click Apply:

7. Verify that the most recent data from your PaperCut NG or MF Application Server is displayed on the Last check and Last value columns:

Note: If the most recent data from your PaperCut NG or MF Application Server is NOT displayed on the Last check and Last value columns, then resolve the issue based on the cause:
| Cause | Resolution |
|---|---|
| The hostname of your PaperCut NG or MF Application Server is incorrect in any one or both of the following places: Step 4, Step 7 | Ensure that hostname of your PaperCut NG or MF Application Server has been entered correctly. |
| Zabbix Server fails to communicate with your PaperCut NG or MF Application Server on the port specified in Step 4 | Ensure that port specified is correct and that the Zabbix server is able to communicate with your PaperCut NG or MF Application Server on that port. |
We’ve also done a video, check it out over here:
Categories: How-to Articles , Monitoring
Last updated March 15, 2024
Comments