If you are using Microsoft’s EndPoint Manager (MECM) - formerly known as System Center Configuration Manager (SCCM) - follow the procedure below to deploy PaperCut Pocket or Hive to your end users.
Deployment is done in two parts: first the edge node and then the print client.
The edge node
The edge node must be installed before the print client.
- The edge node is responsible for handling print jobs throughout their life. It takes care of analyzing, replicating, and getting jobs to the printer, alongside a wide range of other tasks.
- Installing the edge node requires elevated privileges to create the services and the PaperCut Printer print queue. The services are installed under:
C:\Program Files\PaperCut Hive. - The installer creates the PaperCut Pocket or Hive edge node Windows Service and the PaperCut Printer on the user’s device.
The print client
- The same installer is used to install the print client. The print client is responsible for capturing jobs sent to the PaperCut Printer and submitting them into your Edge Mesh, or specifically one particular edge node.
- The installer runs as the logged-on user.
- The print client is installed in the user context and resides in the
C:\Users\AppData\local\Programs\PaperCut Hive directory.
Deploying the edge node and print client
1. Create the edge node package
- Go to the PaperCut Pocket or Hive admin console > Edge Mesh > Add edge nodes.
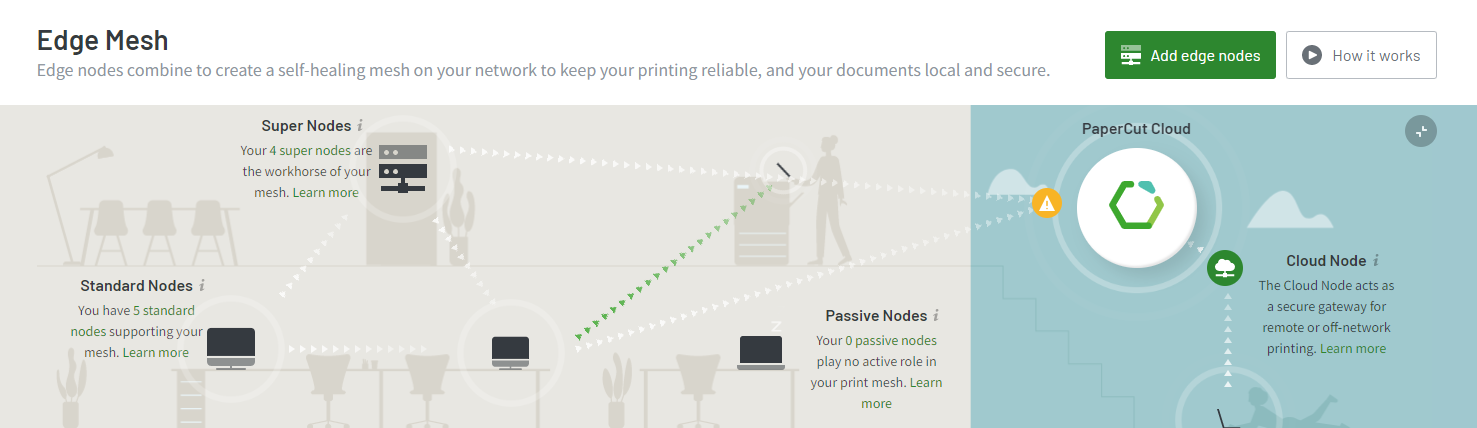
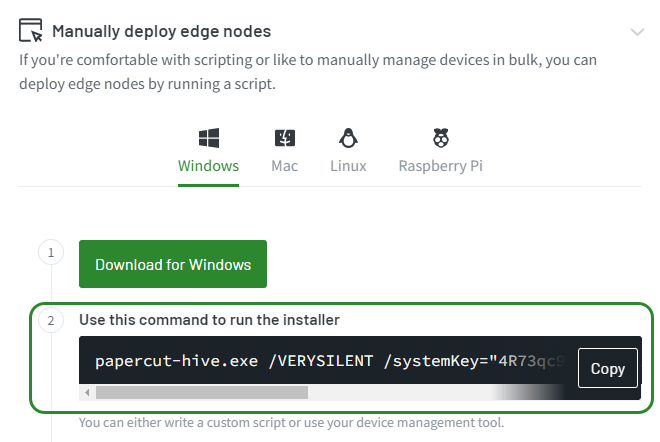
- Select Add edge nodes > Manually deploy edge nodes.
- Click Download for Windows to download the PaperCut Pocket or Hive Installer (e.g.
PaperCut-Hive.exe). - Copy the command line and paste it into a text editor.
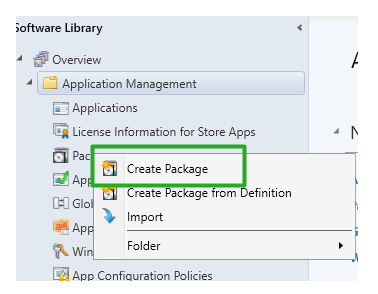
- In the SCCM/MEMCM Configuration Manager, go to Software Library > Application Management. Right-click Packages, then select Create Package.
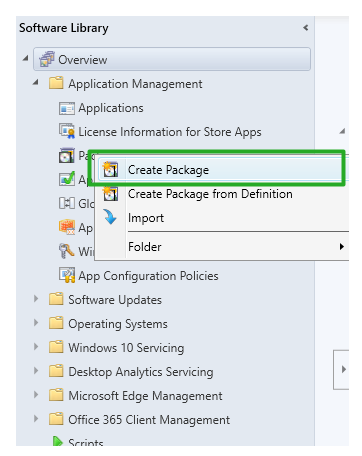
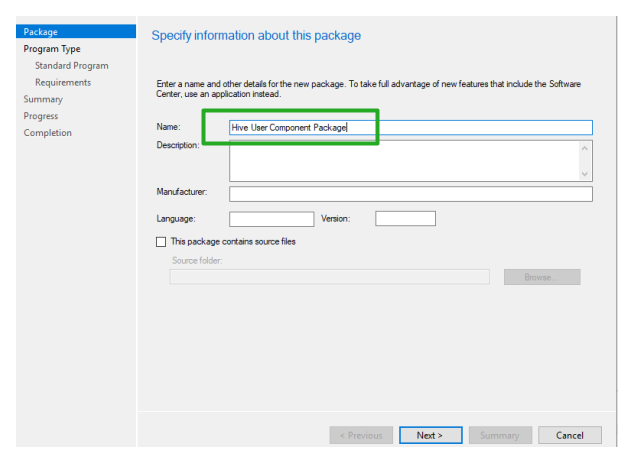
- Type a name for the package (for example,
PaperCut edge node), then click Next.
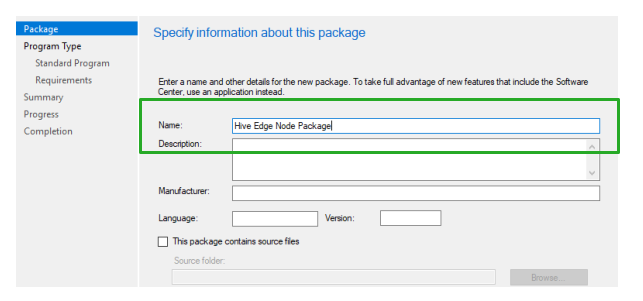
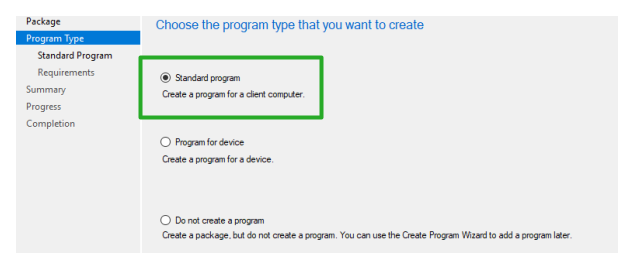
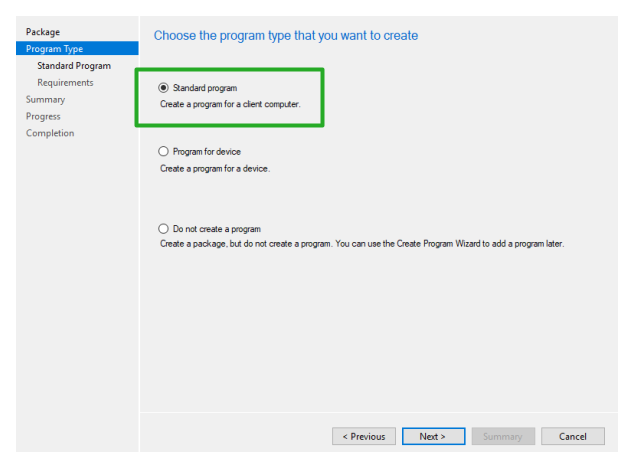
- Select the default Standard program, then cick Next.
-
Create a name for the Standard program (for example,
PaperCut edge node installer).- Paste the command line from your text editor (step 4).
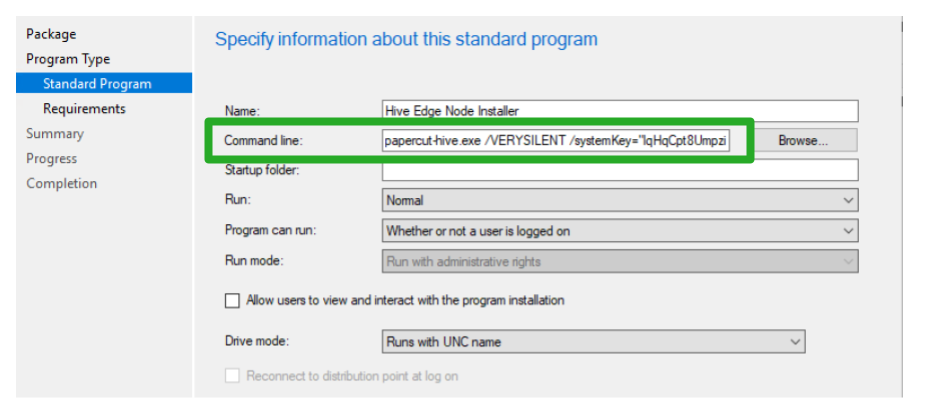
- Leave the Startup folder field blank.
- In Run, select Normal.
- In Program can run, select Whether or not a user is logged in. Run Mode will automatically be set to Run with administrative rights.
- In Drive mode, select Run with UNC name, then click Next.
- Paste the command line from your text editor (step 4).
-
Leave the default configuration for the Requirements Section, then click Next.
-
Confirm the settings, then click Next.
-
Verify the Create Package and Program Wizard has completed successfully.
2. Deploy the edge node package
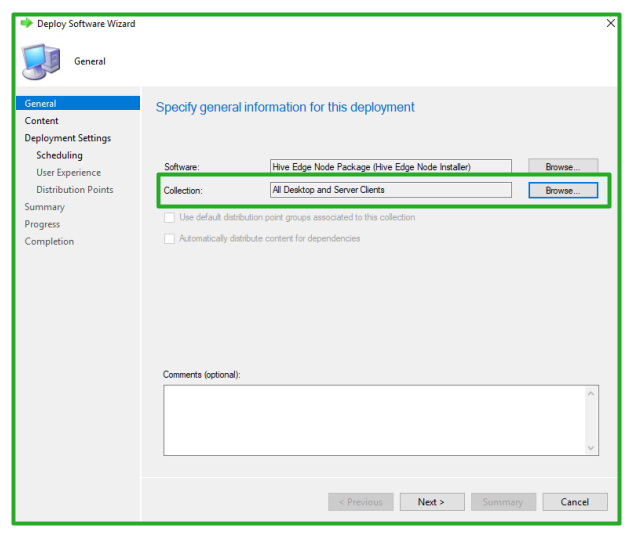
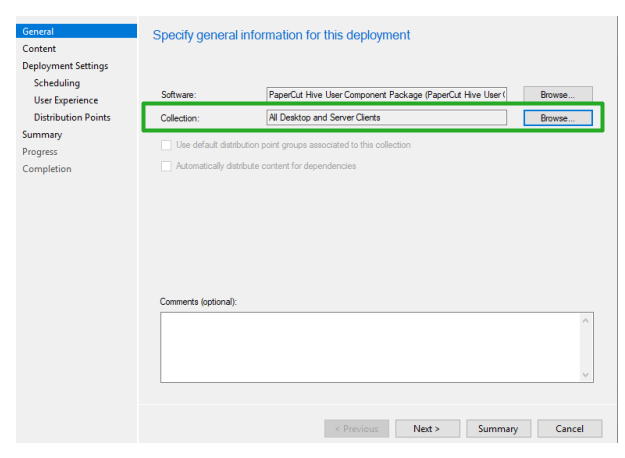
After you’ve created the PaperCut Pocket or Hive edge node package, you’re ready to deploy it to on of your SCCM/MECM collections. Configure the following settings to schedule the deployment.
- Select your collection.
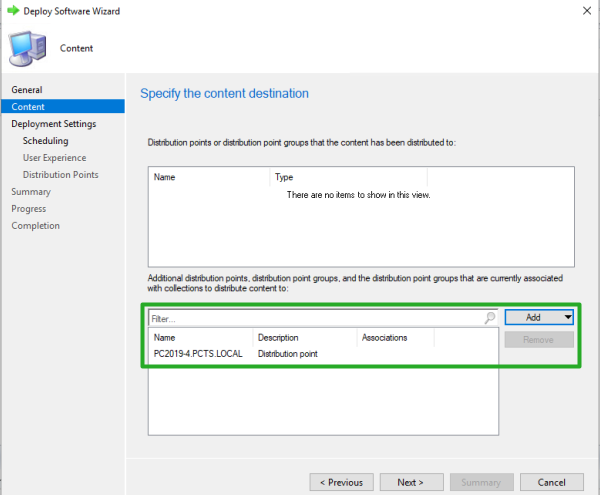
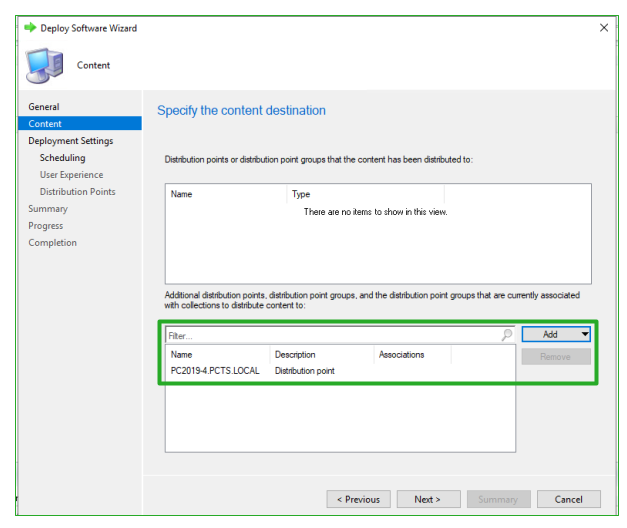
- Add your distribution point containing the
PaperCut-Hive.exeinstaller. For help setting up Distribution Points, refer to the Microsoft documentation .
- Click Next.
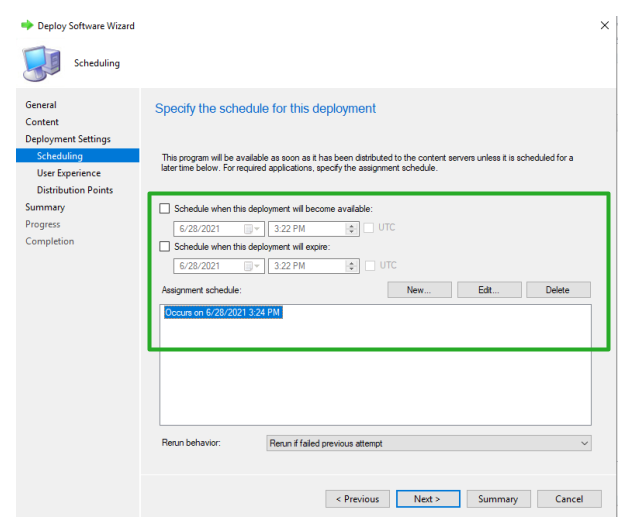
- Schedule the Deployment, then click Next.
- Leave the default settings for User Experience and click Next.
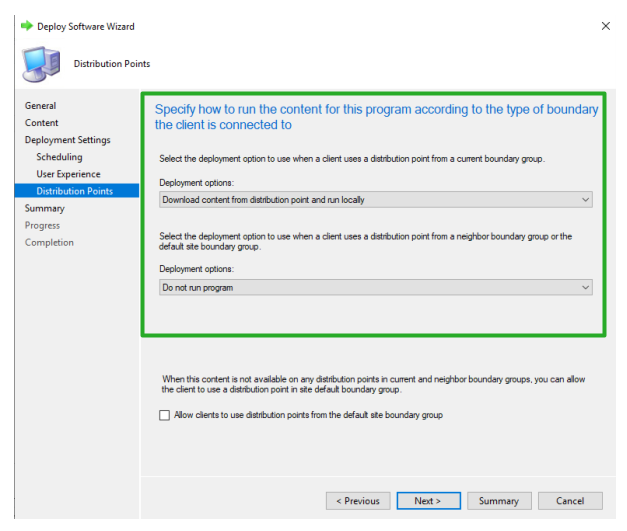
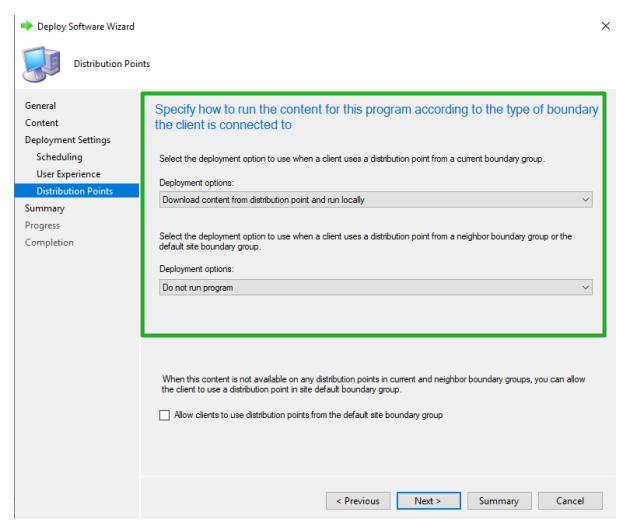
- In Distribution Points, select Download content from distribution point and run locally and leave neighbor boundary groups as Do not run program.
- Review and validate the Deployment Summary, then click Next.
- Validate the Deploy Software Wizard completed successfully.
3. Create the print client package
For the PaperCut Pocket or Hive print client, you need to copy the installation command command from the Intune Add-on instructions. This contains the unique /userkey for your organization that signals the PaperCut-Hive.exe installer to create the user directories and processes.
- From the PaperCut Pocket & Hive admin console, select Add-ons > All Add-ons > Desktop App Deployment with Microsoft Intune.
- Click Learn More and Add.
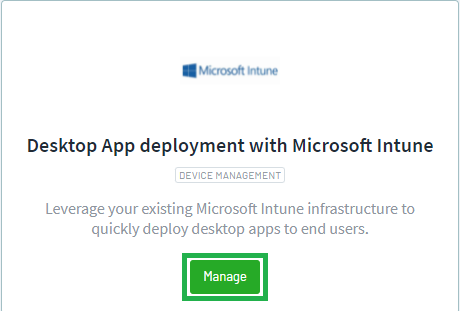
- On the Intune Add-on, select Manage and Follow these instructions.
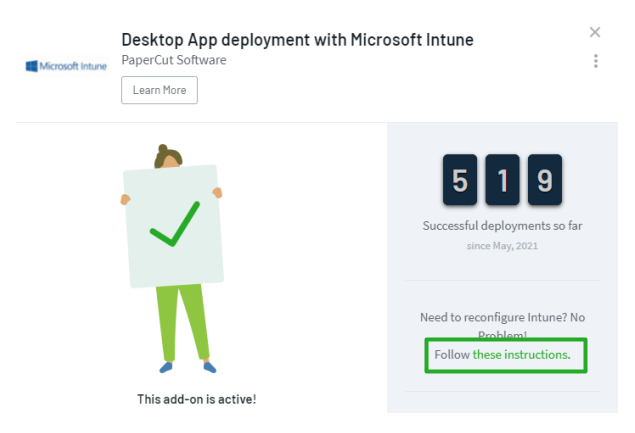
- Click View set up process and scroll down to Step 4. Install the user component. Go to step 6, copy the Install command and paste it into a text editor.

- In the SCCM/MEMCM Configuration Manager, go to Software Library > Application Management, then right-click Packages and select Create Package.
- Type a name for the Package (for example,
PaperCut print client), then click Next.
- Under Program Type > “Standard Program click Standard Program, then click Next.
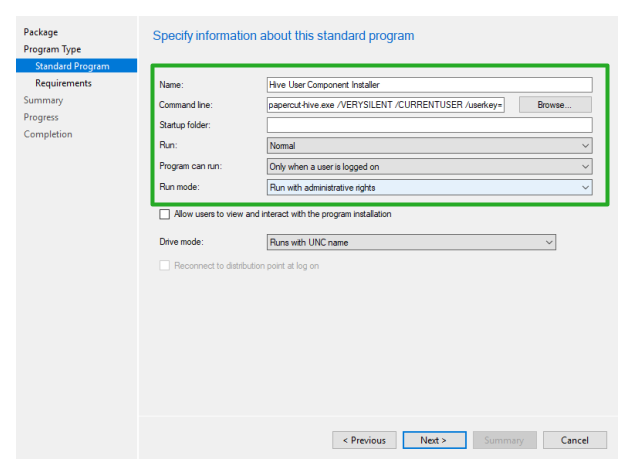
- Specify the details of the standard program:
- Type a name (for example,
PaperCut print client Installer). - Paste the install command line copied from Install User Component in step 4.
- Leave the Startup folder field blank.
- In Run, select Normal.
- In Program can run, select Only when a user is logged on.
- In Run mode select, select Run with user’s rights.
- In Drive mode, select Run with UNC name, then click Next.
- Type a name (for example,
- In the Requirements section, leave the defaults and click Next.
- Confirm the settings, then click Next.
- Verify the Create Package and Program Wizard has completed successfully.
4. Deploy the print client package
After you’ve created the PaperCut Pocket or Hive print client package, you’re ready to deploy it to on of your SCCM/MECM collections. Configure the following settings to schedule the deployment.
- In General, browse and select your collection, then click Next.
- Add your distribution point containing the
PaperCut-Hive.exeinstaller. For help setting up distribution points, refer to the Microsoft Documentation .
- Schedule the deployment, then click Next.

- In the User Experience section, leave the defaults and click Next.
- In Distribution Points, select Download content from distribution point and run locally and leave neighbor boundary groups as Do not run program. Click Next
- Verify successful completion of scheduling the deployment, then select Close.

- Verify that the deployment is complete.
Post-deployment
After both components are deployed, spot-check a few Windows clients to ensure the services are running:
- In Task Manager, check the
pc-edgenode-serviceis running.
The Windows PC requires this service to perform Edge Mesh activities such as receiving, replicating, or printing jobs if the PaperCut Cloud Service calls upon it. - In Task Manager, check that
pc-print-client-service.exeis running.
This is the print client needed to link the end-user to PaperCut Pocket or Hive and submit jobs via the PaperCut Printer. This process must be running in memory. It provides the functions the user needs to print jobs via the PaperCut Printer.
If either of these are not running, please contact your PaperCut reseller and provide copies of the logs.
Logs
- Edge node and setup logs:
C:\Program Files\PaperCut Hive\data\logsorC:\Program Files\PaperCut Pocket\data\logs - Print client logs:
%AppData%\Local\Programs\PaperCut Hive\data\logsor%AppData%\Local\Programs\PaperCut Pocket\data\logs - Print client setup logs:
%AppData%\Local\Programs\PaperCut Hive\data\logsor%AppData%\Local\Programs\PaperCut Pocket\data\logs%AppData%\Local\Temp
Comments